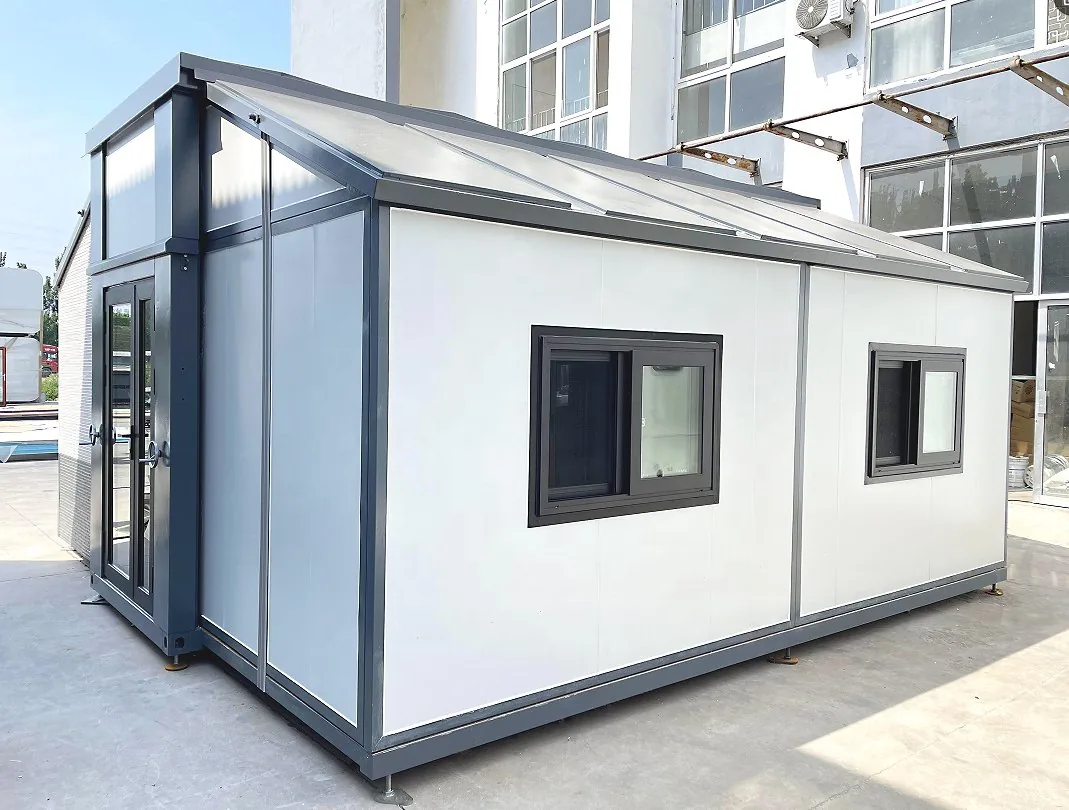
HG Prefab foldable expandable container homes — built to last, delivered worldwide.
A paddleboard and kayak rental business looks like the easiest business on the water, and it is — right up to the moment a queue forms, twenty wet customers come back inside five minutes, and sixty damp life jackets have to be dry by eight o'clock tomorrow morning. The building is not the hard part. The hard part is that you are running a wet logistics operation wearing the costume of a beach hut: boards are bulky and light, customers arrive sandy, wet and in a hurry, and in a growing number of lakes, reservoirs and coastal parks every hull has to be inspected, washed and dried before it can go back out.
This guide works through the decisions that decide whether such an operation makes money: how close to the water you can put the building, what each of our three sizes realistically holds, how to keep wet gear out of the dry zone, how to build a rinse and decontamination station that satisfies aquatic invasive species rules, how much extraction and dehumidification it takes to stop wetsuits going mouldy overnight, how to move customers through check-in and back again without a crowd forming in the doorway, and what the licence, insurance and safety file actually has to contain. If you have read our guide to running a folding unit as a beach shower and changing hut, the plumbing logic will be familiar — this piece takes that logic further, into fleet, flow and compliance.
Why a Water-Sports Rental Works Better Out of a Folding Unit Than Out of a Seasonal Shed
Three things destroy a rental fleet faster than customers do: sun, theft and mildew. Ultraviolet light degrades inflatable seams and chalks hull plastic; anything stacked in the open gets walked off in the dark; and damp kit shut into an unventilated box overnight smells like a wet dog by the middle of the season. A folding unit answers all three at once, because it is genuinely lockable, it brings the entire fleet under a steel roof every night, and it accepts the mechanical extraction, drainage and power that a timber beach shed is almost never specified with.
The season itself is short and brutal. Most lake and coastal operations earn 70 to 90 per cent of their annual revenue across 90 to 120 days, then pay for storage, insurance and repairs through six months of almost nothing. A structure you can lock, winterise and — if the pitch disappoints — relocate, removes a large slice of that risk, and it can be moved to a better site next spring instead of being written off. That reversibility is worth more to a first-year operator than any amount of floor area.
Set-up is also fast enough to catch the season rather than miss it. The unit ships folded to roughly 2.2 m wide on the truck and opens to about double that. Yes — a crane or forklift is required to offload the folded unit from the truck. Once it is set in position, four workers can unfold and assemble the main structure in about 2 hours. In practice that means you can pour the pad in early spring, lift and lock the building in a single morning, spend the next week fitting racks, the life jacket wall and the rinse station, and be taking bookings three weeks after you decided to trade — on a shoreline where nothing stood before.
Siting the Hut: Water Access, Flood Level, Queues and Salt Air
Put the counter inside 50 to 100 m of the launch point
Distance is a staff cost before it is a customer problem. An inflatable paddleboard plus paddle weighs 12 to 18 kg, a rotomoulded kayak 18 to 30 kg, and a tandem sit-on-top can reach 35 kg. Anything beyond roughly 80 to 100 m from where the nose touches the water turns every launch into a two-person carry, and once your staff are carrying instead of serving, the check-in queue stops moving. Aim for a pad 50 to 100 m from the launch, on firm ground, with a clear sight line from the counter to the swimming area so one person can supervise water and till from the same position. If local setback rules push you further back, budget for board carts with wide beach wheels rather than for extra staff.
Elevate above the flood line, then drain everything
Waterfront land floods, and this is the single most expensive mistake new operators make. Set the finished floor level above the design flood level for your site — commonly expressed as the 1-in-100-year or 100-year level — plus a freeboard of at least 300 to 600 mm. Achieve it with a compacted gravel pad, concrete pads or helical piers rather than by building the floor up inside the unit, so that water can pass beneath rather than through the building. Ask for the factory's floor drainage points to be positioned on the low side of your pad, and remember that anything electrical mounted in the lower half of the structure needs to sit above the same datum. Our coastal writing covers the same trade-off in a different climate; see the coastal and beachfront siting guide for how we think about exposure.
Salt spray at coastal sites
Sea air changes the specification. Specify marine-grade external treatment, sacrificial anodes where applicable, and 316 stainless fixings for anything mounted outside — particularly board rack hardware, which is loaded, wet and warm all at once. Do not mix metals in the same fixing run, keep alkaline-salt residue off the shell with a periodic fresh-water rinse of the unit as well as the fleet, and never store batteries, chargers or electronics in direct contact with an external wall. The pattern of failures and how to prevent them is set out in our rust and corrosion guide.
Queue space, shade and the wind board
Rental demand arrives in waves, not evenly: typically the first 90 minutes after opening and the hour after lunch. Plan for that peak rather than for the average. Give yourself a shaded, defined queue lane about 1.2 m wide with stanchions or rope and reel, deep enough for 8 to 12 people standing, plus a shaded waiting area so the people who arrive together can wait off the queue until the full group is there. Then put up a board that answers the questions every customer asks before asking them: wind speed and direction in knots, Beaufort state, water temperature, UV index, your flag colour for the day and the last return time. A green, amber and red flag system read off a written operating limit removes the argument at the counter, because nobody has to interpret a forecast under pressure.
Layout by Size: 20FT, 30FT and 40FT
All three models use the same folding principle — they travel collapsed and open to roughly double their transport width — so the difference between them is floor area and how much separation you can buy with it. Factory prices, ex-works and before freight, taxes and local fit-out, are 20FT $7,200–$9,800, 30FT $10,500–$14,500 and 40FT $12,500–$16,500.
20FT — about 36 m²: sign-up kiosk and small gear
Opening to roughly 5.9 m by 6.1 m, the 20FT is a single-room proposition and it works best as a pure transaction point: a 2.4 m check-in counter with two terminals, a shallow store for paddles, leashes, dry bags and pumps behind it, and both external walls racked for boards. In this size there is no room for real changing, so plan it next to whatever changing facilities already exist — a campsite washroom block, a beach toilet building, a holiday-park amenity — and treat the unit as the desk and the safe, not the whole experience. Fleet size caps out around 12 to 18 boards and six to eight kayaks, which is a genuine single-operator business on a quiet lake or a boutique resort beach.
30FT — about 56 m²: check-in, counted life jacket wall, changing and lockers
At roughly 7.0 m by 8.0 m, the 30FT is the size most operators should buy, because it is the first size where you can hold the line between wet and dry. Put the check-in counter and card terminal at the front, the life jacket wall along one long wall where staff can reach it across the counter, a changing and locker alcove of 4 to 6 m² with its own drained floor, and the board rack and kayak storage behind a threshold that wet feet do not cross. The extra depth also lets you run two staff in parallel — one checking people in, one issuing kit — without them stepping around each other. This is the configuration that handles 18 to 25 hires an hour at peak if the issue lane is designed properly.
40FT — about 76 m²: repair room, full wet/dry split and staff room
At roughly 5.9 m by 12.2 m, the 40FT supports a complete operation: reception and retail at the front, a genuine workshop in the middle for puncture repairs, valve replacement, delamination work and pressure testing, a wet return and rinse bay, and a staff room with lockers, a kettle and somewhere to sit down for ten minutes. That last item is not a luxury — at a busy single-point rental the staff room is what keeps experienced staff coming back next season. The long frontage also reads as a real building from the approach path, and a glazed configuration such as our 40FT glazed unit turns the entire front elevation into the display that sells the hire. Start from the products page and work backwards from the fleet you intend to own.
Fleet Capacity, Throughput and Room Allocation by Unit Size
| Programme | 20FT (about 36 m²) | 30FT (about 56 m²) | 40FT (about 76 m²) |
|---|---|---|---|
| Peak hires handled per hour | 8 to 12, one person doing everything | 18 to 25 with two staff in parallel | 30 to 40 with a dedicated issue and return team |
| Fleet it comfortably serves | 12 to 18 boards, 6 to 8 kayaks | 30 to 40 boards, 14 to 18 kayaks | 50 to 70 boards, 24 to 30 kayaks |
| Life jacket stock on hangers | 30 to 40 adult plus 8 to 12 child | 60 to 80 adult plus 20 to 25 child | 90 to 120 adult plus 30 to 40 child |
| Check-in counter | Single 2.4 m position, one terminal | Two positions, separate pay and issue | Three positions plus a retail and booking desk |
| Changing and lockers | None — partner with an existing block | 4 to 6 m² alcove with drained floor | Two changing rooms plus lockers and a bench |
| Wet return and rinse bay | External hose point on a drained apron | One bay, two rinse lanes, one drain channel | Two bays, quarantine position for decontamination |
| Workshop and repair | Toolbox and a patch kit | Bench along the service wall | Separate repair room with ventilation and power |
| Staff room | No space | Shared stores corner | Enclosed staff room with lockers |
| Winter and off-season use | Secure fleet storage | Storage plus indoor maintenance | Storage, repairs, lessons and paid customer storage |
| Factory price, ex-works | $7,200–$9,800 | $10,500–$14,500 | $12,500–$16,500 |
Read the table as a capacity argument rather than a sales one. Peak throughput scales faster than floor area because it depends on whether two staff can work side by side without collision, and that only becomes possible at roughly 56 m². The factory price column is the smallest number in most of these projects — fit-out for a rental operation typically costs two to four times the shell once you add the drained wet floor, rinse pump, extraction, dehumidification, racks, the life jacket wall and the point-of-sale system.
Wet Zone, Dry Zone: Floor Falls, Drains and Ground Cover
Draw one physical line across your plan and defend it. Everything on one side gets wet — returned boards, kayaks, paddles, leashes, wetsuits, booties, ropes, throw bags, swimming shoes. Everything on the other side stays dry: point of sale, documents, electrical distribution, spare clothing, food, staff phones, anything a customer pays for. The line is usually a threshold upstand of 50 to 75 mm and a change of floor finish, and the single rule that makes it work is that nothing crosses it until it has been rinsed and drained. Most failed rental fit-outs are not badly built; they simply never enforced this one rule, and by August the dry side smells like the wet side.
Floor falls, drains and interceptors
Give the wet zone a floor that falls at roughly 1:60 to 1:80 towards a linear channel drain rather than a single point gully — boards drip along their whole length, so a channel catches water a point drain misses. Specify a removable basket strainer, because sand, weed, hair and the odd fin screw are what block these drains, and add a silt sump or sand interceptor upstream of wherever the water goes, whether that is a mains sewer, a soakaway or a holding tank. Outside the door, do not leave bare wet concrete or mud: use interlocking plastic drainage tiles, timber duckboard or compacted pea gravel over a geotextile to keep the approach non-slip and to strip sand off feet before it reaches the drain.
Getting wet kit dry: extraction, dehumidification and off-floor storage
Here is the failure mode that ends seasons early. Wetsuits, booties and life jackets go into warm dark storage damp, and within 36 to 48 hours they develop mildew that never fully comes out; after three weeks customers are quietly asking for a different jacket. Three things prevent it. First, mechanical extraction in the wet room and above the drying area, sized to change the air roughly six to ten times an hour and running on a humidistat rather than a light switch. Second, active dehumidification — for a compact rental unit, allow roughly 20 to 30 litres per day of removal capacity per 30 m² of wet storage in a humid summer climate, more if you are also drying wetsuits rather than just plastic and webbing. Third, air on all sides: hang jackets from open hooks around their full perimeter rather than stacking them, keep everything at least 150 mm off the floor on open racks rather than in closed cupboards, and never shut damp kit into a sealed plastic box overnight. Our ventilation guide covers the extraction sizing and duct routing in more detail.
Electrical safety when the floor is standing water
Everything electrical inside the wet zone should be IP65 rated at minimum, every circuit serving it protected by a 30 mA residual-current device, and socket outlets mounted above 300 mm from the floor — or preferably outside the wet zone altogether, since the honest answer is that nothing on a rental floor needs a permanently energised socket other than the rinse pump. Have the factory pre-run those circuits and position the outlets from your equipment schedule, so nothing ends up surface-mounted after handover, and keep extension leads and multiway adaptors off the wet floor permanently.
Washdown, Biosecurity and Drying
Rinsing is the most unglamorous and most valuable thirty seconds in the whole operation. Salt crystals abrade valves and stitching, sand grinds into inflatable seams and skews kayak rudders, and lake weed blocks footwell scuppers. Every returned item gets rinsed, every time, even when it looks clean — and when you operate on water where invasive species are a legal issue, that rinse becomes a documented procedure rather than a hose-down.
Rinse station: low pressure, high volume
Build for volume, not for pressure. What you want is roughly 15 to 25 litres per minute at garden-hose pressure — around 2 to 3 bar — from a mains connection or a pumped tank, delivered through a trigger nozzle on a 6 to 8 m hose so staff can reach the far side of a board without moving it. Do not point a pressure washer at inflatable equipment: anything much above about 40 bar, held close, damages seams and valve bases, and the repair costs more than the time saved. Give the station two lanes so one person can rinse while another is checking in the next group, stand the boards on a grating over the same channel drain, and fit an approved backflow prevention device on the supply wherever you are drawing from potable water — it is a plumbing-code requirement in most jurisdictions, not an optional extra. Where there is no mains water, a 1,000 litre tank plus a 230 V or 12 V pump gives you several hundred rinses between fills.
Aquatic invasive species: check, clean, dry
If you operate on freshwater in North America, New Zealand or much of Europe, assume that decontamination is mandatory rather than optional. Zebra and quagga mussels, didymo, starry stonewort and a dozen other organisms travel on hulls, paddles, bailers, straps, boots and — critically — porous items such as wetsuits, neoprene booties and webbing, which stay damp internally long after the outside looks dry. Expect to be asked for a documented three-stage routine: inspect and remove anything visible at the water's edge; clean with fresh water, usually a hot-water flush held at roughly 45 °C for several minutes or a hotter short contact around 60 °C for equipment that tolerates it; and dry thoroughly, with 24 to 48 hours of dry-out typical for hard hulls and considerably longer for porous kit, depending on your local rule. Then keep the record. Operators who can produce a rinse log, staff training notes and a customer-facing sign about the rule are treated very differently by an enforcement officer than those who cannot, and many jurisdictions also require watercraft leaving their waters to carry a permit or self-certification.
Drying after the wash
Washing creates a second drying load, so size the drying area off the wash station rather than squeezing it in later. Hang life jackets from the neck opening on spaced hooks so air reaches the inside of the panels — roughly 100 mm between jackets on a bar, which also gives you the counting visual described below. Stand boards nose-down on a padded rail with the deck facing into airflow. Keep paddles on wall hooks by the blade with the grip clear of the floor, and put drip trays or a channel under everything, because a drying area that drips onto a walking surface is a slip waiting to happen.
Storage: Boards, Kayaks, Life Jackets and Helmets
Board racks
Wall-mounted V-shaped or cradle racks are the right answer for paddleboards in a compact building, because they use vertical volume and leave the floor clear for people. Space them roughly 300 to 400 mm apart for stacked inflatables and 400 to 500 mm for hard boards, mount into the unit's structural framing rather than the wall panel alone, and pad every contact point — a board resting on a hard edge for a whole season develops a permanent dent. Store inflatables rolled loosely at recommended volume rather than fully deflated under pressure, keep them out of direct sun through glazing, and number the rack positions so that issue and return happen at the same slot every time.
Kayak storage
Two options work. Wall-mounted cradles — pairs of padded J-cradles or webbing slings at roughly 600 to 700 mm centres — keep the floor completely clear and suit touring kayaks carried on their side. Floor frames or A-frame stacks suit heavy sit-on-tops and are easier for staff to load, but they eat aisle width: budget 1.2 m of clear aisle in front of any floor stack. Either way support the hull along its length, not on a point, avoid storing boats deck-down in direct sun, and never let a kayak rest its skeg or rudder on the floor.
Life jackets on a counted bar, helmets and paddles
Life jackets are your licence to operate, so store them where they can be counted at a glance. Hang them on a numbered bar or grid of hooks, one jacket per hook, grouped by size — adult S to XXL, junior, and child sizes normally covering roughly 15 to 40 kg — with the size printed or colour-coded above each group. Stock to roughly 1.2 to 1.5 times your maximum simultaneous hirers so that you can issue every customer a jacket while another group's jackets are still drying, and expect children's sizes to be 20 to 25 per cent of the total even though they are usually well under 20 per cent of your customers, because families ask for specific sizes and a near miss loses the booking. Helmets go in open bins or on labelled hooks near the issue point for anything graded above flat water; paddles hang by blade type with lengths marked, since nobody can tell a 210 cm touring paddle from a 230 cm one by eye.
The Hire Flow: Booking, Waiver, Issue and Return
Design the hire flow as a one-way loop and write it on the wall. The rule is that the person checking out and the person checking in should never have to walk through each other, because that is where damage gets missed, queues form and tempers go. The loop is: arrive and queue → check in, pay, sign → size PFD and helmet → collect equipment → launch from the wet door → return through the wet door → return gear checked off, rinsed, drained → equipment either straight back to the rack or into the drying area. Note that there are two different doors in that sentence.
Check-in: booking, deposit, waiver and ID
Target four to six minutes per group at check-in for the whole sequence, which is achievable if booking, waiver and payment are done before the customer reaches the counter. Use an online booking system with a QR check-in, get the liability waiver signed as part of that booking, and take payment with a card pre-authorisation for the deposit rather than cash — a pre-authorised deposit is released rather than refunded, which removes both the float and the argument. Where you must take physical ID, note it on the booking record rather than holding it. Issue every hire a wristband or tag carrying the return time, the board or boat number and the group size, and display the wind limits and boundaries on the same card the customer takes away.
The issue lane: staff work in parallel, not in turn
Once you are past roughly 15 hires an hour, one person doing everything is the bottleneck. Split the job: one person owns the screen, the money and the waiver; another owns sizing and equipment issue. The equipment side should be laid out along a single wall in the order a customer is equipped — PFD wall, helmet bin, paddle rack, then a reach-in slot for the board itself — so the staff member walks one direction only. Keep this lane 1.0 to 1.2 m wide, keep it inside the dry side of your wet/dry line, and keep the door to the wet zone at the far end of it.
Return: timing, damage check, then clean before it goes back
Returns is where the money leaks. Check the wristband against the clock before anyone relaxes, because late returns are the cheapest revenue you will ever have, priced in clear increments per 30 minutes and shown at check-in. Give the return check a written matrix — hull punctures and deep gouges, valve damage, delamination, bent fins, cracked paddles, missing leash, torn PFD webbing, broken buckle — with a repair or replacement price against each line, agreed with whoever owns the boats and posted where staff and customers can both read it. Then enforce the sequence that most operators skip: nothing goes back on a rack unwashed. A board returned sandy and stacked dries into grit that wears every board above it, and a life jacket returned wet goes into storage already mildewing. Rinse, drain, count it back to its numbered slot, and record the damage along the way.
Safety, Compliance and the Revenue Model
PFDs, weather limits, staffing and training
Every customer wears a correctly sized life jacket on the water, with no exceptions and no negotiation, and you need spares on site above the number on the water for replacement, station use and staff rescue work. Write your operating limits down before opening day rather than deciding them on the day: maximum sustained wind, typically quoted in knots and cross-referenced to a Beaufort state; maximum gust; visibility and daylight limits; distance offshore or along the shoreline the hire covers; and a hard rule that nobody paddles alone. Then translate those into the green, amber and red flag system on your notice board, log the daily reading and the decision to restrict or stop, and give every new staff member a written rescue and capsize procedure plus first-aid and CPR training before their first solo shift — most insurers will ask for evidence of both.
Permits, licences, liability insurance and rules of the water
Expect four separate permissions, and start them all early because they rarely run in parallel. A planning or land permission for a commercial structure on the shoreline, often the slowest of the four and the one most affected by conservation and setback rules. A concession, lease or permit to trade from whoever controls the land — national park, municipality, marina operator or private estate. A water-body permit or access agreement from the navigation or water authority, which is increasingly bundled with your invasive species obligations. And commercial rental liability insurance written specifically for hire operations, since standard public liability frequently excludes hired craft. Ask your broker to confirm in writing that hired boards, instruction and guided tours are all covered, and keep the training records, incident log and daily condition checks together in one file — that documentation is what actually resolves a claim.
Unit economics: price, turnover and the three add-ons
The rental maths has only three variables: the hourly or session price, the number of paid sessions you can turn in a day, and the length of the season. Typical stand-up paddleboard rates run roughly USD 20 to 35 per hour or USD 45 to 80 per half day, single kayaks around USD 20 to 30 per hour and tandems USD 30 to 45; at a good lakeside pitch your fleet turns maybe 2.5 to 3.5 paid sessions per unit per day on average across the season, with weekends well above that and Mondays near zero. Everything else is aimed at raising one of those three numbers. A season pass raises utilisation rather than price and is usually sold at 6 to 10 times a day rate. Lessons and guided sunrise or wildlife tours convert idle midweek capacity into premium-priced hours and simultaneously create the returning customers who later rent on their own. And paid winter or weekly storage for privately owned boards and kayaks produces off-season income from floor area you are not otherwise using — the most profitable square metre in the building, because it earns in January.
Sanity-check the plan the same way every time: walk your peak Saturday morning on paper. If your issue lane, life jacket stock and rinse capacity cannot serve the number of people you expect between opening and noon, buy the next size up. A 30FT unit at $10,500–$14,500 with a real wet/dry split and two working positions outperforms a 20FT unit at $7,200–$9,800 that bottlenecks, and a 40FT unit at $12,500–$16,500 pays for itself wherever you intend to run lessons, repairs and winter storage as well as hire. In most markets that converts to break-even somewhere inside 12 to 24 months, driven far more by the pitch and the season length than by the price of the shell.
Planning a container SUP and kayak rental base?
HG Prefab, manufactured by Henan Huangang Machinery Equipment Co., Ltd., builds 20FT, 30FT and 40FT folding expandable container houses to be fitted out as water-sports rental bases, with drained wet-zone floors and linear channel drains, ponded and sloped floor build-ups, pre-run IP65 wet-circuit wiring, extraction and dehumidifier penetrations, external rolling shutters for board access and glazed frontages for reception. Factory prices are 20FT $7,200–$9,800, 30FT $10,500–$14,500 and 40FT $12,500–$16,500. Send your fleet size, staff numbers and site drawing and we will return a specification. Email hgmechequip@gmail.com or WhatsApp +86 191 0388 7380. See the full range on the products page.
Get a Quote Browse modelsDo I need a crane to install a folding container rental hut at a lakeside site?
Yes — a crane or forklift is required to offload the folded unit from the truck. Once it is set in position, four workers can unfold and assemble the main structure in about 2 hours. The harder part is getting the machine to the pad: survey the access track, gate width, overhead lines and ground bearing in advance, and make sure the pad sits inside the crane's rated reach from a position where the truck can legally stand. For waterfront sites also check whether the access road has a load limit or a seasonal restriction, and book the electrician into the same visit so the hookup is tested on day one.
How many life jackets should a paddleboard and kayak rental stock?
Stock roughly 1.2 to 1.5 times your maximum simultaneous hirers, so that a second group can be equipped while the first group's jackets are still drying. In practice that means 30 to 40 adult jackets plus 8 to 12 child sizes for a 20FT unit around 36 square metres, 60 to 80 adult plus 20 to 25 child for a 30FT unit, and 90 to 120 adult plus 30 to 40 child for a 40FT unit. Children's sizes are usually 20 to 25 per cent of the stock even when they are a small share of customers, because families ask for specific sizes and you cannot substitute. Every jacket must fit the person wearing it, which is why sizing happens at the issue lane rather than at the water's edge.
Do I legally need a washdown or decontamination station for rental boards and kayaks?
On a great deal of freshwater, yes. Where aquatic invasive species such as zebra and quagga mussels, didymo or starry stonewort are present, authorities increasingly require hired craft to follow a documented check, clean and dry routine: inspect and remove anything visible at the water's edge, wash with fresh water — often a hot flush around 45 degrees Celsius held for several minutes — and then dry for at least 24 to 48 hours, longer for porous items like wetsuits, booties and webbing straps. Build a rinse bay with low pressure and high volume flow rather than a pressure washer, add an approved backflow prevention device to any potable supply, and keep a rinse and inspection log, because documentation is what satisfies an enforcement visit.
How do I stop wetsuits, booties and life jackets going mouldy inside a container rental unit?
Airflow, dehumidification and storage position, all three together. Run mechanical extraction in the wet room sized at roughly six to ten air changes per hour, humidistat controlled rather than switched with the light. Add a dehumidifier capable of removing about 20 to 30 litres per day for every 30 square metres of wet storage, more if you dry neoprene rather than plastic and webbing. Hang every item open and spaced at least 100 millimetres apart so air reaches the inside of the panels, keep everything at least 150 millimetres off the floor on open racks rather than in closed cupboards, and never shut damp kit into a sealed box or bag overnight, because mildew starts developing within 36 to 48 hours.
Which folding container size should a first-season paddleboard rental buy?
Buy the 30FT unless you are certain the site only justifies a kiosk. At about 56 square metres it is the first size where you can physically separate the dry check-in area from the wet return and rinse bay, and where two staff can work in parallel instead of taking turns — that is what turns roughly 12 hires an hour into roughly 25. It also gives you a small changing alcove with its own drain and enough wall length for a counted life jacket bar. A 20FT unit at $7,200–$9,800 suits a single-operator pontoon with 12 to 18 boards; the 30FT runs $10,500–$14,500; and the 40FT at $12,500–$16,500 is the right choice only if you plan to add repairs, lessons or paid winter storage, which need their own room and ventilation.