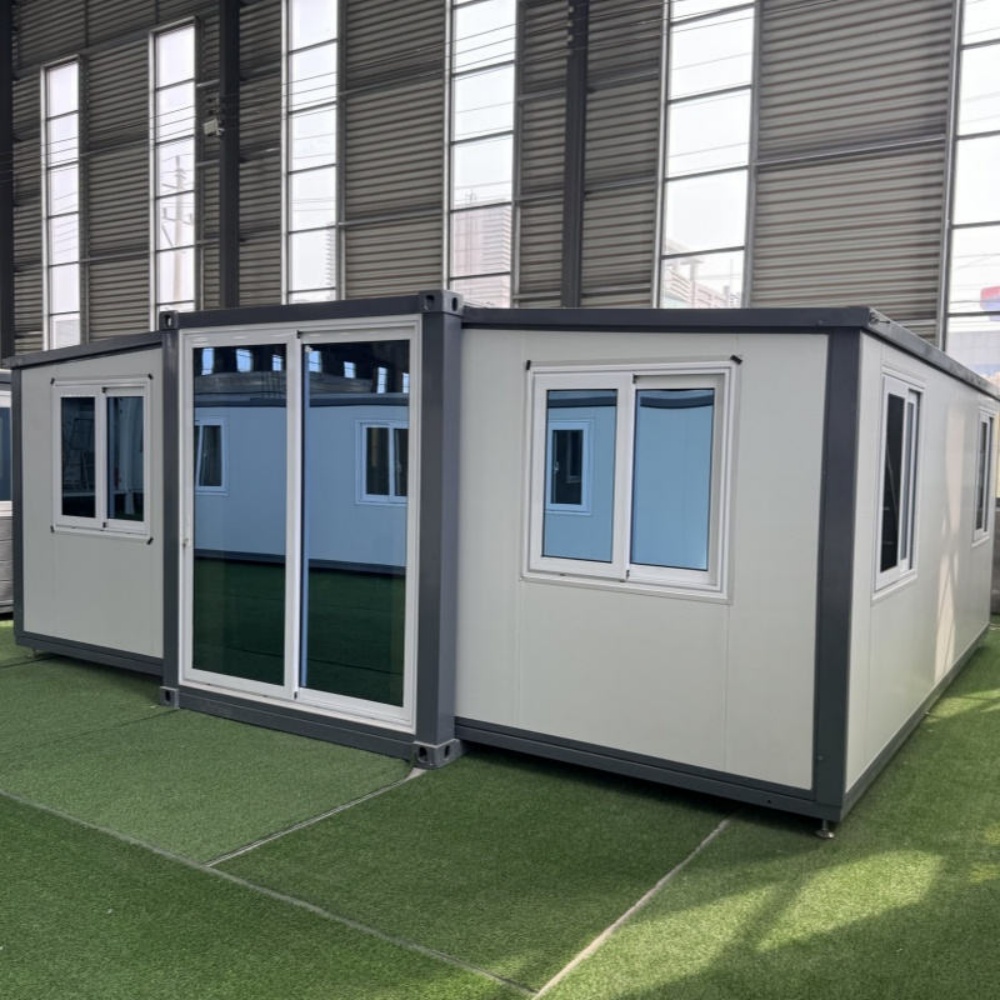
HG Prefab foldable expandable container homes — built to last, delivered worldwide.
Controlled-environment agriculture has migrated from glass greenhouses into insulated steel boxes, and folding container homes make a good starting shell. The unit arrives as a watertight, structurally rigid room with a flat ceiling, four load-bearing corner posts and a predictable internal volume — everything a grow room needs. This guide covers the engineering that separates a productive container farm from an expensive one: insulation and vapour control, lighting load, HVAC and CO2 management, hydroponic water systems, crop selection, realistic yields and the true cost of a 20FT, 30FT or 40FT HG Prefab build.
Why a Container Makes a Good Grow Room
- Sealed, controllable volume — a 40FT unit encloses roughly 28 m² and about 70 m³ of air, a size that small HVAC and CO2 systems can condition precisely, which is what consistent yields require.
- Pest and disease exclusion — a sealed box with filtered intakes and a controlled entry is far easier to keep clean than a greenhouse with vents and glass joints.
- Stackable structure — the corner castings allow vertical expansion. Two stacked units give you double the growing area on the same footprint.
- Relocatable capital — if the site or the market changes, the entire production unit moves with its equipment intact.
- Fast start — Yes — a crane or forklift is required to offload the folded unit from the truck. Once it is set in position, four workers can unfold and assemble the main structure in about 2 hours, so a single-unit farm can begin fit-out in the same week it is delivered.
Two caveats matter. First, a bare container is a steel shell with no vapour control and no drainage — the internal build matters more than the shell. Second, the electrical supply for lighting is the real constraint: a 40FT grow room can easily draw 20 kW or more, far beyond a residential service.
Insulation, Vapour Control and Condensation
Growing indoors means permanently high humidity, and humidity destroys an untreated steel shell from the inside. Condensation forms on any surface below the dew point, so the assembly must keep the steel skin warm and stop moist air reaching it.
Building the Envelope Correctly
- Spray foam or rigid PIR — 75–100 mm of closed-cell spray foam or 80–100 mm of PIR board on walls and ceiling. Closed-cell foam also seals every seam, which is the fastest way to make the shell airtight.
- Vapour barrier on the warm side — the barrier goes on the inside face, behind the lining, with taped joints and sealed penetrations. Getting the barrier on the cold side traps moisture in the insulation and guarantees corrosion.
- Thermal break for the steel ribs — steel conducts heat and forms cold bridges that drip. A continuous insulated lining on stand-off battens solves it.
- Washable, food-safe wall lining — white FRP panels or PVC sheet, sealed at the floor junction with a cove so the room can be hosed down and sanitised.
- Floor build-up — insulate under the floor, then lay a sealed, slip-resistant epoxy with a fall of 1:100 to a central drain.
- Ventilation and dehumidification — even a well-sealed room needs air exchange. A heat-recovery ventilator with a filtered intake keeps CO2 and ethylene in range without throwing away conditioned air.
Managing Humidity
Transpiration from a full canopy can add 15–25 L of water vapour per day in a 40FT room. Without removal it re-condenses on the ceiling and drips onto the crop, causing bud rot and mildew. Design for a dehumidifier sized on litres per day, not on floor area, and set the target at 60–70% relative humidity in vegetative growth and 45–55% during flowering or fruiting. A condensing dehumidifier that drains to the grow system recovers most of that water as usable irrigation.
Lighting Load and Electrical Design
Lighting decides the electrical design, the HVAC load and most of the operating cost.
- LED is the default — modern full-spectrum bar fixtures deliver 2.7–3.2 µmol/J, so you need roughly 1.5–1.8 kW of LED per 4 m² of canopy to reach 600–900 µmol/m²/s PPFD.
- Connected load — a 40FT room with 28 m² of canopy can carry 10–14 kW of lighting alone. Add HVAC, pumps, dehumidifier and dosing equipment and the total reaches 18–25 kW.
- Service sizing — plan a dedicated three-phase supply with its own distribution board. A single-phase supply will not carry a 40FT room, and a 20FT room typically needs 8–12 kW.
- Circuits and protection — one circuit per two to three fixtures with RCBO protection, and a separate circuit for HVAC so a lighting fault never stops climate control.
- Monitoring — a submeter on the lighting board turns energy per kilogram of produce from a guess into a number you can manage.
- Backup — a generator or battery inverter for the pumps and controllers, because a four-hour outage with the lights off and no circulation can cost a whole crop cycle.
For a residential comparison point, our electrical load guide explains how panel capacity is normally calculated.
HVAC, CO2 and Climate Control
Cooling and Heating
LED fixtures still convert most of their input into heat. A 12 kW lighting load must be removed by the HVAC or the room will run 10 °C above ambient within an hour.
- Cooling capacity — size for the lighting load plus the envelope gain plus the latent load from transpiration. As a rule, 1 kW of lighting needs about 1 kW of cooling, and the latent load adds 20–35%.
- Equipment type — a mini-split inverter system works for a 20FT room; a 30FT or 40FT room usually needs a multi-head split or a small ducted unit with a condensing unit mounted outside the container.
- Heating — in cold climates, a heat pump or a sealed electric element maintains the 20–26 °C band overnight when lights are off.
- Air movement — oscillating circulation fans above the canopy prevent microclimates and strengthen stems. Budget one 150 mm fan per 4 m².
CO2 Enrichment
In a sealed room, plants strip CO2 from the air within hours. Enrichment to 800–1,200 ppm can raise yield by 15–30%, but it is only safe and effective when the room is sealed and the climate is already under control.
- Source — a bottled CO2 cylinder with a regulator and a controller, or a burner if the room is large and well ventilated.
- Safety — a CO2 monitor with an alarm, plus an interlock that shuts off enrichment before anyone enters. CO2 above 5,000 ppm is dangerous and enrichment equipment must never be used in a living space.
- Only when sealed — if the exhaust fan is running to control heat, enrichment is wasted. Sequence the controls so CO2 is injected only during closed-loop operation.
Water Systems: NFT, DWC and Dosing
Hydroponic method choice determines the layout of the room and the size of the water plant.
- Deep water culture (DWC) — the simplest system: plants sit in rafts on aerated nutrient solution. Cheap to build, forgiving, ideal for leafy greens. Allow 25–30 L of reservoir per plant.
- Nutrient film technique (NFT) — shallow channels with a thin flowing film. Excellent for lettuce and herbs on tiered racks, using far less water, but it has no buffer: a pump failure kills the crop in 30–60 minutes.
- Drip to media — coco or stonewool slabs with drip emitters. Most tolerant of interruptions and the usual choice for fruiting crops such as tomatoes, peppers and strawberries.
- Aeroponics — highest yield per square metre and the least forgiving. Only specify it with a fully redundant pump and an alarm system.
Water Plant Essentials
- Reservoir and top-up tank — at least two days of water demand in storage, with a float valve to the top-up tank.
- Reverse osmosis — with hard or high-alkalinity water, an RO unit gives you a clean baseline. Blend to about 0.3–0.5 EC before adding nutrients.
- Dosing — a two-part or three-part nutrient doser with pH control. Manual dosing works at 20FT scale; anything larger needs automation to stay consistent.
- Chilling — keep the nutrient solution at 18–21 °C. A small chiller prevents root disease in warm climates.
- Sanitation — UV or ozone on the return line, plus a weekly line flush. Reused solution without treatment is how a farm loses a crop to pythium.
- Drainage and containment — a bunded floor and a dedicated drain to a holding tank. Nutrient water must never go straight to a storm drain.
Match the Crop to the Unit
| Crop type | Cycle length | Best unit | Notes |
|---|---|---|---|
| Leafy greens, lettuce, herbs | 21–35 days | 20FT or 30FT with vertical racks | Fastest turnover, most reliable cash flow |
| Microgreens | 7–14 days | 20FT, racked | Very high value per square metre |
| Strawberries | 90–120 days | 30FT or 40FT | Premium pricing, needs pollination management |
| Tomatoes and peppers | 100–150 days | 40FT with high ceiling | Highest yield per unit but long cycles |
| Culinary mushrooms | 21–45 days | 20FT, dark and humid | Different climate band from green plants |
Leafy greens are the standard entry crop for a single container: 40–60 heads per square metre per cycle, four to six cycles a year on vertical racks. Yields scale with light, climate control and consistency, not with the container itself, so resist stacking more racks until the HVAC can carry the load.
Capital Budget
- Container units: 20FT $7,200–$9,800, 30FT $10,500–$14,500, 40FT $12,500–$16,500.
- Insulation, vapour barrier and washable lining: $4,000–$12,000.
- Electrical service, board and submetering: $5,000–$25,000 depending on the supply available.
- LED lighting and control: $6,000–$18,000 for a 40FT room.
- HVAC, dehumidification and CO2: $8,000–$28,000.
- Racks, hydroponic system, reservoir, dosing and RO: $8,000–$30,000.
- Foundation pad and site services: $4,000–$15,000.
A complete 40FT leafy-green farm typically costs $60,000–$140,000 including the unit, and a 20FT starter unit $30,000–$60,000. Energy is the dominant operating cost: a 40FT room running 18 hours a day consumes roughly 250–400 kWh a day in lighting and HVAC, so electricity price per kWh decides profitability more than anything else. Model the tariff before choosing the site, and consider a rooftop solar array to offset daytime lighting load.
Starting Up: Sequence That Avoids Costly Rework
- Confirm zoning first — some jurisdictions treat a grow room as agriculture, others as light industrial. That classification decides the permit path and the utility rate.
- Secure the power supply before ordering. A three-phase connection can take months, and it is the longest lead item in the project.
- Cure the pad and book delivery. Yes — a crane or forklift is required to offload the folded unit from the truck. Once it is set in position, four workers can unfold and assemble the main structure in about 2 hours.
- Build the envelope before the equipment — insulation, vapour barrier and washable lining first, then electrical, then HVAC, then racks last.
- Run a two-week empty climate trial with lights on and no plants, to verify the room holds its temperature, humidity and CO2 set points and to find every condensation drip while the room is still empty.
- Start with one crop cycle at partial density, log everything, and scale the planting density only after you can repeat the same result twice.
Need a folding container house?
HG Prefab manufactures 20FT, 30FT and 40FT folding expandable container houses for controlled-environment agriculture, workshops and equipment rooms — with optional factory insulation upgrades, floor drain recesses and cable penetrations. Shipped flat-packed worldwide.
Browse modelsFrequently Asked Questions
How is a container grow room delivered and set up?
Yes — a crane or forklift is required to offload the folded unit from the truck. Once it is set in position, four workers can unfold and assemble the main structure in about 2 hours. Because the grow room fit-out starts with insulation and vapour control, plan for the utilities trench and the pad to be finished before the delivery arrives.
How much power does a container hydroponic farm need?
A 20FT room typically draws 8–12 kW, while a 40FT room with 28 m² of canopy can draw 18–25 kW once lighting, HVAC, dehumidification, pumps and dosing are added. Plan a dedicated three-phase supply with its own distribution board, a separate circuit for HVAC and a submeter on the lighting board.
Which hydroponic system is best for a container farm?
Deep water culture is the simplest and most forgiving for leafy greens, NFT uses the least water and suits tiered racks, and drip to coco or stonewool is the most tolerant option for fruiting crops like tomatoes and strawberries. Whatever you choose, specify a redundant pump and an alarm, because NFT and aeroponic systems can lose a crop within an hour of a pump failure.
What does it cost to build a container hydroponic farm?
A complete 40FT leafy-green farm usually costs $60,000–$140,000 including the container, insulation, LED lighting, HVAC, racks and the water plant. A 20FT starter unit lands at $30,000–$60,000. The container itself is $7,200–$9,800 for 20FT, $10,500–$14,500 for 30FT and $12,500–$16,500 for 40FT, with electricity the dominant ongoing cost.