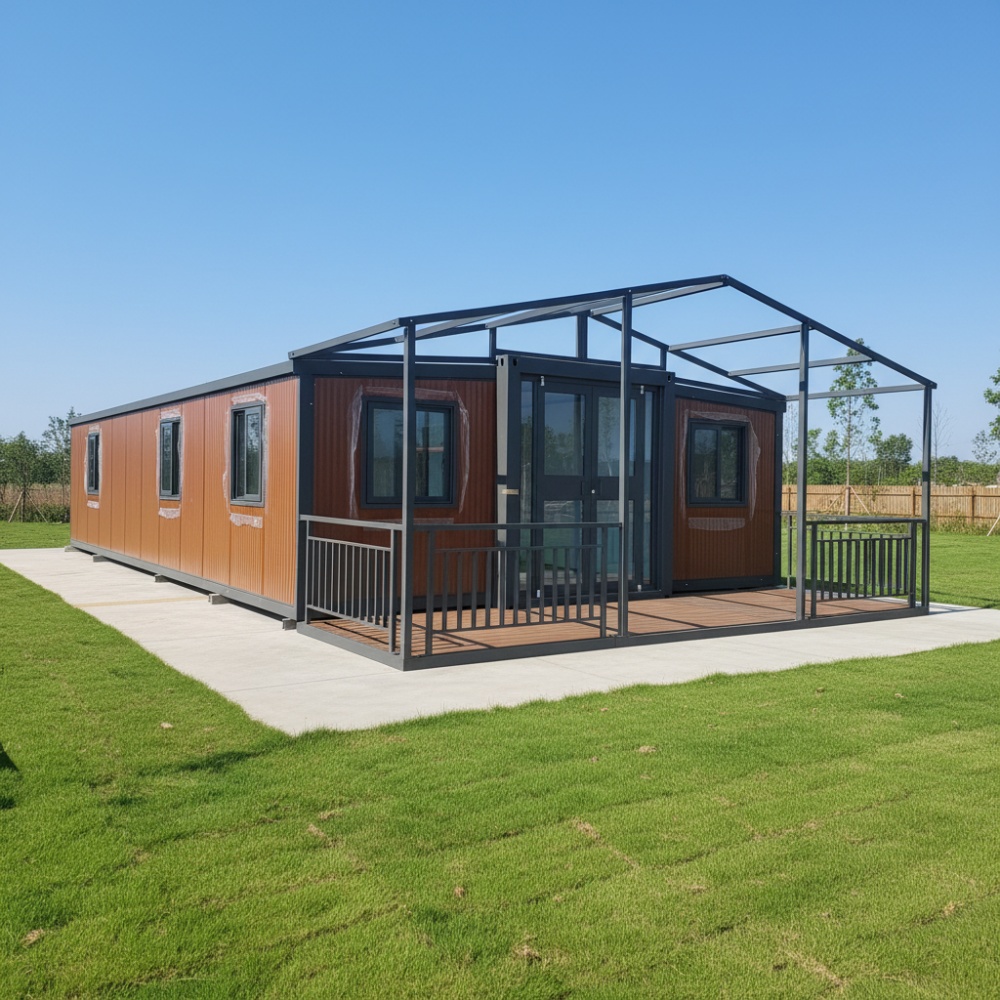
HG Prefab foldable expandable container homes — built to last, delivered worldwide.
A pool house solves a problem every pool owner recognises: wet feet, wet towels and wet swimsuits end up indoors. A folding container home placed beside the pool gives that traffic somewhere to go — a lockable changing room, a shower that is not the family bathroom, a bar that does not require a trip to the kitchen, and a shaded lounge where guests can sit without dripping through the house. Because the unit is a steel structure built for transport, it arrives ready for a wet-area fit-out rather than being adapted to one. This guide covers siting rules, the wet/dry split layout, waterproofing, shower and bar plumbing, electrical safety near water, shade, furniture and the full 2026 cost picture for a 20FT, 30FT or 40FT HG Prefab unit.
Why a Container Pool House Works — and Where to Put It
Four characteristics make a folding container unit unusually well suited to poolside use:
- It locks. Pool equipment, chemicals, glassware and the sound system stay secure when the house is empty. A timber shed with a hasp does not offer the same resistance.
- The structure is already wet-area ready. Steel wall and roof panels accept a waterproof membrane and a tiled or vinyl finish directly, and the factory can cut floor drain penetrations so no one drills a structural floor on site.
- Installation is fast and light on the garden. A single unit, one delivery, a prepared pad. There is no month of wet trades working around a finished pool deck.
- It can move. If the pool is relocated or the property is sold, the unit folds again and leaves. That matters for clients who rent or who plan a phased landscape build.
Poolside is also a demanding environment — constant humidity, chlorinated water, UV exposure and bare feet on hot surfaces. Specify accordingly: corrosion-resistant fixtures, non-slip wet flooring and finishes that tolerate being hosed down. Placement itself is then decided by code, drainage and comfort, in that order:
- Setback from water: most authorities require the structure to sit 3–5 m from the pool water's edge, though the figure varies. Confirm the local pool barrier and accessory-structure rules before you order, because the setback also governs where sockets may go.
- Level pad: a compacted, level base — concrete slab or compacted gravel on a geotextile — extending at least 300 mm beyond the unit footprint. Falls across the pad must run away from the building.
- Sightlines: position the unit so the lounge and bar face the pool, and so an adult at the bar or sink can see the water. Privacy screens belong on the changing-room side.
- Wind shading: orient the long elevation away from the prevailing wind, or use a pergola, hedge or shade sail to create a sheltered outdoor room on the windward side. An exposed bar counter is unusable on a breezy day.
- Truck and lift access: the offload needs a firm approach and clearance for the lifting equipment. Measure gate widths and overhead cables on the route before delivery day.
- Services route: plan the water supply, sewer or greywater run and the electrical feed as one trench from the house to the pad. Retro-fitting a trench across a finished pool deck is the most expensive mistake on this type of project.
Installation itself is quick. Yes — a crane or forklift is required to offload the folded unit from the truck. Once it is set in position, four workers can unfold and assemble the main structure in about 2 hours, so the services trench, not the structure, sets the schedule.
The Wet/Dry Split: Layout That Actually Works
Every successful pool house separates dripping from relaxing. Put the wet zone nearest the pool door and the dry zone nearest the garden, with a bench or half wall between them:
| Unit size | Floor area | Layout | Capacity | Best fit |
|---|---|---|---|---|
| 20FT | ~14 m² | Wet zone with shower and WC, single dry bench area | 4–6 people | Compact changing room and towel store for a family pool |
| 30FT | ~21 m² | Full wet/dry split: changing benches, WC, private shower, lounge | 8–12 people | Changing room plus small bar counter and shaded seating |
| 40FT | ~28 m² | Two cubicles, lounge, 2.4 m bar counter, summer kitchen wall | 15–20 people | Full cabana with bar, summer kitchen and guest changing |
Dimensions worth holding on to:
- Changing benches: 400 mm deep, 450 mm high, with 600 mm of clear space in front to dress. A 400 mm bench also gives a seat that does not dominate a narrow room.
- Lockers: a bank of 300 × 400 mm lockers, ventilated at the top and bottom, on a 100 mm plinth so the floor beneath can be cleaned.
- Private shower zone: a screened cubicle of at least 900 × 900 mm, with a dry-off area outside it so the changing room floor stays walkable.
- WC compartment: 800 mm wide minimum, door opening outward or as a sliding leaf.
- Bar counter: 900 mm high with 600 mm of serve space behind it — enough for a person to work without stepping back into the room.
- Doorways: 900 mm clear openings, and a threshold detail that sheds water outward rather than inward.
- Flow: pool → shower → changing → dry zone → garden. Anything that forces a wet guest past the bar is a layout failure.
A 20FT unit is the sensible choice for a straightforward changing room; see the layout options on our 20FT folding container house page. If the brief includes a bar and a lounge, start at 30FT — the extra width is what buys a usable dry zone rather than a corridor with furniture in it.
Waterproofing the Wet Area
Waterproofing is where pool house projects succeed or fail. Chlorinated water splashed daily will find every gap:
- Full membrane floor: a continuous sheet or liquid-applied membrane across the whole wet zone, dressed 150 mm up the walls and into the drain flange. Do not stop the membrane at the cubicle line.
- Fall to drain: build a 1:80 fall to a linear drain at the shower threshold. A linear drain across the cubicle opening catches splash as well as shower flow, and is far easier to keep level than four separate point drains.
- Coved skirting: carry the floor finish 100 mm up the wall as a coved section. Square internal corners crack and leak; coves do not.
- Marine-grade fixtures: 316 stainless or marine-grade brass for shower fittings, hinges, handles and locker furniture. Chlorine and salt air destroy standard plated hardware within two seasons.
- Wall finish: large-format tile or a seamless PVC wall system to 1.8 m in the wet zone, with the substrate behind it tanked, not just the tile face.
- Ventilation: an extract fan at 15–25 L/s continuous or humidistat-controlled. The enemy is not the water you see, it is the humidity you do not.
Outdoor Showers, Bars and Summer Kitchens
The ideal arrangement is one screened shower inside the unit and one open rinse point outside it, so swimmers can wash sand and chlorine off before they reach the floor:
- Internal shower: a thermostatic hot/cold mixer set to 41 °C, a 200 mm rose, and a handset on a 1.5 m hose for rinsing feet and equipment.
- External rinse point: a wall-mounted mixer beside the pool door, fed from the same hot and cold run, with a foot-tap or a knee-operated valve for hands-free use.
- Freeze-drain valve: fit a drain valve at the lowest point of the external run so the pipework can be emptied before the first frost. Open it, leave it open over winter, and the external riser survives indefinitely.
- Water heater: a 50–80 L unit inside the dry zone, or a solar pre-heat loop on the roof feeding the same mixer. Solar works well here because pool season and sun coincide.
- Soakaway: where no sewer connection exists, discharge shower and rinse water to a gravel soakaway — a 1–2 m³ pit of 20–40 mm clean gravel, geotextile-wrapped, sited at least 5 m from the pool shell and downhill of it. Never discharge to a storm drain.
- Backflow: fit a check valve or air gap on any hose connection that could dip into pool water or a cleaning bucket.
A poolside bar turns a changing room into the place people actually gather, and it shares the same hot and cold run as the shower. Keep it simple and weather-tolerant:
- Counter: 900 mm high, 600 mm of serve space behind, in a solid-surface or compact laminate top that tolerates wet glasses and sunscreen.
- Weatherproof sockets: IP65 rated, with spring-loaded covers, mounted at least 1.2 m above the finished floor. Blender, ice machine and a phone charger are the usual loads.
- Under-counter fridge: on its own dedicated circuit, vented to the front, and rated for outdoor or high-humidity use. A fridge sharing a circuit with the ice machine trips on the hottest afternoon of the year.
- Sink: a small bar sink discharging to the sewer where available, or to a separate greywater line feeding the soakaway. Keep it out of the shower drain line so soap and food waste do not mix.
- Range hood: if the unit will be used for real cooking rather than reheating, a recirculating or ducted hood is required by most codes, along with a fire extinguisher and a clear 600 mm landing space beside the hob.
- Ice and glass storage: a drained ice bin and open shelving above the counter at 1.4 m, out of the splash zone.
Browse the base units and finish options on the HG Prefab products page before finalising the bar wall, so the first-fix positions can be prepared in the factory.
Electrical Safety Around Water
This is the one section that should never be value-engineered. Water, bare feet and mains voltage are a combination with no margin for error:
- RCD protection: every circuit serving the unit, indoors and out, must sit behind 30 mA residual current protection. Test the devices monthly using the built-in test button.
- Equipotential bonding: bond all metallic parts — the container structure, handrails, pool ladder, metal locker frames and pipework — to a common earth per local code. Bonding removes the voltage difference a person can bridge with wet skin.
- Socket height and distance: mount sockets at least 1.2 m above the finished floor and at least 2 m from the pool water's edge. Below that height, use only sealed, fixed-wired equipment.
- Outdoor enclosures: IP65 minimum, UV-stabilised, with cable entries from below so water cannot track into the box along the conduit.
- Lighting: IP44 or better in the wet zone, low-voltage or SELV around the shower cubicle, and external lighting on a photocell or timer so the path from pool to door is lit after dusk.
- Cables: buried runs in conduit at 600 mm depth with warning tape, or surface runs in UV-stable trunking. Never run a temporary extension lead across a wet deck.
- Inspection: have the installation certified by a licensed electrician and keep the certificate with the property documents. Insurers ask for it.
Shade, Furniture and Flow
The unit is only half the outdoor room. Shade is what makes it usable at two in the afternoon:
- Pergola: a timber or aluminium pergola attached along the long elevation, with 150 × 50 mm rafters at 400 mm centres for partial shade. Anchor posts into the pad, not into the landscaped ground beside it.
- Shade sail anchoring: a triangular sail needs substantial anchoring — 100 mm galvanised posts set 600 mm into concrete, or a structural fixing into the container's corner castings using a rated shackle plate. Fabric sails pull harder in gusts than owners expect; undersized anchors are the most common failure.
- Furniture: quick-dry mesh loungers, a teak or aluminium dining set, and a 600 mm deep shelf along the bar wall for glasses. Leave 900 mm of circulation between furniture and the pool door.
- Flooring outside: a non-slip deck or textured paving running 1.5–2 m out from the unit, falling away from the threshold.
- Storage: a drained outdoor cupboard for pool chemicals, kept separate from the bar and away from any food storage. Chlorine and glasses do not belong in the same cabinet.
Costs and Installation Sequence
Typical 2026 budget for a container pool house or cabana:
- Container unit: 20FT $7,200–$9,800; 30FT $10,500–$14,500; 40FT $12,500–$16,500 depending on size and finish.
- Site pad and services trench: $2,500–$8,000, driven by distance from the house.
- Waterproofing, membrane, linear drain and wet-area finishes: $2,500–$7,000.
- Plumbing, shower, mixer, freeze-drain valve and water heater: $2,000–$6,000.
- Bar counter, fridge, sink and joinery: $3,000–$10,000.
- Electrical, RCD protection, bonding and lighting: $2,500–$7,500.
- Pergola or shade sail with anchoring: $1,500–$6,000.
- Permits and inspections: $800–$4,000.
Run the work in this order: confirm the setback and pool barrier rules first; cut the services trench and cast the pad; deliver and unfold the unit; complete the wet-area membrane and linear drain; first-fix plumbing and electrics; then bar joinery, shade structure and landscaping last. Tell your sales engineer where the shower, WC, floor drain and bar sink will sit and HG Prefab can factory-prep the wet-area substrate, floor drain penetrations and the electrical sub-panel position, so the plumber and electrician start the day after assembly rather than cutting into a finished floor.
Need a folding container house?
HG Prefab manufactures 20FT, 30FT and 40FT folding expandable container houses with factory wet-area prep and floor drain penetrations for pool house and cabana fit-outs — shipped flat-packed worldwide.
Browse modelsFrequently Asked Questions
What size container do I need for a pool house?
A 20FT unit at about 14 m² suits a changing room with a shower and a towel store. A 30FT fits a full wet/dry split with changing benches, a WC and a small bar counter, and a 40FT carries two changing cubicles, a lounge, a 2.4 m bar and a summer kitchen along one wall.
How is a container pool house delivered and installed?
Yes — a crane or forklift is required to offload the folded unit from the truck. Once it is set in position, four workers can unfold and assemble the main structure in about 2 hours. The wet-area membrane, linear drain, shower plumbing and RCD-protected electrics are then finished by the relevant trades before the unit is used.
How safe is electricity near a pool house?
Safe when it is specified correctly. Every socket inside and outside the unit must sit behind 30 mA RCD protection, equipotential bonding is required per local code, and sockets should be mounted at least 1.2 m above the finished floor and at least 2 m from the pool water's edge. Use IP65 weatherproof enclosures outdoors and marine-grade fixtures throughout the wet zone.
Can a pool house container be used year-round in a cold climate?
Yes, with winterisation. Fit a freeze-drain valve at the lowest point of the shower and bar pipework, drain the lines before the first frost, keep the internal heater on a low frost-protection setpoint, and specify insulated wall and roof panels plus a heated towel rail in the changing room so the wet zone dries out between uses.