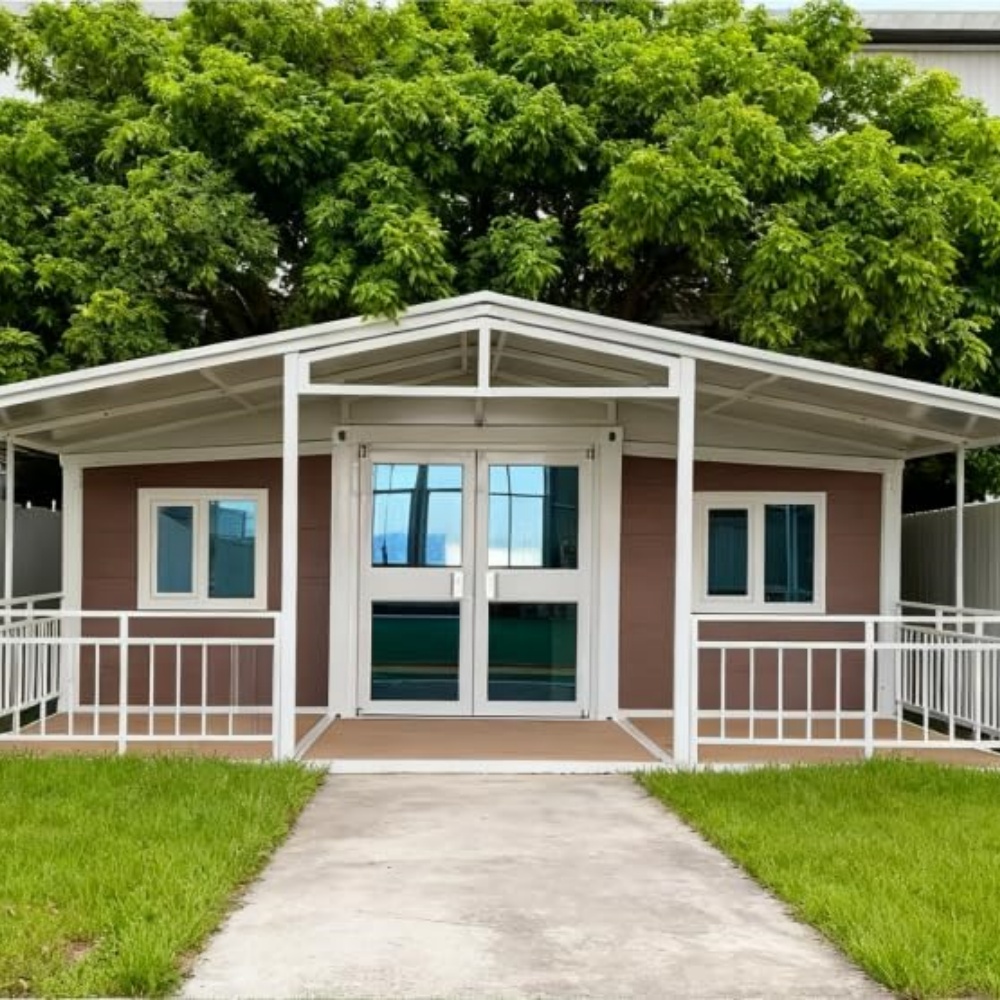
HG Prefab foldable expandable container homes — built to last, delivered worldwide.
Steel does not fail because it is old. It fails because a coating was breached, water and oxygen reached bare metal, and nobody noticed for two seasons. That is the whole story of container home corrosion, and it is good news: every one of those three conditions is under the owner's control. This article is the materials-science and maintenance companion to our general container home maintenance checklist — where that piece lists what to look at, this one explains why steel corrodes, how the HG Prefab steel frame is protected before it leaves the factory, how to grade your own site's corrosion risk, and exactly how to fix rust once it appears.
Why Steel Rusts: The Electrochemistry in Plain Terms
Rust is not a surface stain; it is a volume change. When iron oxidises it becomes iron oxide, which occupies roughly six times the volume of the steel it came from. That expansion is what lifts paint into blisters, jams door hinges, splits weld seams and, eventually, perforates a 1.6 mm panel. Understanding the four ingredients tells you which ones you can actually remove.
The four ingredients
A corrosion cell needs an anode, a cathode, an electrolyte and oxygen. On a container home, the anode and cathode are usually two neighbouring spots on the same sheet of steel — a scratch next to intact coating, a weld next to clean plate, a wet dust deposit next to dry metal. The electrolyte is a film of water, and in practice that film forms above about 60% relative humidity combined with a surface contaminant such as salt or dirt that pulls moisture out of the air. Oxygen diffuses in from the air. Remove any one of the four and corrosion stops. Coatings remove the electrolyte and the oxygen path; drainage removes standing water; rinsing removes the salt that lets a film form at 45% humidity instead of 75%.
Why salt air is so much worse
Chloride ions do three harmful things at once. They make the water film conductive, so the corrosion cell carries current more easily. They break down the passive layer that slows corrosion on bare steel, so the anode keeps dissolving instead of self-limiting. And they form soluble iron chlorides that migrate, so rust creeps sideways underneath intact paint — the classic undercutting you see as a bubble ring around a stone chip. It is not unusual for an unprotected steel surface 100 m from a surf beach to lose four to eight times more thickness per year than the same steel in a dry inland climate.
Corrosion standards describe this with chloride deposition rates and corrosivity categories. In rough terms: inland and arid sites deposit under 5 mg/m²/day of chloride; temperate urban and inland humid sites sit in the tens; a general coastal site within a few kilometres of the ocean reaches 100–300 mg/m²/day; a directly sea-facing site, especially on an exposed headland, can exceed 500. Each step up roughly doubles the corrosion rate on bare steel and shortens coating life more than proportionally, because coatings fail by undercutting at defects rather than by uniform thinning.
Interior condensation: the rust you cannot see
The most under-reported corrosion in container homes happens inside the wall build-up, not on the outside face. Steel is a near-perfect vapour barrier and an excellent thermal conductor, so when warm humid interior air reaches a cold steel surface it condenses. A family of four generates 5–10 litres of water vapour per day through cooking, showering and breathing; without a continuous vapour control layer and a ventilated cavity, several litres of that can condense against the coldest steel every week in winter. The visible symptom is a rust bloom on the inner face of an exterior panel, usually at the floor line and at corners where air is still. The fix is design: continuous vapour barrier on the warm side, 20–40 mm ventilated service cavity, and mechanical extraction running at 15–30 L/s in wet rooms. Retrofitting a vapour barrier after the interior lining is fitted is far more expensive than specifying it up front.
Cut edges and welds: where coating fails first
Every opening you cut for a window or door creates a fresh, sharp, uncoated edge at the most exposed geometry on the building — a horizontal ledge that holds water and a knife-thin coating edge that pulls back under thermal cycling. In our experience cut edges account for well over half of all early warranty claims, ahead of the flat panels they sit in. Welds fail for a related reason: the heat-affected zone has a different microstructure and a mill scale that must be removed mechanically before priming, otherwise the primer bonds to scale and lifts off with it in a single sheet. Drilled fixings are a third category, because a self-drilling screw leaves bare swarf packed around a bare hole.
How HG Prefab Protects the Steel Frame at the Factory
Factory application beats site application for one reason above all: environment. A shop can control temperature, humidity and surface cleanliness; a windy site with 90% humidity and salt in the air cannot. A coating applied over a invisible salt residue on site will blister within a season no matter how good the paint is.
Surface preparation and priming
Steel sections are shot-blasted or power-tool cleaned to remove mill scale, rust and rolling oils, then degreased. The frame receives a zinc-rich epoxy primer, which protects in two ways: it is a barrier, and the zinc dust sacrifices itself electrochemically so that a scratch 1–2 mm wide does not turn into a rust bloom. That sacrificial behaviour is the single most important property in a coastal coating system, and it is the reason a cheap alkyd primer over hand-scraped steel performs so poorly by comparison. Dry film thickness for the primer is held at 60–80 microns, measured wet and checked dry.
Topcoat and bake finish
The primer is overcoated with a durable polyurethane or baked enamel topcoat of 40–60 microns, giving a total system in the 100–160 micron range on primary structural members. The bake cycle cross-links the film, raising hardness and gloss retention so the coating resists the chalking and fading that follows five years of UV exposure. Colour also matters thermally: a light-reflective roof finish can drop exterior surface temperature by 15–25°C in summer, which slows every temperature-driven degradation process including coating embrittlement.
Outgoing inspection
Each unit leaves with a recorded check of coating thickness on sampled members, adhesion by cross-cut test, visual inspection of welds and cut edges, verification that all site-cut openings are sealed and primed, and confirmation that the base rail and corner castings are coated. Any handling damage is repaired before packing, not after. Ask your sales engineer for the coating specification sheet for your unit and keep it — it tells the future owner exactly which products to use for touch-up, and using an incompatible topcoat over an existing primer is a common cause of premature failure.
Environmental Risk Grading: What Class Is Your Site?
Grade your site honestly before you choose inspection intervals. Where two categories could apply, take the higher one.
| Environment | Typical conditions | Corrosion class | First coating check | Inspection interval |
|---|---|---|---|---|
| Inland dry | Arid or continental, low humidity, >50 km from coast, no industrial source | Low | Year 6–8 | Every 12 months |
| Inland humid / urban | Regular rain, 60–80% RH, winter road salt on nearby highways | Moderate | Year 4–6 | Every 12 months |
| General coastal | 500 m–5 km from the shoreline, prevailing onshore wind | High | Year 3–4 | Every 6 months |
| Direct seafront | Under 300 m, exposed to surf spray, headland or open bay | Very high | Year 2–3 | Every 3–6 months |
| Heavy industrial / geothermal / pool plant | Sulphur dioxide, acidic condensate, fertiliser or chemical storage nearby | Very high to severe | Year 2–3 | Every 3–6 months, plus sampling |
Two modifiers move a site up a class on their own. The first is persistent wetting: a unit sitting under a tree canopy, against a north-facing bank, or in a hollow that ponds after rain stays damp for days longer than its neighbours, and time-of-wetness drives corrosion more than almost any other variable. The second is airborne abrasives — desert sand, salt-laden wind with grit, or a gravel drive — which erode the topcoat and renew the bare metal underneath on a cycle of years rather than decades. If your site also sits in a cold-climate snow belt, read our dedicated piece on container homes in extreme climates for the freeze-thaw and de-icing salt detail.
Prevention: Site, Water and Details
Every measure below removes one of the four ingredients of the corrosion cell. None of them is expensive at build time; all of them are expensive to add later.
Drainage, ground clearance and airflow
Water that cannot leave will eventually find steel. Give the pad a 1–2% fall away from the building for at least 2 m, keep finished ground level 150 mm below the base rail, and stand the unit on piers or a plated skid so air can move beneath it. A unit sitting directly on soil wicks moisture into the base rail continuously and will rust through the bottom 100 mm of the frame long before the roof shows any wear. Where a pier foundation is used, isolate the steel from the concrete with a bituminous or EPDM pad so the alkaline pore water in fresh concrete does not attack the coating at the contact point.
Drip edges, flashings and cut-edge sealing
Roof sheets and wall panels should terminate in a drip edge that throws water at least 30 mm clear of the steel below, so run-off does not track back along the underside and sit on the top of the base rail. Every cut edge around a window or door opening gets treated as a three-step job: grind to a 1–2 mm radius so the coating has something to grip, apply zinc-rich primer, then seal the joint with a UV-stable polyurethane sealant that stays flexible over a ±25% movement range. Sealant over bare steel without primer fails — the sealant bonds, the rust creeps under it, and the joint opens.
Keep planting and soil off the walls
Raised planter beds against a container wall are the most common owner-inflicted corrosion problem we see. Soil holds moisture against the panel for weeks, irrigation water carries fertiliser salts, and the bed hides the damage until the wall is perforated. Keep a minimum 300 mm clear gap between any planting and the steel, irrigate with drip line rather than spray, and never let mulch or gravel touch the base rail. Timber cladding battens and decking fixed to the shell should be isolated with a plastic or rubber shim, and stainless or hot-dip galvanised fixings should be used rather than zinc-plated ones — a plated screw loses its 5–8 micron layer in two or three coastal seasons.
Rinsing salt off the shell
On a seafront site, a fresh-water rinse of the exterior shell every four weeks in the first 500 m from the waterline is the cheapest corrosion control available. Use a garden hose at low pressure, working top down, paying attention to the roof, the base rail, window reveals and the underside of any overhang where salt concentrates and rain never reaches. Do not use a pressure washer above about 80 bar on coated steel — it drives water past seals and strips the coating at edges. A monthly rinse typically removes 80–90% of deposited chloride before it can form an electrolyte.
Inspection Schedule
Corrosion is cheap to stop and expensive to repair, so the value is entirely in catching it early. Put the dates in a calendar and take photographs from the same positions each time; a photo series makes creep rate obvious in a way memory never does.
Annual inspection checklist
- Base rail and corner castings: probe with a screwdriver. Any soft spot or flaking scale means section loss, not surface rust.
- Cut edges of every opening: look for a rust line running under the sealant bead.
- Fixings: rust staining below a screw head means the fixing is corroding from the inside out. Replace, do not paint over.
- Roof: ponding areas, seam sealant condition, and any place where debris has been left sitting.
- Welds and hinge points: especially on folding units, where the mechanism creates wear points in the coating.
- Interior: musty smell, discolouration at the floor line, or lifting of interior finishes — all signs of interstitial condensation.
- Contact points: anything leaning against the shell, a stored ladder, a bicycle, a tarpaulin tied on and left for a season.
After a typhoon, blizzard or hailstorm
Run an extra inspection within 72 hours of any event with wind above 60 km/h, salt-laden storm surge, hail, or more than 100 mm of rain in a day. Look for coating damage from flying debris, bent flashings that now direct water inward, sealant torn at panel joints, gutters and downpipes dislodged, blocked drainage, and any new ponding where debris has dammed a channel. Photograph for insurance and repair within two weeks — a chip that is primed in week one costs a few dollars; the same chip left until spring becomes a 100 mm undercut patch.
Touch-Up Painting: The Correct Sequence
Most touch-ups that fail do so for a reason that has nothing to do with the paint: they were applied over salt, over moisture, or over rust that was only smeared flat. Follow the sequence, in these conditions — substrate at least 3°C above the dew point, air temperature above 5°C, relative humidity below 85%, and no rain for four hours.
- Wash: fresh water with a mild detergent to remove salt and dirt, then rinse and let it dry completely.
- Abrade: angle grinder with a flap disc or wire brush back to bright metal, feathering the surrounding sound coating 30–50 mm so there is no hard edge. Do not polish the surface smooth — an anchor profile of 30–50 microns gives the primer something mechanical to hold.
- Degrease: solvent wipe, clean cloth, changed frequently.
- Prime: zinc-rich epoxy primer, 60–80 microns dry film, applied within four hours of abrading. Bare steel left overnight in coastal air will flash-rust and has to be re-prepared.
- Topcoat: two coats of the compatible polyurethane or enamel topcoat at 40–50 microns dry film each, with the manufacturer's stated recoat window respected between coats.
- Check: a wet-film gauge during application and a dry-film check afterwards is the difference between a five-year patch and a one-year patch.
Small chips under 5 mm on a flat panel can be treated with a brush-applied system; anything larger, anything on an edge, and anything on a structural member deserves the full sequence. Keep a labelled tin of the original primer and topcoat on site for the life of the building.
Repairing Existing Rust: Surface Bloom or Section Loss?
The distinction decides whether you are doing a weekend job or a structural repair. Surface rust is a uniform orange-brown bloom, feels rough but hard when scraped, and stands proud of the surrounding coating. It has consumed well under 5% of the plate thickness and the metal underneath is solid. Treat it with the sequence above and move on. Section loss shows as flaking scale that comes away in layers, a soft or punky feel under a scraper, visible pitting, or — decisively — perforation with light coming through. Original structural panels are in the 1.4–2.0 mm range, so 0.5 mm of pitting is already a quarter of the wall.
For section loss, cut back to sound metal rather than bridging over it. On a non-structural panel, grind out the perforated area and weld in a patch plate of equal or greater thickness, then prime and topcoat both faces. On a structural member — base rail, corner post, roof beam — do not weld without engineering advice; the repair usually means a sister plate or a full member replacement, and it is worth a call to the manufacturer for the section drawing. Never fill a rust hole with body filler or spray foam. It hides the problem for one season and makes the eventual repair larger.
If more than roughly 10% of a panel area is affected, or if rust is appearing simultaneously in many locations, stop treating spots and plan a full repaint: abrasive blast or mechanical clean back to a near-white finish, prime the whole surface, and topcoat as a system. Spot repair over widespread coating breakdown is a treadmill.
Coating Service Life: Realistic Expectations
Set expectations against your site class, not against a marketing number. A factory-applied zinc-rich primer plus baked topcoat system, on a well-drained site with the details above, gives roughly 12–15 years to first full repaint inland and dry; 8–12 years in a temperate urban or general coastal setting; and 5–8 years on a direct seafront or industrial site. Localised touch-up is expected much earlier — around year 2–4 at edges and fixings on coastal sites — and that is normal maintenance, not failure. Each successful touch-up cycle buys another 8–12 years on the repaired area, so a container home in a coastal town does not have a shortened structural life; it has a shorter maintenance interval. Owners who want the full picture of how long the building itself lasts should read our guide to container home lifespan.
Cost, Delivery and Installation
Corrosion protection is mostly a build-time cost. The factory coating system is included in the unit; what costs money is the site work — a drained pad, piers or a plated skid, drip edges, sealant and a couple of tins of the specified paint. Budget a few hundred dollars for the detailing and a few hundred per decade for touch-up cycles, against a four-figure repair bill for a perforated base rail.
HG Prefab folding expandable container houses are priced 20FT $7,200–$9,800; 30FT $10,500–$14,500; 40FT $12,500–$16,500 depending on size and finish. Yes — a crane or forklift is required to offload the folded unit from the truck. Once it is set in position, four workers can unfold and assemble the main structure in about 2 hours. Two corrosion-related points during that day: protect the coating where slings and chains contact the frame, and touch up any handling marks the same afternoon, before a night of dew turns a scratch into a rust seed. You can review the full model range and coating options on our products page.
Planning a coastal or high-humidity build?
HG Prefab manufactures 20FT, 30FT and 40FT folding expandable container houses with factory-applied zinc-rich primer and baked topcoat, sealed and primed cut edges, and a documented outgoing coating inspection — shipped flat-packed worldwide. Tell us your distance from the shoreline and we will specify the coating system and inspection interval for your site.
Browse modelsPrefer to talk directly? Message our engineers on WhatsApp, or email hgmechequip@gmail.com for the coating spec sheet and a site-specific quote.
Frequently Asked Questions
How long does the factory coating on a container home last?
In an inland dry environment the original system typically reaches its first full repaint at 12 to 15 years, in a general urban or temperate coastal environment at 8 to 12 years, and on a direct seafront site at 5 to 8 years. Localised cut edges, fixings and the base rail need touch-up years earlier, which is why an annual inspection matters more than the headline number.
Can I repaint a rusty container home myself?
Yes for surface rust and small areas. Work dry, above 5 degrees C and below 85 percent relative humidity, grind back to bright metal, degrease, apply a zinc-rich primer at 60 to 80 microns dry film, then two coats of compatible topcoat at 40 to 50 microns each. Anything with section loss, perforation or rust that keeps bleeding through needs a welded repair or panel replacement.
How often should I inspect a container home near the sea?
Every three months for the first two years on a direct seafront site, then every six months, with a full annual audit. Focus on the base rail, corner castings, cut edges around window and door openings, fixings, roof seams and any place where the coating has been drilled through. Rinse the shell with fresh water monthly in the first 500 m from the shoreline.
Does living 100 m from the beach really make that much difference?
Yes. Salt deposition measured on the first 100 to 300 m from the surf line is typically three to ten times higher than at 1 km inland, which is why standards classify it as a higher corrosivity category. Wind direction, a headland, or a road that sprays salt water all push a site up a category. Assume the worst and design drainage, drip edges and inspection intervals for it.
How is a foldable container home delivered and installed?
Yes — a crane or forklift is required to offload the folded unit from the truck. Once it is set in position, four workers can unfold and assemble the main structure in about 2 hours. During assembly, check that factory coating damaged by slings or tools is touched up the same day, because those marks are where corrosion starts.