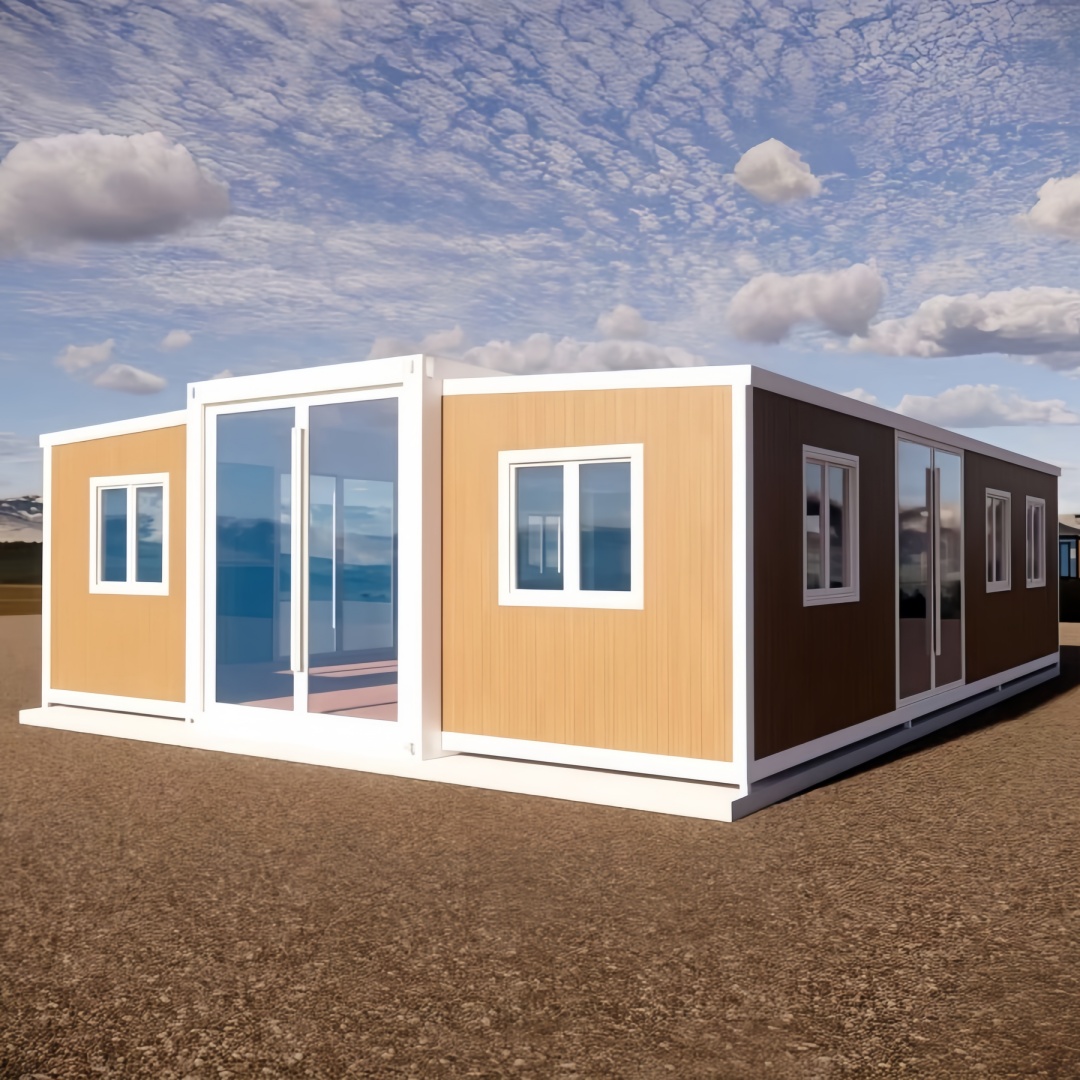
HG Prefab foldable expandable container homes — built to last, delivered worldwide.
A fish hatchery is two things at once: a wet, warm, biologically fragile production area, and a control problem that never sleeps. Aeration fails at three in the morning, a heater sticks on, ammonia climbs after a feeding error, and the whole year's output can be lost in a single night. What protects against that is not more tanks. It is a dry, insulated, well-drained, well-instrumented building sitting right next to the tanks, where the filtration plant lives, the records are kept, the feed is stored, and somebody is present when an alarm goes off.
That building is where a folding expandable container house earns its keep. It arrives as a steel-framed, insulated shell that unfolds into 36, 56 or 76 square metres of usable floor, it can be set on a simple pad beside a pond rather than on a permanent foundation, and it can leave again when the lease ends. This guide covers how to specify one properly: which size, how to zone the interior, what the water actually has to do, how the filtration chain is sized, how much power you need and what happens when it fails, how to keep disease out, how to stop the building rotting from the inside, and what the whole package costs. It pairs with our water supply guide, our electrical load guide and our solar and battery microgrid guide, because hatchery sites are usually off-grid or weakly grid-connected.
Why a Relocatable Steel Building Suits Aquaculture Sites
Remote ponds, seasonal camps and lease sites
Three site types make permanent construction a bad bet, and they cover most of the world's small and medium hatcheries.
- Remote pond clusters. Grow-out ponds sit kilometres from the nearest road, on land that floods, with no grid connection and no contractor willing to travel for a small job. A building that can be trucked in, set on a compacted pad and commissioned inside a week beats a blockwork structure that needs a wet trade crew on site for two months.
- Seasonal and seasonal-camp operations. Where spawning runs for four to six months and the site is otherwise idle, a building you can lock, drain and leave — or move to the next site — matches the operating rhythm. Permanent buildings carry year-round maintenance and security costs for a seasonal return.
- Lease and concession sites. Coastal shrimp and tilapia operations frequently sit on land held under five to fifteen year concessions. At the end of the term, the tanks, the liner and the shade structure are written off; a relocatable building is an asset that leaves with you. Over two concession cycles that difference alone can justify the building.
The structural argument is secondary but real. Steel framing does not rot, does not support mould, resists termites and rodents far better than timber, and the insulated sandwich panel shell holds a stable internal temperature so the laboratory instruments, the feed and the fry themselves are not swinging with the weather. In hot climates the panel insulation plus a reflective roof finish keeps the internal air within a few degrees of the set point for a fraction of the cooling energy a tin shed would need.
What the building actually does on a working hatchery
In practice, one container houses five functions that are usually scattered across a site.
- Laboratory bench: microscope, salinity refractometer, dissolved oxygen meter, pH and ammonia test kit, a balance for weighing fry and feed, and a bench with a sink and hot and cold water.
- Fry rearing and incubation room: jar racks, larval tanks or early-rearing tanks, kept warm, dark-controllable and away from foot traffic.
- Feed and equipment store: sealed bins on pallets, off the floor, in a dry room with a dehumidifier, plus nets, buckets, spare diffusers and spare pump parts.
- Plant and filtration room: drum filter, biofilter, pumps, UV, oxygen cone, the distribution manifold and the drain line.
- Staff room and records: the place where the logbook lives, where the alarm panel is visible, and where someone is sitting during feeding rounds.
Putting all five in one insulated shell, ten metres from the tanks, is what turns a collection of ponds into a managed production unit. It is also what makes the difference between a batch record you can show a buyer and a batch record that exists only in someone's memory.
Choosing the Size: 20FT, 30FT and 40FT
20FT (about 36 m²): the single-tank satellite station
The 20FT works when the building serves one production function plus a desk. A realistic layout is a wet room of roughly 20–22 m² holding one circular rearing tank of 3–5 m³, a small cartridge-and-biofilter loop and a floor drain, and a dry room of roughly 12–14 m² with a bench, a feed bin and the electrical panel. It suits a satellite station serving a satellite pond group, a broodstock holding point, or a demonstration and training unit. It does not give you a separate laboratory, and it does not give you a genuine quarantine room — if either matters, go up a size.
30FT (about 56 m²): hatching room plus office
The 30FT is the most common hatchery configuration, because 56 m² is the first size that supports a real two-room split with circulation between them. A typical arrangement gives 22–26 m² to the wet side for incubation jars, four to six larval tanks and the filter loop, and 26–30 m² to the dry side for the laboratory bench, the feed store, the monitoring panel and a small staff corner. Our 30FT white folding house is the model most often specified for this use: the white finish reflects heat on exposed pond sites, and the internal layout takes a bulkhead partition without structural modification.
40FT (about 76 m²): laboratory, feed store and plant room
The 40FT is the first size that supports three genuinely separate rooms, and separation is the whole point on a hatchery. A working layout is a fry and laboratory room of about 26–30 m², a dry feed and equipment store of about 18–22 m², and a plant and generator room of about 20–26 m² with its own externally vented air supply, acoustic lining and a fire-rated separation from the rest of the building. Keeping the generator and the fuel store out of the production rooms is not a nicety: it removes exhaust risk, removes noise from the spawning area, and keeps diesel away from feed.
Internal Zoning: Wet Zone, Dry Zone and the Bulkhead
The bulkhead partition
One insulated partition with a single door does more for a hatchery than any piece of equipment you can buy. It separates the wet, humid, biologically active side from the dry side where feed, electronics and records live. Specify it as a full-height insulated panel sealed top and bottom, with a door fitted with a drop-down threshold seal and a closer, and with every service penetration through it sleeved and sealed on both faces. Cables and pipes should pass through one defined, sealed penetration plate, not through a dozen ad-hoc holes, because the penetration plate is what you inspect and reseal each season.
Wet zone specification
- Floor: chemical-resistant resin screed or welded vinyl with a 1.5–2% fall to a trench drain; coved up the wall by 100–150 mm so there is no right angle to clean.
- Walls: the standard insulated panel is acceptable behind a washable PVC or GRP cladding sheet to 1.8 m; above that, keep it smooth and sealed.
- Electrical: IP65 outlets, IP65 luminaires, RCD protection at 30 mA on all socket circuits, and nothing mounted below 300 mm from the floor.
- Drainage: a linear trench drain with a removable grating and a silt basket, discharging to a settlement and disinfection tank, never straight to the field.
- Water: hot and cold at the bench and at a hose point, plus a dedicated dechlorinated or treated water line for making up saltwater and for rinsing equipment.
Dry zone specification
The dry side is where the building earns its money over a ten-year life. Keep it below 60% relative humidity with a dehumidifier sized as set out below, store feed on pallets at least 150 mm off the floor and 300 mm from any external wall, put the electrical distribution board and the monitoring controller here rather than in the wet room, and make sure the record-keeping surface is somewhere a wet, muddy person will not sit. The laboratory bench wants a 1.2–1.5 m uninterrupted run with power and data above it and a sink at one end, plus a lockable cupboard for reagents and test kits.
Water Quality Parameters for Common Culture Species
Every design decision downstream — filter size, pump size, alarm set points, backup oxygen — is driven by the target values for the species you are producing. The table below gives practical working ranges rather than laboratory ideals. Note the direction of travel in each row: the alarm set point is always set inside the lethal limit, with enough margin that a night-staff member has time to act.
| Parameter | Tilapia (Oreochromis) | African catfish (Clarias) | Rainbow trout | Shrimp PL (P. vannamei) |
|---|---|---|---|---|
| Temperature | 26–30 °C; spawning 27–29 °C; feeding stops below 16 °C | 25–30 °C; optimum 28 °C; tolerates 20–32 °C | 10–16 °C optimum; stress above 20 °C; lethal above 24 °C | 28–31 °C; avoid swings above 1 °C per hour |
| Dissolved oxygen | Minimum 4 mg/L; production target 5–7 mg/L | Minimum 3 mg/L; tolerates 1–2 mg/L via air breathing; target 5 mg/L | Minimum 7 mg/L; stress below 5 mg/L; lethal below 3 mg/L | Minimum 5 mg/L; production target 6–8 mg/L |
| pH | 6.5–8.5; optimum 7.0–8.0 | 6.5–8.0; optimum 7.0–7.5 | 6.5–8.0; optimum 7.0–7.5 | 7.5–8.5; avoid daily swing above 0.4 units |
| Unionised ammonia NH3-N | Below 0.05 mg/L; act at 0.1 mg/L | Below 0.05 mg/L; short peaks to 0.1 mg/L tolerated | Below 0.0125 mg/L; act at 0.02 mg/L | Below 0.05 mg/L; act at 0.1 mg/L |
| Nitrite NO2-N | Below 0.5 mg/L; maintain chloride above 20:1 ratio to nitrite | Below 0.5 mg/L | Below 0.1 mg/L; trout are highly nitrite-sensitive | Below 1.0 mg/L in brackish water; chloride is protective |
| Salinity | 0–8 ppt; acclimated strains tolerate 15 ppt | 0 ppt; strictly freshwater | 0 ppt; strictly freshwater | 10–25 ppt; postlarvae acclimated at 15–20 ppt |
| Total alkalinity | 50–200 mg/L as CaCO3 | 50–150 mg/L as CaCO3 | 80–200 mg/L as CaCO3; higher is safer | 100–180 mg/L as CaCO3 |
| Carbon dioxide | Below 20 mg/L | Below 20 mg/L | Below 10 mg/L | Below 15 mg/L |
| Secchi / turbidity | Not critical in clear-water RAS | Not critical | Keep suspended solids below 10 mg/L | Keep suspended solids below 15 mg/L |
Turning the table into alarms
A printed table on the wall is not a management system. Convert the two or three parameters that actually kill stock into instrumented alarms with a written response:
- Dissolved oxygen: a galvanic or optical probe in the outflow of the rearing tanks, with a warning at 1.0 mg/L above the minimum and a critical alarm at the minimum. The critical alarm must trigger backup aeration automatically, not just ring.
- Temperature: warning at 2 °C outside the optimum band, critical at 3 °C. On trout sites the heater-stuck-on failure is as dangerous as the heater-off failure.
- pH: warning at 0.3 units outside band, which is usually the first visible sign of a biofilter problem or an alkalinity crash.
- Water level and flow: a float switch in the pump sump and a flow switch on each rearing tank inlet. A blocked inlet kills faster than almost any water quality excursion.
The Filtration Chain
Mechanical filtration: drum and screen filters
Solids removal always comes first, because every milligram of solids you leave in the water becomes an ammonia load downstream and consumes oxygen while it decomposes. A rotary drum filter with a 40–80 micron screen panel is the standard for recirculating systems above about 20 m³ per hour; below that, a wedge-wire or static screen at 100–200 microns with an automatic backwash is more economical. Budget the wash water: a drum filter uses 1–3% of the system flow for backwashing, at 2–4 bar, and that water goes to the drain, so it has to be included in the effluent calculation.
Biofiltration: media and surface area per kilogram of feed
Nitrification is the reaction that sets the size of the whole plant. Working figures:
- Ammonia production: one kilogram of 32% protein feed produces roughly 30–40 g of total ammonia nitrogen. At 40% protein, nearer 45–50 g.
- Design nitrification rate: 0.2–0.6 g TAN per square metre of protected surface area per day, depending on temperature. Use 0.4 g/m²/day at 25 °C and derate hard below 18 °C, because nitrifying bacteria lose roughly half their rate for every 10 °C fall.
- Resulting requirement: one kilogram of feed per day needs about 75–100 m² of effective biofilm surface area.
- Media volume: moving-bed media at 500 m²/m³ nominal gives roughly 350 m²/m³ of effective protected area, so plan on 0.25–0.35 m³ of media per kilogram of daily feed. A hatchery feeding 20 kg per day therefore wants 5–7 m³ of moving-bed media, which in practice means a dedicated biofilter vessel or two.
- Aeration of the media: the media must be kept moving, at roughly 25–40% fill fraction with an air supply of 8–12 m³ of air per cubic metre of media per hour.
Two practical notes. First, size the biofilter for the peak feeding rate of the production cycle, not the average — a shrimp hatchery at peak postlarval density can be feeding three to four times its weekly average. Second, a new biofilter takes four to eight weeks to mature at 25 °C; seed it with media from an established system or with a commercial bacterial culture, and feed it ammonia during the start-up period so the colony has something to eat before the fish arrive.
Ultraviolet sterilisation and dose
UV sits after mechanical filtration and before or after the biofilter depending on whether you want to protect the biofilter or the fish. Dose determines what it kills:
- 30–60 mJ/cm²: effective against most free-living bacteria and heterotrophic load; this is the standard hygiene dose in a recirculating system.
- 90–140 mJ/cm²: effective against many parasites and larger protozoa.
- 120–180 mJ/cm²: the range specified for viral and myxozoan control in hatchery water, and the usual choice for incoming water treatment on a hatchery intake.
All of those figures assume clean water and decent transmittance. Size the unit at 60–75% UV transmittance rather than at the quoted clean-water figure, put a 5-micron or finer filter immediately upstream because turbid water shadows organisms from the lamp, sleeve the quartz and clean it every one to three months, and replace the lamp every 8,000–9,000 hours whether or not it still glows — output falls long before the lamp fails visibly. Fit a flow switch and an hour meter interlocked with the pump so the steriliser cannot run dry.
Protein skimmers and degassing for marine systems
On a marine or brackish shrimp hatchery, a protein skimmer removes dissolved organic compounds before they break down, which is the single cheapest improvement to water clarity and bacterial control available. Specify on air rather than water volume: 0.5–1.5 m³ of air per cubic metre of treated water per hour, with a contact time of 60–120 seconds in the reaction column. Where ozone is used, keep the contact chamber sealed, vent the off-gas through a destruct unit, and never allow ozone into an occupied room.
Degassing is the other half of the job. Fish and bacteria produce carbon dioxide continuously, and in a densely stocked recirculating system CO₂ is often the limiting factor rather than oxygen. A packed-column degasser with a counter-current air flow strips CO₂ to below 10–15 mg/L, and also strips nitrogen, which matters because gas supersaturation causes gas bubble disease in fry. Where space is tight, a low-head spray degasser inside the wet zone does the same job with less efficiency and far less capital.
Aeration and oxygen cones
Air is for circulation and carbon dioxide stripping; pure oxygen is for carrying stock above air-saturation limits. The chain of demand:
- Oxygen consumption: roughly 0.8–1.0 kg of oxygen per kilogram of feed for warm-water finfish, and 1.0–1.5 kg per kilogram for shrimp, because the microbial load in a shrimp system is higher.
- Air-based aeration: diffusers and paddlewheels typically transfer 1.0–2.0 kg of oxygen per kWh in clean freshwater. In seawater the figure is better, in warm dirty water considerably worse.
- Oxygen cones: a pressurised contact cone with 3–5 minutes of contact time will drive dissolved oxygen to 15–25 mg/L, which is what lets you carry three to five times the biomass per cubic metre. Run the cone on the recirculation loop rather than on a once-through line, and control it on a dissolved oxygen set point, not on a timer.
- Emergency oxygen: a cylinder bank or a liquid oxygen vessel feeding a diffuser grid through a normally-open solenoid, so that a power failure opens the oxygen path rather than closing it.
Pumping, Plumbing and Turnover
Turnover rates by system type
Turnover is how many times the system volume passes through the treatment loop each hour. It is the number that sizes every pump on the site, and it varies enormously by production stage.
| System / stage | Turnover (system volumes per hour) | Typical flow for a 20 m³ unit | Notes |
|---|---|---|---|
| Incubation jars and egg trays | 20–40 | 400–800 m³/h per jar bank, usually 3–6 L/min per jar | Flow keeps eggs gently rolling; too little and they clump and fungus, too much and they are damaged |
| Larval and fry rearing tanks | 4–8 | 80–160 m³/h | Set by feed distribution and solids removal, not by oxygen, in the first two weeks |
| Recirculating grow-out with biofilter | 2–4 (15–30 min retention) | 40–80 m³/h | Higher turnover improves solids capture but costs pumping energy; 2 is usually the economic point |
| Biofilter and treatment loop | 4–10 of total system volume | 80–200 m³/h | Sized for the nitrification load and for media fluidisation, whichever is greater |
| Earthen pond with paddlewheels | 0.2–0.5 equivalent | n/a | About 1 kW of paddlewheel per 3,000–5,000 kg of standing crop; emergency demand doubles this at dawn |
| Flow-through raceway (trout) | 1–2 exchanges per hour, once through | 20–40 m³/h of fresh water | Water availability, not pumping, is the limiting factor; oxygen is replenished by the inflow |
Pipe sizing and head loss
Design velocity is the whole of pipe sizing: 1.0–1.5 m/s on suction lines so the pump does not cavitate, 1.5–2.5 m/s on delivery lines so friction stays affordable. At those velocities, 90 mm pipe carries about 12–18 m³/h and 110 mm carries about 18–28 m³/h, which is why most hatchery manifolds are built from 90 mm and 110 mm pressure pipe rather than from 50 mm fittings that looked adequate on paper.
Calculate the total dynamic head as static lift plus the friction loss in the longest run plus the losses through the filter, the UV chamber and the degasser plus the residual head the equipment manufacturer requires, then add 10–20% for ageing and fouling. Read the pump curve at that head, not at the zero-head figure on the nameplate — a pump sold as 40 m³/h commonly delivers 22 m³/h once it is pushing through a drum filter and a UV chamber. Choose variable-speed pumps on the main loop: a 20% reduction in speed cuts pumping energy by close to 50%, and it lets you dial the flow down at night without touching a valve.
Emergency aeration: batteries, cylinders and automatic changeover
Every hatchery needs a layer of aeration that does not depend on mains power, on the generator starting, or on anybody being awake. The architecture that works has three levels:
- UPS on the critical circuit carrying the control system, the monitoring, the alarms and one aerator, with 30–60 minutes of autonomy. This covers the gap before the generator starts.
- Battery-backed aerator: a 12 V or 24 V DC air pump drawing 30–60 W per diffuser line, on the same battery bus as the monitoring, with capacity for four to eight hours. It is cheap, it has no moving parts beyond the diaphragm, and it is the layer that most often saves a batch.
- Oxygen cylinder bank with a normally-open solenoid: sized to deliver the full oxygen demand for two to four hours at peak biomass, opening automatically on a low dissolved oxygen signal or on a power-fail relay. One 50-litre cylinder at 200 bar holds about 10 m³ of oxygen, so carrying 1 kg of oxygen per hour of peak demand for four hours means roughly four to six cylinders on a manifold with an automatic changeover.
Test the whole chain monthly, under load, and record the result. An untested backup is a spare part, not a system.
Power Demand and Redundancy
What runs continuously
A hatchery's electrical load is unusual because almost all of it is continuous and almost none of it can be deferred. Typical figures for a fitted support building:
- 20FT satellite station: 1.0–2.5 kW continuous — one circulation pump 0.4–0.9 kW, blower or aerator 0.3–0.75 kW, UV 0.1–0.3 kW, lighting and controls 0.2–0.4 kW.
- 30FT hatchery support: 1.5–4.0 kW continuous — main circulation 0.8–1.5 kW, aeration 0.5–1.2 kW, drum filter drive and wash pump 0.3–0.6 kW, UV 0.2–0.5 kW, dehumidifier 0.6–1.5 kW intermittent, chiller or heater 0.5–2.0 kW seasonal, plus lighting, monitoring and a small refrigerator.
- 40FT with plant room: 4–9 kW continuous, with the additional load coming from a second loop, a larger blower, a chiller for broodstock or live feed, and the workshop and compressor load.
Generator sizing and the solar-battery hybrid option
Size the generator at 1.5 to 2 times the continuous running load. That is not waste: a diesel set running at 25–30% of rating for long periods glazes the bores and accumulates wet stacking, while a set at 60–75% runs cleanly and lasts. In practice that means roughly 6–10 kVA for a fully fitted 30FT package and 10–18 kVA for a 40FT, with an automatic transfer switch and an exercised-once-a-week start schedule. Solar and battery hybrid systems are a genuine alternative for the daytime load and are covered in detail in our microgrid guide; the important point for a hatchery is that solar reduces the fuel bill but does not remove the generator, because aeration must run at three in the morning through three cloudy days. Size the battery for the night-time critical load, not for the whole site.
Alarms and auto-diallers
An alarm that nobody hears is decoration. Specify a GSM auto-dialler or SMS controller with inputs for low dissolved oxygen, high and low temperature, low water level, low flow, mains failure and generator failure, and with a relay output that starts backup aeration before it tries to call anybody. Give it its own 12 V battery and its own antenna location, put it on the critical circuit rather than on the general supply, and set it to call at least two numbers in sequence so that a single flat phone does not defeat it. Cheapest reliable configuration costs a few hundred dollars installed; it has repaid itself on most hatcheries within the first year.
Biosecurity
Airlock entry and the footbath sequence
Disease arrives on boots, on nets, on hands and in water — in that order. The building layout should force a sequence rather than ask for one. A workable three-stage entry into the wet zone:
- Outer step: boot wash with a hose and a brush, and a dry stand for boots, outside the door.
- Airlock: a small threshold area with a footbath containing a disinfectant at working strength, and a hand-wash basin. Footbaths are only effective if the solution is changed; a footbath that has been standing for a week is a bacterial culture, so change it daily and after any visible soiling.
- Inner door: into the production room, with a drop-seal threshold and a closer, so the wet zone is never open directly to the outside.
Rotate disinfectants on a two to four week cycle so that no tolerant organism is selected for. Common rotations use an iodine-based product, a quaternary ammonium compound and a peroxygen compound; chlorine dioxide and potassium peroxymonosulfate are widely used for equipment. Observe the stated contact time — most surface disinfectants need 5–30 minutes of wet contact, and a spray-and-wipe achieves nothing.
Quarantine room
Any new broodstock or incoming postlarvae should be held separately for 14–30 days with its own nets, its own buckets, its own aeration and its own drain line that does not join the main effluent until after disinfection. In a 40FT this is a genuine fourth room of 6–10 m². In a 30FT it is a partitioned corner of the wet room with separate equipment, which is less satisfactory but still separates the risk. In a 20FT there is no honest way to do it, which is the strongest argument for going up a size if you buy stock in more than once a year.
Rodent, bird and predator proofing
A warm building next to a feed store attracts everything. Fit stainless steel mesh at 6 mm or finer over every vent and intake, seal the gap under the door with a brush strip and a threshold, fit a kick plate to the bottom 300 mm of the external door, keep feed in lidded bins rather than sacks, and keep a cleared margin of at least one metre around the building so rodents have no cover. Overhead, bird netting or a taut wire grid keeps herons and kingfishers off outdoor tanks, and a closed, lit building is far less attractive to snakes and monitor lizards than an open shed. Rodents are not just a feed loss: they chew cable, and a chewed aeration cable is a stock loss.
Effluent discharge and permits
Hatchery effluent carries suspended solids, nitrogen, phosphorus, and often salt, disinfectant residues and veterinary compounds. Most jurisdictions regulate it, and the discharge consent usually predates the building, not the other way round. Plan for a settlement tank sized at 30–60 minutes of peak flow, a polishing or constructed wetland stage where the site allows it, and a disinfection step on the outlet where the receiving water is sensitive. Test total suspended solids, total ammonia nitrogen and biochemical oxygen demand at the outfall on the schedule the permit requires, and keep the results with the batch records. Effluent is also the reason the wet-zone floor drain must be a piped, sealed system discharging to a tank — a soakaway under a hatchery is a permit waiting to be revoked.
Flooring, Drainage and Waterproofing
Falls, trench drains and slip resistance
The wet-zone floor is the component most likely to fail early, and it always fails the same way: no fall, standing water, and a slip. Specify 1.5–2% fall to a linear trench drain running across the room rather than to a point gully, because a trench collects a spill across its whole width while a point gully only collects what flows to it. Use a removable stainless or GRP grating with a silt basket that is emptied daily, and give the trench a minimum of 100 mm depth with a fall of 1% along its length. Slip resistance should be specified as a value, not as a texture: aim for a pendulum test value above 36 in the wet, which in practice means a fine aggregate broadcast into the resin or a profiled vinyl with a certificated rating.
Chemical-resistant floor coatings
The wet floor sees saltwater, chlorine, iodine, ozone, organic acids from feed and waste, and daily pressure washing. Two-part epoxy at 2–4 mm is the standard for moderate exposure; polyurethane concrete at 6–9 mm is the right specification where hot washdowns, thermal shock or heavy point loading are expected, and it survives the temperature cycling that cracks epoxy. Welded-sheet vinyl with coved upstands is cheaper and comfortable underfoot but must be laid over a fully sealed substrate, because any water that gets beneath it will lift the whole sheet. Whichever is chosen, the coating must continue up the wall as a coved upstand of 100–150 mm and must be carried through the door threshold into the drain, or the wall-floor junction will fail first.
Connecting the wet pod to external tanks
The unit's wet pod is delivered with hot and cold distribution, a sink and a grouped waste connection, which makes the external work short: one treated-water supply line, one waste line to the settlement tank, and one hose point for washdown. Bring the supply in below frost depth where the climate requires it, terminate at an isolation valve and drain cock immediately outside the unit, and fit a backflow prevention device on any line that could ever be connected to a mains supply. Route the tank connections through a single sealed penetration plate in the end wall of the wet zone, with the pipes sleeved and sealed on both faces, and support them independently so no pipe load is carried by the panel.
Insulation, Humidity and Corrosion Control
Condensation and the dehumidification load
An insulated panel building with warm water inside and cooler air outside will condense on the coldest surface, which is usually the steel ceiling. The cure is to remove the water vapour at source, and the source is the open water surface. An uncovered tank at 28 °C in a room held at 50% relative humidity evaporates roughly 0.1–0.3 kg of water per square metre per hour, so 20 m² of open water puts 2–6 litres per hour into the air. Covering the tanks with lids or floating sheets removes 70–90% of that, which is the cheapest dehumidification you will ever buy.
Size the dehumidifier on what is left. Allow 0.6–0.8 kWh of energy per litre of water removed, so a residual load of 1.5 litres per hour needs roughly 1.0–1.2 kW of dehumidification capacity, and hold the room at 55–65% relative humidity. Below 45% the room becomes uncomfortable and static becomes a problem for electronic sensors; above 70% condensation and mould begin on any cold surface. Our insulation guide covers the panel specification in detail, and our ventilation guide covers the extract rates that go with it.
HVAC with corrosion-resistant coils and salty-air intake filtration
Air conditioning in a hatchery fails by corrosion long before it fails mechanically. Salt aerosol carried in on the ventilation air attacks the aluminium fins of a standard coil, and the coils sit in a room that is permanently above 60% relative humidity. Specify an epoxy or polymer-coated coil, or a hydrophilic-fin coil with a certified salt-spray rating, use stainless or marine-grade fasteners throughout, and keep the outdoor unit upwind and as far as practical from the tank aeration, which is where the aerosol is generated.
Every air intake on a coastal or brackish site needs a washable, corrosion-resistant pre-filter — a coarse G4 panel plus a coalescing or mesh stage — because replacing it is far cheaper than replacing a coil. Intake openings should face away from the prevailing onshore wind, sit above 500 mm from the pad, and be screened at 6 mm against rodents. Clean the filters monthly on a coastal site; the pressure drop across them is the easiest condition-monitoring indicator you have.
Lighting and Photoperiod Control for Spawning
Photoperiod is a production tool, not a comfort feature. Tilapia and catfish spawn more reliably on a controlled 12:12 or 14:10 light-dark cycle, shrimp maturation is manipulated by both photoperiod and light intensity, and trout smoltification and spawning are triggered by a changing day length that can be reproduced electrically. Specify LED fixtures on a programmable timer with a dimming ramp of 15–30 minutes at each transition, because an abrupt switch to darkness causes a fright response and, in larval tanks, physical damage.
Intensity matters as much as duration. Keep the production room at a low, even 100–300 lux with no direct glare on the water surface, because reflective glare stresses fry and makes visual inspection harder, and provide a separate local task light of 500–800 lux at the laboratory bench and at the packing table. Use IP65 fittings with diffused lenses in the wet zone, fit emergency lighting on the critical circuit so a power failure does not plunge a room full of running water into darkness, and keep any light leaking into the fry room from the corridor sealed, because a door opening at midnight is a photoperiod event.
Remote Monitoring, Data Logging and SMS Alerts
Modern hatcheries are data operations. A basic monitoring package for a containerised support building costs a fraction of the plant it protects and consists of four elements: sensors, a controller that logs, a communications link, and an alarm path.
- Sensors: dissolved oxygen, temperature, pH, salinity or conductivity, and water level, plus current and voltage on the main circuits. Two dissolved oxygen probes on separate tanks is better than one accurate probe, because a probe failure is indistinguishable from a real excursion unless there is a second reading to compare.
- Logging: record at one to five minute intervals to local storage with at least 12 months of capacity, and back it up off-site weekly. A log is what lets you prove a batch was held in specification, which is increasingly what buyers and certifiers ask for.
- Communications: GSM or 4G where coverage exists, LoRa or a wired link back to the farm office where it does not. Test the signal at the exact pad location before you buy the hardware, because a hatchery in a valley or behind a bund is the classic dead spot.
- Alarm path: SMS to at least two numbers, plus a local audible and visual beacon, plus automatic actuation of backup aeration. Log every alarm and every acknowledgement, so you can distinguish a sensor fault from a management failure.
Calibrate the probes on a schedule — dissolved oxygen monthly, pH fortnightly, conductivity quarterly — and keep a manual test kit on the bench as the reference. An uncalibrated probe that reads comfortably is more dangerous than none at all.
Logistics: Getting a Folded Unit to a Remote Pond
Hatchery sites are, by definition, at the end of the road. The good news is that the unit travels folded at a standard container shipping footprint, so it moves on the same flatbed or container truck that delivers anything else, along any road a delivery truck can already use. In practice that means 3.0–3.5 m of clear width, adequate overhead clearance for the load, a surface firm enough for a loaded truck in the wet season, and a turning or reversing point at the pad, because pond tracks rarely loop.
Before the truck is booked, prepare the pad. Compact and level a gravel pad, ground screws, piers or a reinforced slab sized to the expanded footprint, set it above the highest seasonal water level, and bring the treated-water supply, the drain line to the settlement tank and the electrical conduit up through the pad at the marked stub positions. Build the pad about 150–200 mm proud of the surrounding ground so surface water sheds away rather than under the building, and leave 800 mm of clear working space on the unfolding sides.
Yes — a crane or forklift is required to offload the folded unit from the truck. Once it is set in position, four workers can unfold and assemble the main structure in about 2 hours.
After that, the fit-out sequence is straightforward and usually runs two to five days: seal the penetration plate and connect the supply and drain lines, install the bulkhead partition and the airlock door, lay the wet-zone floor coating and the trench drain, terminate the electrical distribution and the critical circuit, mount the filtration plant and connect the manifold, install the monitoring and the auto-dialler, then fill, pressure-test, disinfect and commission. Book the crane for the first morning and commission the filtration last, because the longest lead item is almost always the media delivery or a back-ordered UV chamber, not the building.
Fit-Out Cost: 20FT, 30FT and 40FT Packages
The figures below are typical fitted costs for a hatchery support building, excluding the outdoor tanks, the siteworks, the pond construction, permits and freight. The unit prices shown are factory prices for the folding expandable container house itself.
| Item | 20FT (about 36 m²) satellite | 30FT (about 56 m²) hatchery + office | 40FT (about 76 m²) lab + feed + plant room |
|---|---|---|---|
| Base folding unit (factory price) | $7,200–$9,800 | $10,500–$14,500 | $12,500–$16,500 |
| Bulkhead partition, airlock door and seals | $700–$1,400 | $1,200–$2,200 | $1,800–$3,200 |
| Wet-zone flooring, coving and trench drain | $1,100–$2,200 | $1,800–$3,400 | $2,600–$4,800 |
| Electrical: board, RCDs, IP65 outlets, earthing, critical circuit | $900–$1,800 | $1,500–$2,800 | $2,200–$4,000 |
| Ventilation and dehumidification | $800–$1,600 | $1,400–$2,600 | $2,000–$3,600 |
| Filtration plant: drum filter, biofilter, UV, pumps, manifold | $4,000–$9,000 | $8,000–$16,000 | $14,000–$28,000 |
| Monitoring, sensors, controller and GSM alarm dialler | $1,200–$2,600 | $1,800–$3,600 | $2,400–$4,800 |
| Generator, ATS or solar-battery hybrid | $2,500–$6,000 | $4,000–$9,000 | $6,000–$14,000 |
| Biosecurity fit-out: footbaths, quarantine, disinfection, proofing | $500–$1,200 | $900–$1,900 | $1,300–$2,800 |
| Total fitted, excluding tanks and siteworks | $18,900–$35,600 | $31,100–$56,000 | $44,800–$81,700 |
Two observations from that table. The filtration plant is the single largest variable and can exceed the cost of the building itself, which is why the production plan has to be settled before the order is placed rather than after. And the generator and backup aeration, which together are typically under 15% of the total, are the only line items that protect the other 85% — a hatchery that economises there is betting the whole season on the grid.
Building New vs Modifying a Shipping Container
Buyers often ask whether a used 20FT or 40FT shipping container, cut open and lined, would do the same job for less. Sometimes it will, but the comparison is closer than the headline price suggests.
- Floor area. A used container gives you 14–15 m² of internal floor and no more. A folding expandable unit in the same nominal size gives roughly 36 m² at 20FT and 76 m² at 40FT, because the side walls fold out. For a hatchery that needs a wet room and a dry room, the used container simply is not big enough without joining two, which means a structural alteration and a new roof.
- Condition and contamination. Used containers have carried unknown cargo and may have been fumigated. Lining one properly means stripping the original floor, treating the steel, and insulating and cladding inside, all of which must happen on site.
- Cutting. Every opening weakens the corrugated shell; a big hatchery doorway needs a welded frame and a compensated structure. The folding unit arrives with its doors, windows and panel shell already engineered.
- Services. Both options need the same electrical, drainage and filtration fit-out, and that fit-out is most of the cost in the table above. The container is the cheap part of either solution, which is exactly why the decision should be made on usable floor area and delivery condition rather than on the shell price.
Planning a hatchery or aquaculture support building?
HG Prefab, made by Henan Huangang Machinery Equipment Co., Ltd., manufactures 20FT, 30FT and 40FT folding expandable container houses in a factory-controlled process and ships them folded worldwide at a standard container shipping footprint. Tell us your species, your daily feed rate, your power situation and whether the site is a lease or a permanent one, and we will confirm the model, the bulkhead layout, the stub positions for water, drainage and power, and the fit-out package that suits your production plan. Email hgmechequip@gmail.com or WhatsApp +86 191 0388 7380. Full range on the products page.
Browse modelsFrequently Asked Questions
Can a folding container house be used as a fish hatchery control building?
Yes, and it is one of the strongest non-residential uses for a folding expandable unit. The steel frame arrives folded and is set on a simple pad, the insulated sandwich panel shell holds a stable water and air temperature, and the interior can be split by a bulkhead partition into a wet zone for tanks, filtration and drainage and a dry zone for the laboratory bench, feed store, controls and staff room. Because the whole building is relocatable, it suits lease sites and seasonal camps that a permanent blockwork building would not justify. The specification that matters is not the structure but the fit-out: a chemical-resistant floor with a fall to a trench drain, corrosion-resistant electrical fittings, dehumidification sized to the open water surface, and redundant aeration with an independent alarm.
What size folding container house do I need for a small hatchery?
A 20FT unit at roughly 36 square metres suits a single-tank satellite station: one incubation or early-rearing tank, a small filter loop, a feed bin and a desk, with no separate laboratory. A 30FT unit at about 56 square metres is the most common hatchery configuration, because it fits a hatching and fry-rearing room at one end and an office with a laboratory bench at the other, separated by a bulkhead door. A 40FT unit at roughly 76 square metres is the first size that supports a genuine three-way split: laboratory and fry room, a dry feed and equipment store, and a plant or generator room with its own acoustic and fire separation. Sizing is driven less by floor area than by the number of separate rooms you need to keep clean, dry and secure at the same time.
How much power does a hatchery support container need?
A fully fitted 30FT hatchery support building typically runs a continuous load of 1.5 to 4 kW covering blowers or aerators, circulation pumps, the UV steriliser, filtration controls, refrigeration for feed and live feed, lighting and the monitoring system. A 20FT satellite station is usually 1 to 2.5 kW and a 40FT with a plant room 4 to 9 kW. Size the generator at 1.5 to 2 times the continuous running load so it is not sitting at full output for hours, which means roughly 6 to 10 kVA for a 30FT package and 10 to 18 kVA for a 40FT. Whatever the source, separate the critical circuit, which is aeration, monitoring and alarms only, and put it on a UPS with 30 to 60 minutes of autonomy plus a battery-backed aerator or an oxygen cylinder bank that opens automatically on power failure.
How do you control humidity and corrosion inside an aquaculture container?
Start by covering the tanks, because uncovered water is the entire source of the problem: an open surface at 28 degrees Celsius in a room held at 50 percent relative humidity evaporates roughly 0.1 to 0.3 kilograms per square metre per hour, so 20 square metres of open water loads the building with 2 to 6 litres of water vapour every hour. Cover the tanks and that load falls by 70 to 90 percent. Then specify a dehumidifier on the remaining load, allow 0.6 to 0.8 kWh of energy per litre of water removed, and hold the room at 55 to 65 percent relative humidity so condensation never forms on the steel ceiling panel. Use epoxy-coated or polymer-finished HVAC coils, stainless or marine-grade fixings, IP65 fittings throughout the wet zone, and washable intake filtration on any air entering from a coastal or salty site.
How does a folded unit reach a remote pond site, and how long does assembly take?
The unit travels folded at a standard container shipping footprint, so it moves on an ordinary flatbed or container truck along any road a delivery truck can already use, which in practice means a road with 3.0 to 3.5 metres of clear width, adequate overhead clearance and a surface firm enough for a loaded truck. Before it arrives, build a level pad of compacted gravel, ground screws, piers or a reinforced slab, sized to the expanded footprint and set above the wettest seasonal water level, with the trench drain and the utility stubs already in place. Yes — a crane or forklift is required to offload the folded unit from the truck. Once it is set in position, four workers can unfold and assemble the main structure in about 2 hours. The internal fit-out, filtration connections and commissioning then take a further two to five days depending on how much equipment is being installed.
Talk to HG Prefab
Henan Huangang Machinery Equipment Co., Ltd. (HG Prefab) manufactures folding expandable container houses in 20FT, 30FT and 40FT sizes and ships them folded worldwide. Factory prices are 20FT $7,200–$9,800; 30FT $10,500–$14,500; 40FT $12,500–$16,500. For a hatchery or aquaculture support building, send us the species and production stage, your peak daily feed rate, the number of separate rooms you need, whether the site has grid power or runs on a generator or a solar-battery hybrid, and the site access and pad conditions — those five facts determine the model, the bulkhead layout and the fit-out specification.
Email hgmechequip@gmail.com or message us on WhatsApp at +86 191 0388 7380. You can also browse the full range at products.html, including the 30FT white folding house most often specified for hatchery support use, or request a quotation at contact.html.