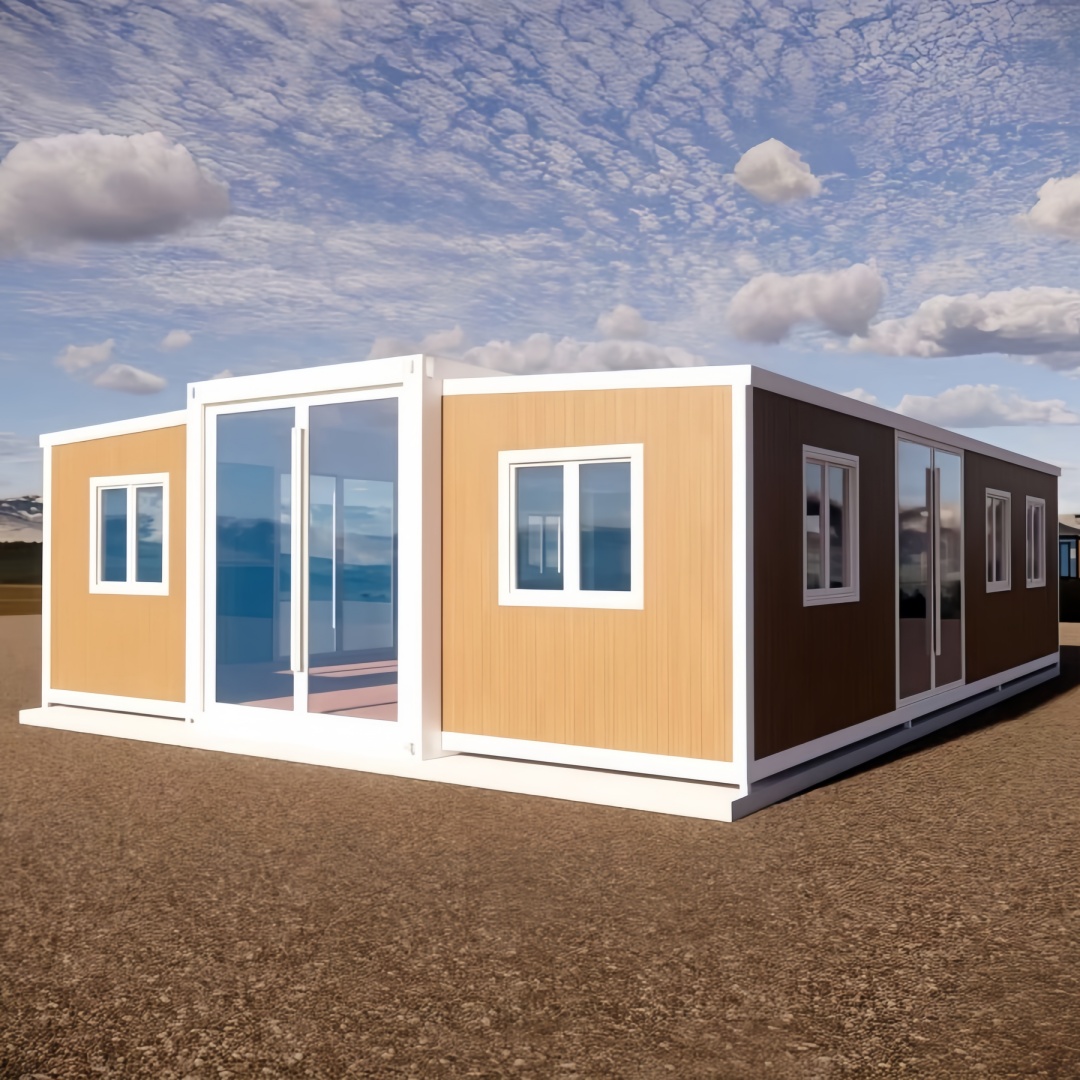
HG Prefab foldable expandable container homes — built to last, delivered worldwide.
A folding container home arrives with the internal plumbing already installed: hot and cold distribution, a shower, a basin, a kitchen feed and a waste connection grouped in a single wet pod. What it does not arrive with is water. Supply is a site decision, and for most buyers it is the single largest variable cost in the whole project — larger than the foundation in some regions, and far more consequential than any finish option.
Four sources cover almost every site: a drilled well, a stored-water cistern filled by tanker or rainwater, a municipal mains connection, or some hybrid of the three. Each has a different capital cost, a different operating rhythm and a different failure mode. This guide walks through all of them in the order you will actually make the decisions: how much water you need, where it comes from, how it gets pressure, how it is treated, how it connects to the unit, and how it survives winter. It pairs with our foundation comparison, our cold-climate guide and our insulation guide, because the water strategy and the substructure strategy have to be settled together.
Step 1: Sizing Daily Water Demand
Per-person and per-fixture demand
Everything downstream — pump size, tank volume, pipe diameter, filter capacity — is derived from two numbers: litres per day and litres per minute. Confusing them is the most common sizing error.
- Full-time residence: 80–150 litres per person per day. That covers a shower, cooking, dishwashing, a flushing toilet and a laundry load spread across the week.
- Weekend or holiday use: 50–80 litres per person per day, but with sharper peaks because four people shower within an hour of arriving.
- Shower: 8–10 litres per minute, 40–60 litres per use.
- Kitchen tap and dishwasher: 6–10 litres per minute, 30–50 litres per day.
- Toilet flush: 4–6 litres, roughly 30 litres per person per day.
- Washing machine: 50–80 litres per cycle.
- Drinking and cooking water: only 2–4 litres per person per day — worth remembering, because it means treating the whole supply to drinking standard is usually unnecessary if you filter at the kitchen tap.
Applying it to 20FT, 30FT and 40FT
A 20FT unit at roughly 36 m² realistically houses one or two people, so budget 150–300 litres per day. A 30FT white folding house at about 56 m² suits a couple or a small family at 250–450 litres per day. A 40FT at roughly 76 m² can sleep four to six, so 450–700 litres per day is a defensible planning figure.
Peak flow is the tighter constraint. Two showers plus a washing machine fill is about 20 litres per minute, and if your well, pump or pipe run cannot deliver 20 l/min at that moment, the pressure collapses and the shower becomes a trickle. This is why storage and pressure vessels matter as much as the source itself: a 4 l/min well feeding a 5,000 litre cistern feeding a 40 l/min pump delivers a perfectly comfortable household, because the cistern decouples the slow source from the fast demand.
Step 2: Drilled Wells
Depth, yield and what "good" means
Depth is dictated by the aquifer, not by preference. Shallow sand-and-gravel aquifers are often reached at 15–30 metres; many rural bedrock wells run 60–120 metres; hard-rock, arid or drought-affected regions can exceed 150 metres. Cost scales with depth because rig time, casing and development all scale with metres drilled.
Sustainable yield matters far more than depth. A well tested at 8–15 litres per minute continuous will run almost any single container home directly. A well at 2–4 l/min will not keep up with morning demand, but it is still perfectly usable if it fills a cistern over 24 hours. A well under 2 l/min generally means drilling deeper, drilling elsewhere, or planning entirely on stored water.
Always insist on three things from the driller: a measured yield test over at least a few hours, a water analysis for bacteria, nitrates, hardness, iron and total dissolved solids, and a written log of depth, casing and static water level. Those three documents determine every component you buy next.
Pump types
- Submersible well pump (deep wells). A multi-stage centrifugal pump sitting below the water level, pushing water up rather than sucking it. This is the standard answer for anything deeper than about 8 metres of suction lift, and for wells from 30 to 150 metres it is the only practical option. Typical household units deliver 20–60 l/min against 40–80 metres of head and run on 230 V single-phase or, increasingly, on 48 V DC for solar.
- Shallow-well jet pump (shallow wells, cisterns). Mounted at the surface, it pulls water through a suction line. Fine down to roughly 7–8 metres and useful for drawing from a cistern or a shallow sand point, but it loses prime easily, is noisy, and struggles on long horizontal runs. Acceptable for a seasonal cabin; not the first choice for a permanent home.
- Convertible or deep-well jet pump. Uses a two-pipe ejector assembly down the well. Cheaper than a submersible at moderate depth but less efficient and more sensitive to wear. Worth considering only where the well is shallow and the budget is tight.
- Solar DC pump (off-grid). A brushless DC submersible or surface pump running directly from a photovoltaic array, usually with a linear current booster or a variable-frequency controller. It produces water whenever the sun shines, which is exactly what a fill-by-day, draw-by-evening cistern system wants. We return to this below.
Pump sizing comes down to total dynamic head, which is the vertical lift from the water level to the highest outlet plus the friction losses in the pipe, plus the pressure you want at the tap. As a rough working rule, allow 10 metres of head for every 1 bar (14.5 psi) of delivery pressure, add the static lift, add 10–20% for friction, and then read the pump curve at that head to find the real flow. A pump marketed as "60 l/min" may deliver 25 l/min at your actual head.
Step 3: Cistern and Tank Options
Sizing
Size storage against the longest gap you expect between refills, not against average daily use. A holiday cabin visited every other weekend needs about 1,000–2,000 litres with a top-up every few weeks. A full-time home on a low-yield well or delivered water should carry 5–14 days of autonomy.
Practical brackets: a 20FT with two occupants needs roughly 3,000–5,000 litres; a 30FT with three occupants 5,000–8,000 litres; a 40FT with four occupants 8,000–12,000 litres. Tanks are normally supplied in 1,000–5,000 litre modules, so installing two or three on a common manifold lets you start small and expand. Every tank in a bank should share a single fill line and a single draw line at the same level, or the first tank will do all the work while the last one goes stagnant.
Placement
Water weighs one tonne per cubic metre, so a 5,000 litre tank is five tonnes before you add the tank itself. Set it on a compacted, level base — a reinforced slab, a gravel pad with a concrete ring beam, or a properly engineered deck — never on bare soil that will settle and crack the fittings.
Place the tank upslope of the unit where the terrain allows, so gravity contributes head and the pump works less. Keep it shaded if possible: sunlight through a translucent tank grows algae within weeks, and warm water also carries less dissolved oxygen and tastes flat. Keep it within 30–40 metres of the unit so suction and friction losses stay manageable, and keep it accessible for a tanker hose if delivered water is part of the plan.
Freeze protection
In any climate that drops below freezing, the tank, the pump and every exposed pipe need protection. The hierarchy, cheapest first:
- Bury it. Below the local frost line — 0.6 m in temperate Europe, 1.0–1.2 m across much of North America, 1.5–2.0 m in continental interiors — the ground does the insulating for free. Buried cisterns are the most robust answer and also solve the algae and aesthetics problems at once.
- Insulate and box it. An above-ground tank in a closed-cell insulation jacket inside a timber or block enclosure retains enough heat to survive short cold snaps, especially if it is being topped up regularly with water that arrives at 8–12 °C.
- Heat trace and thermostatic control. Self-regulating heat tape on the draw pipe and on the pump housing, under an insulation sleeve, with a thermostat set to switch on around 3–4 °C. Budget 40–120 W of continuous load in cold weather, which matters if you are sizing a solar array.
- Keep water moving. A slow continuous trickle or a timer-driven circulation loop resists freezing far better than a static column, but only if you have somewhere for the water to go.
Pipe runs should be buried below frost depth or, where that is impossible, run in an insulated sleeve with heat trace and a continuous fall so they can be drained. Every external run needs an isolation valve and a drain point at its lowest position — see the winterization section below.
Step 4: Pressure Tanks and Booster Pumps
A pressure tank is a bladder or diaphragm vessel pre-charged with air. Water entering compresses that air, so the vessel stores a usable volume of pressurised water and the pump only starts when the pressure falls to its cut-in setting — typically 20–30 psi (1.4–2.1 bar) — and stops at the cut-out setting, usually 40–60 psi (2.8–4.1 bar).
Without it, the pump starts every time a tap opens. That is destructive to motors and unpleasant to use. With it, a single 20FT or 30FT runs comfortably on an 80–120 litre vessel; a 40FT with several simultaneous draws wants 200–300 litres, usually delivered as two tanks in parallel. The air pre-charge must be set about 2 psi below the cut-in pressure and checked twice a year, because a vessel that has lost its air charge becomes "waterlogged" and the pump short-cycles again.
A booster pump is a different job. It raises pressure where the source pressure is inadequate: a long run from a distant tank, a low static head, a gravity-fed rainwater system, or a municipal supply that arrives at barely 1 bar. Modern variable-speed boosters hold a constant set pressure regardless of how many fixtures are open, which is what stops the shower temperature swinging when someone flushes. Where mains power is unreliable or absent, a DC booster on a battery bus does the same job on a fraction of the energy.
Step 5: Filtration and Disinfection
Treat to the use, not uniformly. Whole-house treatment to drinking standard is expensive to run; point-of-use treatment at the kitchen tap is cheap and gives better-tasting water. A typical staged train:
- Sediment pre-filter, 20–50 micron. Protects everything downstream. A spin-down or cartridge filter changed every one to three months.
- Iron and manganese removal where the analysis shows it — usually an oxidising filter or an air-injection system. Untreated iron stains fixtures rust-brown and gives water a metallic taste.
- Water softening or scale control above roughly 150–200 mg/L hardness as CaCO₃. Ion-exchange softeners need salt and a drain; template-assisted crystallisation or a polyphosphate feeder needs neither and is often the better fit for a small off-grid unit.
- Activated carbon for taste, odour, chlorine and organic compounds. Usually a whole-house cartridge plus a dedicated under-sink block for drinking water.
- Disinfection. Ultraviolet at 40 mJ/cm² or higher, preceded by a 5-micron filter because turbid water shadows the organisms from the UV lamp, is the standard chemical-free answer for bacterial contamination. Shock chlorination of the well and tank once or twice a year remains a sensible supplement, and is the standard remedy after any works that open the system.
- Reverse osmosis at the kitchen tap only where total dissolved solids exceed about 500–800 mg/L. RO is slow and wasteful, so it belongs on a single drinking-water tap with its own small pressurised faucet tank, never on the whole house.
Test the raw water first and then test the treated water annually. Guessing at a treatment train is how buyers end up with a softener they never needed and no UV where they did.
Step 6: Plumbing Hookup to the Wet Pod
The unit's wet pod is delivered with hot and cold inlets, a shower and basin, the kitchen feed and a combined waste outlet grouped at a single connection face, so the external work is one supply line, one waste line and one electrical feed to the water heater. The practical sequence:
- Bring the supply in below frost depth or through an insulated, heat-traced sleeve, terminating at an isolation valve and a drain cock immediately before the unit.
- Fit a pressure-reducing valve if the incoming pressure can exceed about 5 bar, which protects every appliance and flexible hose inside.
- Fit a check valve and a small expansion vessel on the cold feed to the water heater, because a closed system with a heating element needs somewhere for expanding water to go.
- Connect the waste to a sealed system: a septic tank, a two-chamber treatment plant, or a municipal sewer, with a vent stack and a rodding point. A greywater soakaway for shower and basin water is permissible in many jurisdictions and reduces the load on the septic field, but kitchen and toilet waste must never go to a soakaway.
- Pressure-test and disinfect before occupation. Pressurise the cold and hot circuits, hold for an hour, then flush through a mild chlorine solution and rinse.
- Label every valve. In winter, at night, you will need to find the drain cock in a hurry.
Foundation choice and plumbing have to be designed together — a slab lets you sleeve the pipes through in exact positions, while piers or ground screws leave an accessible under-floor void that is both easier to route and easier to drain. Read our foundation comparison before you fix the pad, and our thermal bridge guide for how the services penetrations should be detailed so they do not become cold spots.
Step 7: Off-Grid and Solar Pumping
Solar pumping is the most common off-grid water solution and, done properly, it is simpler than its mains-powered equivalent. The architecture that works is source–storage–pressure rather than source–tap: the array runs a DC pump during daylight, the pump fills a cistern, and a small AC or DC pressure pump draws from the cistern on demand. Because the storage is the buffer, the system never needs batteries for the water supply itself.
Sizing starts with the energy, not the panel count. Lifting a volume of water takes energy of head (m) × volume (m³) × 9.81 ÷ pump efficiency. Pumping 2 m³ per day up 50 metres at 40% overall efficiency needs roughly 0.7 kWh per day; at 30% for a marginal DC pump it is closer to 0.9 kWh. In a location with four peak sun hours, a 300–400 W dedicated array covers that comfortably and with margin for cloudy days — and the margin is what lets you skip batteries entirely, because the cistern carries the cloudy-day reserve.
Practical notes: mount the array where it cannot be shaded during the middle of the day; use a linear current booster or a proper solar pump controller so the pump can start in low light instead of stalling; keep the DC cable run short and correctly sized, because voltage drop is the most common reason a solar pump underperforms; and fit a float switch in the cistern so the pump stops when the tank is full. If you also want mains-quality pressure at night, run the pressure pump from the same battery bus as your lights and add a small inverter — far cheaper than doubling the size of the dedicated pumping array.
Step 8: Winterization
A folding container home used only in summer needs a proper shutdown sequence, because one forgotten pipe will split and flood the unit by spring.
- Isolate the incoming supply at the main valve and open the drain cock at the lowest point.
- Drain the pressure tank, the filter housings and the pump body — a diaphragm tank left full of water in a freezing shed will split.
- Drain the water heater and bypass it if the model allows.
- Blow the lines out with compressed air, or use a wet/dry vacuum to pull the water out, working fixture by fixture from the highest to the lowest.
- Pour potable-grade propylene glycol into every trap and into the toilet bowl and cistern; never use automotive ethylene glycol anywhere in a potable system.
- Leave internal doors and the wet-pod cupboards open so air can circulate, and set the heating to a low frost-protection setpoint where power is available.
- Leave a note on the main valve listing every drain point, so the spring recommission is a checklist rather than a search.
For year-round occupation the job is different: keep the heat on at a minimum setpoint, keep the under-floor void ventilated but not wind-scoured, and check the heat trace before the first freeze. Pair this with the detailing in our cold-climate guide and the insulation guide, which cover the pipe-insulation specification in more depth.
Water Source Options Compared
The four realistic sources differ far more in operating rhythm than in capital cost. All figures below are typical ranges for a single-household system serving one 20FT, 30FT or 40FT unit, excluding the unit itself and excluding local permits and drilling risk.
| Source | Typical setup cost | Ongoing cost & maintenance | Reliability | Best for |
|---|---|---|---|---|
| Drilled well with submersible pump | $4,000–$15,000 depending on depth, casing and water quality; add $800–$2,500 for pressure tank, controls and filtration | $80–$250/yr: electricity $50–$150, annual water test, filter cartridges, pump replacement every 8–15 years | High once drilled, but yield can fall in drought and the water quality is fixed by geology | Permanent off-grid or rural homes on a proven aquifer |
| Cistern with delivered water (tanker) | $1,200–$4,500 for 3,000–10,000 L of tank, base, pump and fittings | $0.01–$0.04 per litre delivered, so roughly $300–$1,200/yr for a full-time household; tank cleaning every 2–3 years | Very high: independent of rainfall and of power if you add a hand or 12 V pump | Arid sites, holiday cabins, anywhere drilling is impractical or failed |
| Municipal mains connection | $1,500–$8,000 for connection fees, trenching and meter, highly location-dependent | $0.001–$0.005 per litre plus fixed quarterly charges; essentially no maintenance | Highest available, and no equipment to fail on your side of the meter | Any site within reach of a mains main, even at a distance |
| Rainwater harvesting | $2,500–$9,000 for roof catchment, first-flush diverter, 5,000–10,000 L storage and filtration | $100–$300/yr for filters, pump and tank cleaning; requires UV or filtration for potable use | Seasonal and climate-bound; needs a backup source through any dry season | Moderate-rainfall regions, as a supplement that cuts delivered-water bills |
| Hybrid: well or rainwater into cistern + solar pump | $6,000–$18,000 all in, including array and controls | $100–$400/yr; no fuel, no grid bill, pump replacement every 10–15 years | High, because storage buffers both cloudy days and low well yield | Off-grid sites wanting mains-like convenience without a running bill |
Two conclusions follow from that table. First, the cheapest capital option is rarely the cheapest over ten years: delivered water at $0.02 per litre costs a full-time 40FT household around $3,000–$5,000 per decade, which is roughly the cost of a shallow well. Second, storage is the common denominator in every resilient system — the sites that work well are the ones where the source is slow and the tank is large, not the ones where the pump is oversized.
What a Complete System Costs
Pulling the components together for a typical full-time installation, excluding the container home itself:
- Source: drilled well $4,000–$15,000, or mains connection $1,500–$8,000, or tanks and catchment $1,200–$9,000.
- Storage: 3,000–10,000 litres with base and fittings, $1,200–$4,500.
- Pumping and pressure: submersible or surface pump, controller, pressure vessel and booster, $800–$3,000.
- Treatment: sediment, carbon, UV and softening or scale control where needed, $600–$3,500.
- Plumbing and waste: supply line, waste line, septic tank or treatment plant, valves and heat trace, $1,500–$7,000.
- Solar option: dedicated pumping array and controller, $900–$2,800.
A sensible full-time off-grid water system therefore lands at roughly $8,000–$20,000, with the well depth and the waste-treatment requirement dominating the spread. Against factory prices of 20FT $7,200–$9,800; 30FT $10,500–$14,500; 40FT $12,500–$16,500, water and waste are a comparable order of magnitude to the building — which is exactly why they belong in the first budget conversation rather than the last.
Delivery and Installation Sequence
Water work happens before and after the truck, never during. Commission the source, lay and pressure-test the supply line, and build the base for the tank while the unit is in production. Then, on delivery day, the sequence is short: Yes — a crane or forklift is required to offload the folded unit from the truck. Once it is set in position, four workers can unfold and assemble the main structure in about 2 hours, and the supply line, the trap and the waste connection to the wet pod are made immediately afterwards so the system can be tested the same day.
Nothing about the water system changes the shipped footprint: the unit still folds to roughly a fifth of its expanded volume and travels at a standard container shipping footprint. Browse the folding container home range, and pair a compact 20FT winter-finish unit with a modest cistern, or a family-sized 40FT teak retreat with a well and a 10,000 litre bank.
Planning water supply for your container home?
HG Prefab, made by Henan Huangang Machinery Equipment Co., Ltd., builds 20FT, 30FT and 40FT folding expandable container houses with an integrated wet pod, pre-installed hot and cold distribution and a single grouped utility connection face, shipped folded worldwide at a standard container shipping footprint. Send us your site location, occupancy and whether you have a well, mains or no source at all, and we will confirm the connection details, utility stub positions and model that suit your plan. Email hgmechequip@gmail.com or WhatsApp +86 191 0388 7380. Full range on the products page.
Browse modelsFrequently Asked Questions
How much water does a container home need per day?
Plan on 80–150 litres per person per day for a full-time residence with a shower, kitchen, laundry and flushing toilet, and 50–80 litres for weekend or holiday use. A 20FT unit housing two people therefore needs about 200–300 litres per day, a 30FT family of three about 300–450 litres, and a 40FT with four occupants about 450–700 litres. The binding constraint is rarely the daily total: it is the peak flow, because a shower running at 8–10 litres per minute plus a washing machine fill will draw far faster than a small pump or a long pipe run can supply.
How deep does a well need to be for a container home?
Depth is whatever the local aquifer requires, not a figure you choose. A shallow sand-and-gravel aquifer may be reached at 15–30 metres, many rural bedrock wells run 60–120 metres, and hard-rock or arid regions can exceed 150 metres. What matters more than depth is sustainable yield: a well that produces 8–15 litres per minute continuously will cover almost any single folding container home, while one yielding 2 litres per minute will not keep up with morning demand and must be paired with a storage cistern that accumulates water overnight. Always drill with a licensed local contractor, test the yield and have the water analysed before you size the pump and treatment.
What size cistern do I need for a 20FT, 30FT or 40FT unit?
Size storage against the longest gap you expect between refills rather than against daily use alone. For a weekend or holiday unit, a 1,000–2,000 litre tank covers roughly two to three weeks of light use. For full-time living on a low-yield well or with delivered water, work to 5–14 days of autonomy: a 20FT with two occupants needs about 3,000–5,000 litres, a 30FT with three occupants about 5,000–8,000 litres, and a 40FT with four occupants about 8,000–12,000 litres. Tanks are usually installed in 1,000–5,000 litre modules, so you can start with two modules and add more later on the same manifold.
Do I need a pressure tank if I have a cistern and a pump?
Yes, for any normal household system. A pressure tank stores a few litres of water under compressed air so the pump starts only when pressure falls to the cut-in setting, typically 20–30 psi, and stops at the cut-out setting, usually 40–60 psi. Without it the pump cycles on every time a tap opens, which burns out motors and makes fixtures pulse. An 80–120 litre diaphragm pressure tank suits a single 20FT or 30FT unit, and a 200–300 litre tank or a pair of tanks suits a 40FT with more simultaneous draw. Where the static head is low, incoming pressure is marginal or the run from tank to unit is long, add a variable-speed booster pump so the shower pressure stays steady when two fixtures are open.
Does the water system change delivery or installation of the folding unit?
The water system is external to the unit, so it does not change the folding mechanism or the shipped footprint, but the pad and the utility stubs have to be ready before the truck arrives. Set the unit on piers, ground screws or a slab with the inlet and drain stubs positioned to meet the wet pod connection point, and pressure-test the supply line before delivery day. Yes — a crane or forklift is required to offload the folded unit from the truck. Once it is set in position, four workers can unfold and assemble the main structure in about 2 hours. After that, the water inlet, the trap and the waste line are connected and every joint is checked for leaks before the unit is occupied.
Talk to HG Prefab
Henan Huangang Machinery Equipment Co., Ltd. (HG Prefab) manufactures folding expandable container homes in 20FT, 30FT and 40FT sizes and ships them folded worldwide. Factory prices are 20FT $7,200–$9,800, 30FT $10,500–$14,500 and 40FT $12,500–$16,500. For water planning, send us your site location, the number of occupants, whether you have a well, a mains connection or no source yet, and your winter low temperature — those four facts determine the whole supply, storage and treatment specification.
Email hgmechequip@gmail.com or message us on WhatsApp at +86 191 0388 7380. You can also browse the full range at products.html or request a quotation at contact.html.