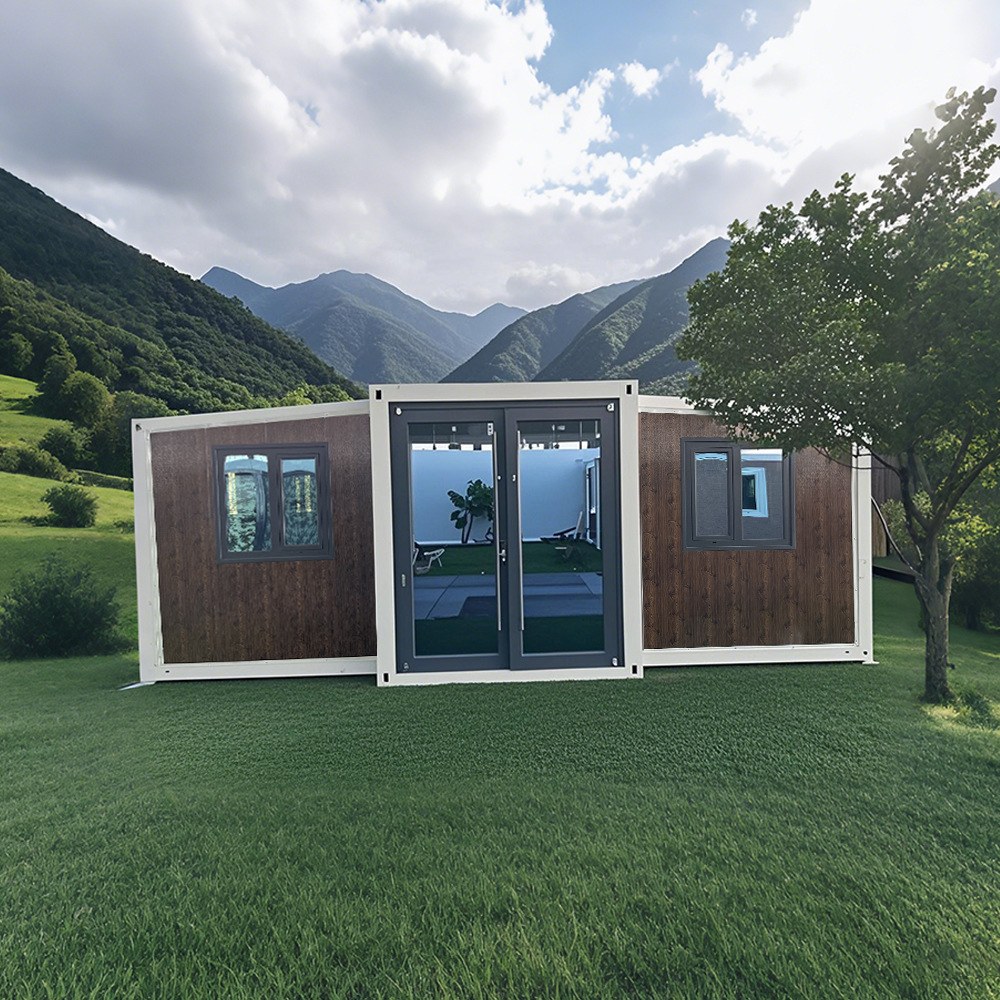
HG Prefab foldable expandable container homes — built to last, delivered worldwide.
A golf simulator is one of the few home improvements that is easier to get right in a purpose-built steel outbuilding than in the house. It needs a tall, wide, uninterrupted volume; it needs a wall you are allowed to hit; it needs dark, controlled lighting; it needs a lot of electrical capacity in one corner; and it makes a noise that nobody else in the household wants to hear at eleven at night. A garage fails on almost every one of those points. A folding expandable container unit, specified correctly, satisfies all of them at a fraction of the cost of a conventional extension.
This guide covers the whole build in the order you should decide it: whether a dedicated unit is worth it at all, the three dimensions that govern the bay, how those map onto the 20FT, 30FT and 40FT HG Prefab footprints, the structural and services work inside the shell, what the simulator package itself costs at three tiers, four business cases, and what happens on delivery day. For the ceiling-height and screen reasoning behind the projector choices, our container home home theater guide covers the same physics in more detail; for power sizing, see our container home electrical load guide; for impact noise, see our acoustic soundproofing guide.
Why a Dedicated Steel Outbuilding Beats Converting the Garage
Garage conversions are the default answer, and they are usually wrong for this specific use. Five reasons, in the order they will bite you.
Year-round insulation instead of an unconditioned box
A simulator you can only use for eight months of the year is an expensive mistake. An attached garage is typically uninsulated, unsealed and thermally coupled to a house wall on one side and a big uninsulated door on the other, so it runs 8–15 °C away from house temperature at both extremes. Insulating and conditioning one properly means building a new thermal envelope inside an old one: framed walls, a ceiling, a sealed floor, and a heating source that was never sized for the space.
A folding unit arrives with the envelope already built. The wall and ceiling sandwich is specified as a package — typically 50–75 mm of PIR or rock wool in the walls and 75–100 mm in the ceiling — which is what makes a 3.5 kW mini-split adequate for a 20FT unit rather than a 7 kW one. That insulation is not a comfort upgrade for a simulator, it is the thing that makes the room bookable in February and tolerable in August.
No fumes, no solvents, no car
A garage contains a vehicle, a petrol can, a lawnmower, paint tins and a solvent cabinet. You will be spending hours in there swinging a club at full speed, breathing hard. Removing all of that is the price of admission, and it rarely happens: the car comes back. A separate unit has none of it, and the separation is structural rather than a matter of willpower.
Acoustic separation a garage cannot give
Impact transmission is the problem, not airborne noise. A driver strike is a short, broadband, high-energy transient — roughly 95–110 dB at 1 m from the mat — and a garage shares a structure with the house, so that transient travels through the shared slab and the shared wall into bedrooms directly above or beside it. No amount of foam on the garage walls fixes a flanking path through a common footing.
A detached unit on its own pad has no common structure. Put it 5–10 m from the house and the airborne path alone is usually enough. Inside the room, treat it properly: 50–100 mm broadband absorbers at the first reflection points on the side walls and ceiling, bass traps floor-to-ceiling in at least two corners, and carpet or turf over the whole floor. That package turns a ringy steel box into a room where the strike sounds like a strike rather than a gunshot, and it protects the launch monitor's microphone and camera from spurious triggers.
Dedicated power and a clean electrical reference
A garage is usually fed by one or two sockets on a circuit shared with the house, the freezer and the power tools. A simulator wants a gaming PC with a discrete GPU, a projector, a launch monitor, lighting and a mini-split, all on one circuit, all sensitive to voltage sag and to noise from a compressor starting up. Running a new radial feed from the house consumer unit to a garage is real electrical work; specifying a dedicated bay circuit in a new build is a line item.
A wall you are allowed to hit, and a room nobody else uses
The garage has a car in it, a door that opens onto the driveway, and a floor covered in things. The bay needs the opposite: an uninterrupted 3.5–4.5 m of width, a 5–6 m of clear depth to the screen, and the certainty that nothing breakable is ever inside the swing cone. A dedicated room gets laid out once around that cone and stays that way, which is why simulators in shared spaces get used far less than their owners expect.
What a Golf Simulator Bay Actually Needs
Three numbers determine whether the bay works, and only one of them is negotiable.
Ceiling height: the number that decides everything
Work to a 3.0 m minimum clear height and treat 4.0 m or more as the ideal for a full driver swing. The reason is the club, not the player: a driver is roughly 1.15–1.22 m long, a tall player's hands at the top of the backswing sit around 2.1–2.3 m, and the clubhead passes well above that on a steep plane. Add a floor build, a ceiling lining and a projector mount and the finished clear height is always less than the structural one.
Now the honest part. An unfolded HG Prefab unit gives roughly 2.4–2.6 m of clear internal height as standard, with about 2.6 m on the higher-cube option we offer on 30FT and 40FT builds. What that means in practice:
- Wedges, irons and hybrids: no problem. A 9-iron or a pitching wedge at the top of the backswing sits comfortably inside 2.4 m.
- Driver: workable for most players on a flat or shallow plane, and genuinely tight for a tall player with a steep, upright swing. Measure your own top-of-backswing clubhead height with a tape against a wall before you commit — it takes two minutes and it is the single most useful measurement you will make.
- If driver work matters to you, specify a raised-roof build to reach 3.0–3.2 m of clear height. This is a factory option, not a site modification, so it has to be decided at order time.
- Whatever the height, do not spend any of it. Recess the projector or use an ultra-short-throw unit, use flush or surface-mounted LED panels rather than pendant fittings, and keep the top of the impact screen at least 200 mm below the finished ceiling line.
Swing width: 3.5–4.5 m
The ball sits on a mat, but the club travels through a wide arc. Allow 3.5 m minimum and 4.0–4.5 m as comfortable, measured as finished wall-to-wall clear width, not as the external dimension of the unit. Two additional constraints apply inside that width: the screen and its enclosure need 150–300 mm of depth at the front wall, and you need a 900 mm–1.2 m clear walkway past the mat so a second player can sit or stand without being inside the arc. A 3.5 m bay is a single-player bay; a 4.5 m bay is a coaching bay with room for an instructor to stand beside the player.
Depth: 4.5–6 m
Depth is measured from the impact screen to the back of the hitting area, and it is driven by three separate needs: the ball-flight distance, the player's stance and follow-through, and the projector throw distance.
- Ball to screen: 2.4–3.5 m. Most manufacturers recommend 2.4–3.0 m for photometric units and 3.0–3.7 m for radar units that need space behind the ball to read the flight.
- Behind the ball: 1.8–2.5 m of clear floor for the stance, the follow-through and the launch monitor itself if it is a floor-standing unit behind or beside the ball.
- Projector throw: a conventional 1.3–2.0:1 throw ratio needs real distance; an ultra-short-throw or short-throw unit (0.25–0.8:1) needs almost none and is often the better choice in a container bay.
- Working total: 4.5–6.0 m. Under 4.5 m and you will be shortening your swing without noticing it, which quietly ruins the data you are paying the launch monitor to produce.
Matching the Bay to HG Prefab Sizes
Here is the practical mapping, using the expanded footprints and internal areas we publish on the product pages.
| Model | Folded footprint | Expanded footprint | Internal area | What fits in a simulator layout |
|---|---|---|---|---|
| 20FT | 2.15 m × 5.9 m | 5.9 m × 6.1 m | 36 m² | One bay at roughly 4.0 m wide × 5.5 m deep with the screen on the short end wall. Single player, one stool, club storage on the opposite wall. No room for a sofa or a bar. |
| 30FT | 2.50 m × 7.0 m | 7.0 m × 8.0 m | 56 m² | The sweet spot. A 4.0–4.5 m wide bay plus a 1.2–1.5 m walkway and a social half with two armchairs, a small bar counter, a television and storage. |
| 40FT | 2.15 m × 12.0 m | 5.9 m × 12.2 m | 76 m² | A bay plus a genuine lounge with seating for six and a bar, or two bays side by side for a commercial coaching or club-fitting studio, with a reception corner at the door end. |
20FT: the pure bay
At 36 m² you get the bay and very little else. Lay it out with the screen on the 5.9 m short wall, the mat 3 m out, and the walkway along one side. This is the right buy for a backyard golfer who wants to hit balls for an hour after work and does not need an audience, and it is the cheapest route into a dedicated room by a wide margin. Its limitation is social: two people cannot comfortably watch a round in there.
30FT: bay plus seating
At 56 m² the 7.0 m width is the thing you are buying. It lets you run a 4.2–4.5 m bay on one side of the long axis and still have 2.5–2.8 m left over for a bench, two chairs, a small bar counter and a wall-mounted television showing the same round. Split it with a low half-height partition or simply with the rug line, keep the social side outside the swing cone, and use the extra width to give a coach somewhere to stand. If you are buying one unit for a household, this is the size.
40FT: two bays, or a bay and a lounge
At 76 m² on a 5.9 × 12.2 m footprint, the long axis does the work. Option A is one generous 4.5 m bay at one end and a 6 m lounge, bar and viewing area at the other — the configuration that turns a simulator into a room people actually gather in. Option B, for commercial use, is two 3.5–4.0 m bays side by side across the 12.2 m length, sharing one screen wall construction and one plant room, with a reception and retail corner at the door end. Option B is the layout a driving range or a coaching academy should be costing.
Structure Notes Inside the Shell
Ceiling height inside the folded and expanded unit
Understand where the height goes. The unit ships folded — roughly 2.15 m wide for a 20FT, 2.50 m for a 30FT — and when it unfolds, the side walls swing out and the roof rises to its final position. The finished internal clear heightis the number that matters and it is smaller than the structural height by the thickness of the ceiling lining, the insulation and any service void. On a standard build that lands at about 2.4–2.6 m; on the higher-cube option for 30FT and 40FT, about 2.6 m; on a raised-roof custom build, 3.0–3.2 m. Always ask for the finished figure, in writing, before you buy a screen sized to the room.
Fixing anything to the ceiling
The ceiling is a steel-framed sandwich panel, not plasterboard, and it will not hold a screw the way a timber joist does. Three correct methods: fix into the purlins or the frame members with self-drilling tek screws into the steel; use a spreader plate or a unistrut run across two members to distribute the load; or, best of all, hang a projector and lighting from a purpose-made bracket specified at order time so the reinforcement is in the panel before it is lined. Never hang a projector from the inner lining board alone.
Mounting the projector
A ceiling-mounted projector eats 200–300 mm of the height you just fought for, and in a 2.4–2.6 m room that is a third of your margin. Two better approaches for a container bay:
- Ultra-short-throw or short-throw on a low console beneath or just in front of the screen, at 0.25–0.8:1 throw. It needs almost no depth, it is out of the swing arc entirely, and it can never be hit by a topped shot.
- Flush-recessed standard-throw in a shallow ceiling box, only where the clear height allows it, with the lens roughly level with the top of the screen.
Whichever you choose: buy for vertical lens shift or use a mount with a long adjustable column, because the lens will not line up with the screen centre by accident. Shield or recess every lighting fixture, and make sure no downlight sits between the projector and the screen — a stray beam across the image is the most common simulator install error. Run a 50–75 mm conduit from the rack position to the projector and to the launch monitor position, each with a draw string left inside.
Floor: turf mat on a levelled floor
The standard finished floor is already hard and load-bearing, which is exactly what you want. Do not build a sprung or cushioned floor — a golf swing needs a firm, stable surface, and a soft floor changes your weight transfer and therefore your data. What you do need:
- Level to within 3 mm over 2 m. Check it with a straightedge before the mat arrives. A visibly sloping floor makes the ball roll off line and makes every putt read as a miss.
- A 1.5 × 1.5 m hitting mat at 15–25 mm for the stance, on top of a larger turf panel — typically 3 × 4 m or wall-to-wall — so a fat shot lands on turf rather than on a hard surface.
- Non-slip backing and, if the unit sits on a hard pad rather than on bearers, a 3–5 mm rubber underlay for foot comfort and impact noise.
- A putt strip in front of the mat if your simulator does putting, laid dead flat and joined with seaming tape rather than left as a loose edge.
Ball-impact wall padding and the enclosure
The screen is the primary impact surface and it must be a real impact screen, not a projection screen: a tightly woven polyester or vinyl-nylon laminate rated for ball speeds up to 200 mph plus, hung with 150–300 mm of slack so it absorbs rather than reflects, and with a net or curtain return behind it. Around it, build the enclosure:
- Side walls and ceiling of the bay: a suspended net or a padded vinyl-covered foam panel system, taken at least 2.5–3 m back from the screen so a shanked ball never reaches a hard surface.
- Side net depth: at least 1.2 m of return on each side, tensioned on a frame fixed to the wall and the ceiling, not tied to furniture.
- Floor-to-ceiling coverage in the first 3 m, because a ball off the heel goes sideways and upward before it goes forward.
- Padding thickness: 25–50 mm of closed-cell foam behind a wipe-clean vinyl face is enough for a residential bay; a commercial coaching bay should use a full net enclosure rated for continuous use.
One detail that saves the building: where the enclosure frame fixes into the wall, use load-spreading plates and fix into the frame members, and never pierce the external cladding from the inside.
Lighting: anti-glare and high CRI
Lighting a simulator is harder than lighting a home cinema, because you need enough light for a camera-based launch monitor to read the ball and dark enough for the projected image to hold contrast. The resolution is placement plus spectrum:
- No downlight directly in front of or above the screen, and none between the projector and the screen. Wash the screen wall from the sides, or use shielded fixtures angled away from it.
- High CRI, 90 or above, at 4,000–5,000 K. Colour rendering matters because photometric launch monitors track a marked ball and a low-CRI source washes out the markings.
- 150–300 lux at mat level for camera-based units, dimmable down to 50–80 lux for radar-based units and for projected play.
- Two switched zones: a bright practice zone and a dim play zone. You will use both constantly.
- Consider infrared. Some photometric units supply their own IR illumination; check before you install anything that floods the bay with infrared, because it can interfere.
Electrical load for PC, projector and launch monitor
Size the bay as its own radial circuit and you will never think about it again. Realistic draws:
- Gaming PC with a discrete GPU: 400–700 W continuous, and it wants clean, stable voltage.
- Projector: 300–500 W on a lamp unit, 200–350 W on LED or laser.
- Launch monitor: under 50 W, but sensitive to supply noise — put it on the same circuit as the PC.
- Lighting: 150–400 W depending on the zone count.
- Mini-split: 800–1,500 W running, on its own circuit.
- Subwoofer and audio: 100–300 W.
That is a realistic continuous load of 1.8–3.0 kW, comfortably inside a single 16 A radial with headroom. Add surge protection on the bay circuit, keep the mini-split and any pump or compressor on separate circuits entirely so startup transients never reach the PC, and put a clean earth reference on the rack. Our electrical load guide covers circuit sizing and distribution for these units in full.
HVAC for year-round comfort
A simulator room has an unusual thermal profile: a person swinging a club hard for an hour generates real heat, the projector and PC add 600–1,000 W of it, and the room is small. Size the mini-split for the equipment as well as the envelope — roughly 3.5 kW for a 20FT, 5 kW for a 30FT and 7 kW for a 40FT — and install it so the supply air does not blow across the screen or directly onto the player's neck. In a two-bay commercial studio, allow 6–8 air changes per hour during peak sessions and use ceiling fans at low speed to keep air moving without adding compressor load. Insulation is what makes these numbers work: 50–75 mm of PIR or rock wool in the walls and 75–100 mm in the ceiling is the difference between a 3.5 kW unit and a 7 kW one.
What It Costs: Simulator Packages and Container Units
Simulator equipment by tier
| Component | Entry | Mid | Pro / commercial |
|---|---|---|---|
| Launch monitor | $500–$2,000 (entry photometric, ball-and-club data) | $2,000–$5,000 (advanced photometric or doppler radar, full club and ball data, putting) | $6,000–$20,000+ (ceiling-mounted or overhead radar and camera fusion, no marked balls, multi-player) |
| Projector | $600–$1,200 (1080p, 3,000–4,000 lumens, standard throw) | $1,500–$3,500 (4K or 1080p short-throw, 4,000–5,000 lumens) | $2,500–$6,000 (laser ultra-short-throw, 5,000+ lumens, 25,000-hour service life) |
| Impact screen and enclosure | $800–$2,000 (DIY screen, net returns, foam side panels) | $2,500–$6,000 (kit enclosure with tensioned screen and padded surround) | $6,000–$15,000 (commercial net enclosure, dual-layer screen, full bay padding) |
| PC and software | $900–$1,500 (gaming laptop or entry desktop, one course package) | $1,500–$2,800 (dedicated desktop with mid GPU, course subscription) | $2,800–$5,000 (workstation GPU, multi-bay licence, lesson-capture software) |
| Hitting mat and turf | $200–$500 (single stance mat, small turf panel) | $500–$1,200 (premium stance mat, 3 × 4 m turf, putt strip) | $1,200–$3,000 (commercial-grade replaceable mat system, full-floor turf) |
| Lighting, electrical and acoustic treatment | $500–$1,200 (two zones, basic absorbers, new radial circuit) | $1,500–$4,000 (dimmable high-CRI zones, corner traps, dedicated distribution) | $4,000–$9,000 (full acoustic package, commercial lighting design, three-phase where required) |
| HVAC (mini-split installed) | $1,200–$2,000 | $2,000–$3,500 | $3,500–$7,000 (two-head or ducted, fresh-air ventilation) |
| Simulator package total | $4,700–$9,400 | $11,500–$26,000 | $26,000–$65,000 |
Container unit prices
| Model | Factory price | Expanded footprint | Internal area | Best simulator use |
|---|---|---|---|---|
| 20FT | $7,200–$9,800 | 5.9 m × 6.1 m | 36 m² | Single bay, backyard golfer, no social area |
| 30FT | $10,500–$14,500 | 7.0 m × 8.0 m | 56 m² | Bay plus seating and a small bar, or a one-to-one coaching bay |
| 40FT | $12,500–$16,500 | 5.9 m × 12.2 m | 76 m² | Two commercial bays, or a bay plus lounge, or a club-fitting studio |
Three complete builds
- Backyard entry build — $13,000–$20,000. A 20FT unit at $7,200–$9,800 with the standard insulation package, an entry photometric launch monitor, a 1080p projector, a DIY screen with net returns, a gaming laptop, a stance mat over a turf panel, two switched lighting zones and a 3.5 kW mini-split. One player, no audience, and it pays for itself against range balls and green fees in about two seasons of regular use.
- Serious home build — $24,000–$42,000. A 30FT unit at $10,500–$14,500 with the higher-cube ceiling option, a mid-tier photometric or doppler radar launch monitor, a short-throw 4K projector, a kit enclosure with a tensioned screen and padded surround, a dedicated desktop PC, a premium mat with a putt strip, full acoustic treatment, dimmable high-CRI lighting and a 5 kW mini-split. This is the configuration most households should be aiming at, because the 7.0 m width is what makes the room social.
- Commercial studio — $45,000–$90,000. A 40FT unit at $12,500–$16,500 fitted as two 3.5–4.0 m bays, an overhead radar or camera-fusion launch monitor per bay or one movable unit, laser projectors, commercial net enclosures with replaceable mat systems, lesson-capture software, a reception and retail corner, the full acoustic package and 7 kW of conditioned air with ventilation. Two bays is the point at which a simulator stops being a cost and starts being a revenue line.
Where the money actually goes, in order: the launch monitor, because it determines whether the data is worth trusting; the enclosure, because it is what stops you putting a ball through a wall; and the unit size, because it is the only decision you cannot reverse later. Cut the projector before you cut the monitor.
Four Business Cases
The backyard golfer
The straightforward one: someone who plays once a week and wants to hit balls in the evening without driving anywhere. The value proposition is repetition — 150 balls a night, four nights a week, twelve months a year — and repetition is the only thing that reliably lowers a handicap. Buy the 20FT if it is genuinely solo practice, the 30FT if a partner or a child will ever be in the room with you. Add a putting strip, because short game practice is where the handicap strokes actually come from.
The coaching bay for a golf instructor
This is where a container unit beats a purpose-built studio on cost and loses to nobody on quality. A pro needs: a 4.0–4.5 m wide bay so the coach can stand beside the player rather than behind a net; a launch monitor with full club data, because the lesson is about the delivery, not the ball flight; video capture from two angles, down-the-line and face-on; and a room that is available in bad weather, which is precisely when golfers book lessons. A 30FT gives one bay with room for a pupil's partner to sit in. A 40FT gives two bays, which doubles the hourly throughput against roughly a 40% increase in build cost — the strongest commercial argument on this whole page.
The driving-range side bay
Ranges have the land, the customers and the parking, and they lose those customers for four months of the year. A bay beside the range office turns weather downtime into revenue and, more importantly, into a fitting and lesson funnel that feeds the outdoor business. Specify commercial-grade enclosures and replaceable mats from the start, because a residential screen will not survive the volume. A 40FT with two bays and a small reception area is the standard configuration, sited within sight of the range entrance so the offer sells itself.
The club-fitting studio
Fitting has the highest revenue per hour of any simulator application and the strictest technical requirements: full club-head data including lie, face angle and strike location; consistent, tightly controlled lighting; a perfectly level floor, because a 1-degree lie error is a fitting error; and a launch monitor accurate enough that the customer believes the numbers enough to buy. Budget for the pro tier on the monitor and spend the rest on the room: a 30FT with a 4.5 m bay, a fitting wall with shaft and head racks on the opposite side of the walkway, and a bench with a vice and a lie board. A fitting studio is also the one application where the raised-roof option genuinely pays for itself, because fitters need to see a full driver swing from a tall customer.
Delivery Day and Setup Sequence
Half the site work has to exist before the truck and the other half cannot start until the truck has left. Build first: shape and compact the pad, lay any drainage, and compact the access route in layers. Keep a 3.5–4 m wide route with about 4.5 m of overhead clearance, clear of cables and of anything stacked, and make sure the ground under it is firm and level — not loose gravel, not bark, not fresh topsoil.
Then the unit arrives and goes up quickly: Yes — a crane or forklift is required to offload the folded unit from the truck. Once it is set in position, four workers can unfold and assemble the main structure in about 2 hours. Final utility hookups take another one to two hours.
Only after the shell is open do you fit out the bay, in this order: run the dedicated radial circuit and the conduit to the projector and launch monitor positions; mount the enclosure frame and the screen; install and aim the projector; lay and level the turf and the mat; install the lighting zones; then commission the launch monitor and calibrate it to the room. Do not mount the screen before the unit is unfolded and level, because the frame has to be square to the floor, and do not calibrate the monitor until the lighting is final — changing the lights changes the calibration. See our workshop and garage guide for more on fixing into these shells, and browse the folding container home range for the full size and finish list.
Planning a golf simulator bay in a container unit?
HG Prefab, made by Henan Huangang Machinery Equipment Co., Ltd., builds 20FT, 30FT and 40FT folding expandable container houses that ship folded worldwide and unfold on a compacted, level pad. Send us your bay dimensions, the tallest club you need to swing, whether you want seating or a second bay, and your power supply, and we will confirm the model, the clear height option and the fit-out sequence. Email hgmechequip@gmail.com or WhatsApp +86 191 0388 7380. Full range on the products page.
Browse modelsFrequently Asked Questions
How much ceiling height does a golf simulator need in a container home?
Plan for 3.0 m of clear height as the working minimum and 4.0 m or more as the ideal for a full driver swing. An unfolded HG Prefab unit gives roughly 2.4–2.6 m of clear internal height as standard, with about 2.6 m on the higher-cube option offered on 30FT and 40FT builds. That is genuinely enough for a ceiling-mounted launch monitor, irons, wedges and a flat or low-loft driver swing, and it is not enough for a tall player making a full driver swing with a steep plane. If driver work matters, specify a raised-roof custom build to reach 3.0–3.2 m, or recess the projector and lighting into the ceiling so nothing steals headroom. Always measure the finished clear height after the ceiling lining, the light fittings and any projector mount, because the number printed on a spec sheet is usually the structural height, not the finished one.
Which HG Prefab size should I buy for a golf simulator bay?
Buy the 30FT if you want one bay plus somewhere to sit, and the 40FT if you want a bay plus a seating or bar area. A 20FT unit expands to about 5.9 m × 6.1 m and 36 m², which fits the bay itself at roughly 4 m wide by 5.5 m deep with a 3 m ceiling, but leaves almost no room for seating, a bar or a second player. A 30FT expands to about 7.0 m × 8.0 m and 56 m², which is the sweet spot: a full bay plus two armchairs, a small bar counter and storage for clubs and shoes. A 40FT expands to about 5.9 m × 12.2 m and 76 m², which fits a full bay and a genuine lounge, or two bays side by side for a commercial coaching studio. Choose by what you want behind the hitting mat, not by the mat itself, because the mat is only about 1.5 m × 1.5 m.
Can a golf simulator share a container room with seating and a bar?
Yes, and this is the single best reason to buy a dedicated unit rather than convert a garage. Keep the hitting bay and the social area on opposite halves of the long axis: bay at one end with the impact screen on the short end wall, then a 1.2–1.5 m walkway, then seating, a bar counter and a television. The two rules are sightlines and glassware. Nobody should be able to walk between the ball and the screen, and no glass, bottle or screen should sit inside a 3.5 m wide by 5.5 m deep cone in front of the mat. Use a 30FT for bay plus two seats and a 40FT for bay plus a proper lounge, and put the bar on the same wall as the screen so plumbing and power stay on one service face.
Do I need a special floor or extra electrical capacity for a simulator?
The floor only needs to be level, hard and covered, which the standard finished floor already is. Lay a 15–25 mm hitting mat on a 1.5 m × 1.5 m or larger turf panel, and check the floor is level to within 3 mm over 2 m so the ball does not visibly roll away from the launch monitor. Electrically, budget a dedicated radial circuit for the bay: a gaming PC with a discrete GPU draws 400–700 W, a projector 300–500 W, the launch monitor under 50 W, lighting 150–400 W, and a mini-split 800–1,500 W, so a realistic continuous load is 1.8–3.0 kW and a 16 A dedicated circuit covers it with headroom. Add surge protection on the bay circuit, keep the projector and the audio on the same supply as the PC to avoid hum loops, and put the mini-split on its own circuit entirely.
How is the folding container unit delivered and how long does setup take?
Yes — a crane or forklift is required to offload the folded unit from the truck. Once it is set in position, four workers can unfold and assemble the main structure in about 2 hours. That means the access route matters as much as the pad: keep a 3.5–4 m wide route with about 4.5 m of overhead clearance, firm and level ground compacted in layers, and no overhead cables in the lift path. The unit arrives folded, so it travels as a narrow load and is lifted onto the pad rather than driven down a driveway. After the shell is open, allow another one to two days for the simulator fit-out: mount the screen and enclosure, run the bay circuit, set the projector, level the mat, and calibrate the launch monitor to the room.
Talk to HG Prefab
Henan Huangang Machinery Equipment Co., Ltd. (HG Prefab) manufactures folding expandable container homes in 20FT, 30FT and 40FT sizes and ships them folded worldwide. Factory prices are 20FT $7,200–$9,800, 30FT $10,500–$14,500 and 40FT $12,500–$16,500. For a simulator project, send us your bay dimensions, the tallest club you need to swing at full speed, whether you want seating or a second bay, your available power supply and your climate — those five facts determine the model, the clear height option, the HVAC size and the fit-out sequence.
Email hgmechequip@gmail.com or message us on WhatsApp at +86 191 0388 7380. You can also browse the full range at products.html or request a quotation at contact.html.