HG Prefab foldable expandable container homes — built to last, delivered worldwide.
A folding container home arrives as a compact steel box that opens into a finished building in a single working morning. That speed is wasted if the ground underneath takes three weeks to prepare. Concrete means excavation, formwork, a pour, a cure period and a spoil pile; a slab means all of that plus a permanent commitment to the site. Ground screws remove most of those steps: they are installed with a hydraulic drive head, they take load the moment they reach depth, they can be levelled the same afternoon, and they can be unscrewed again if the building moves. This guide covers what ground screws are, how the installation day runs, which soils accept them, how the pile grid is laid out for a 20FT, 30FT or 40FT unit, how the cost compares with piers and a slab, and how to level and connect the frame.
What Ground Screws Are
A ground screw, also called a screw pile or helical pile, is a steel foundation element that is rotated into the ground rather than driven or cast. It has three parts:
- The shaft. A hollow or solid galvanised steel tube that carries compression load down the pile and resists bending where the surface soil is soft.
- The helix. One or more steel flights welded near the tip, shaped like a screw thread. The helix pulls the pile downward as it rotates, and once installed it bears against undisturbed soil like a buried washer.
- The head. The top of the shaft — a flat plate with bolt holes, a threaded adjustable coupler, or a U-shaped cradle — where the building bracket connects and final height is set.
Unlike a driven pile, a ground screw displaces very little soil, so it produces almost no spoil and can be installed close to a boundary, an existing structure or a tree root zone without damaging vibration. Unlike a concrete pier, it takes load immediately rather than waiting to cure.
The load pattern of a container-based building suits this foundation type well. Weight is concentrated at corner castings and along the perimeter rails rather than spread evenly across a floor plate, so the foundation does not need to be continuous — it needs to be accurate at a limited number of points, which is exactly what individually levelled screw piles deliver. Buyers still weighing the wider question should read our container home foundation comparison first.
How Installation Works
The installation day is short and runs in a fixed order: set out, install, verify, level, connect.
Machine-driven torque
The pile is held by a hydraulic drive head on a compact excavator, skid steer or dedicated rig. The operator positions it on the mark, checks plumb, then rotates it into the ground under downward pressure, controlling speed so the helix advances at roughly its own pitch. If the machine spins faster than the pile descends, the screw is drilling rather than screwing, and the disturbed soil costs capacity.
Installation torque is the field measure of capacity: as the helix enters denser material, the torque needed to keep it turning rises, and the installer records the final reading at design depth. Too low and the pile is extended or moved; too high and it has hit refusal. That reading is taken pile by pile on the day, so the foundation is verified as it is built rather than inferred from a soil report written months earlier.
Load brackets and heads
Three head types are common for container units:
- Fixed plate head. A galvanised plate with slotted bolt holes. Simple and rigid, but it demands accurate pile height because adjustment range is small.
- Threaded adjustable head. A coupler that lets the bracket be wound up or down several centimetres after installation — the practical choice on uneven ground, because levelling becomes a spanner job instead of a re-drive.
- Cradle head. A U-shaped bracket that captures a perimeter rail or bottom side beam directly.
Whatever the type, the bracket must be protected to match the pile, and bolts sized for both vertical load and the horizontal load wind applies to a lightweight building. Uplift is the case most often overlooked: a tall, light structure on an exposed site can generate more uplift at the windward corner than the dead load there, so the bracket has to be a mechanical connection, not just a bearing surface.
Soil Suitability
Ground screws are not universal, and the failure stories almost always come from skipping soil assessment.
Sand, clay and gravel
- Firm clay and clayey silt. Generally the best ground. The helix bears well, torque readings are stable, and the shaft gains useful friction. Watch for clay that shrinks and swells seasonally with moisture.
- Gravel and sandy gravel. Good bearing but harder driving; cobbles can deflect the shaft or refuse the helix, so a larger shaft diameter and a robust helix edge help.
- Sand. Workable, and excellent below the water table, but loose dry sand gives almost no shaft friction, so capacity depends on the helix — go deeper or wider.
- Layered ground. Common and usually fine, provided the helix passes through the weak layer into something competent rather than stopping inside it.
Frost heave zones
In any climate with seasonal freezing, the helix must sit below the local frost penetration depth. Ice lenses form in frost-susceptible silt and fine sand and lift whatever is above them, and a pile jacked upward each winter will not settle back fully. Get the design frost depth from the building department rather than a neighbour, add margin, and use a smooth upper shaft section so freezing soil cannot grip and drag the pile. Where frost depth exceeds screw pile reach, deep concrete piers or a hybrid design is the honest answer.
Rock refusal and buried obstructions
Shallow bedrock, dense cobbles, buried rubble and large roots all stop a helix short. Early refusal is not automatically a failure — dense material may already give ample capacity — but it does mean the planned grid may not be achievable everywhere. The safeguard is a trial installation: drive two or three sacrificial piles in the worst corners before the crew and the delivery truck are scheduled.
Layout Patterns for 20FT/30FT/40FT
The grid follows the structure. Points go under the corner castings, under any internal load-bearing partition, and at intermediate positions along the long perimeter rails so the bottom side beam never spans too far. The figures below are starting layouts on good ground; the final grid is set by the unit frame drawing and the trial installation result.
| Model | Approx. footprint when open | Ground screws (typical) | Spacing along the long side | Spacing across the width | Notes |
|---|---|---|---|---|---|
| 20FT | approx. 5.9 m × 4.8 m | 6–8 | 1.8–2.0 m | 3.0–4.8 m (2 rows) | Four corners plus 2–4 intermediate points; the lightest grid and the most tolerant of soft spots. |
| 30FT | approx. 9.0 m × 4.8 m | 8–10 | 1.8–2.2 m | 3.0–4.8 m (2 rows) | Add a pair at mid-span on each long side; a third row if an internal partition sits off-centre. |
| 40FT | approx. 11.8 m × 4.8 m | 10–14 | 1.8–2.4 m | 2.4–4.8 m (2–3 rows) | Longest span and most sensitive to differential settlement; a centre line of piles under the folding seam is often worth the cost. |
Keep vertical loads concentric: a pile sitting 100 mm off a corner casting turns compression into bending on the bracket. Keep spacing consistent rather than convenient, because an irregular grid gives an irregular settlement profile, and on a folding unit with hinged panels an out-of-level frame shows up as doors that will not latch. Sites with a cross-fall need the same thinking in three dimensions — see our guide to siting a container home on sloped terrain.
Ground Screws vs Concrete Piers vs Slab
Each option is the right answer somewhere, and the deciding factors are usually time, reversibility, spoil handling and behaviour on difficult ground rather than headline material cost.
| Factor | Ground screws | Concrete piers | Concrete slab on grade |
|---|---|---|---|
| Excavation / spoil | None — soil is displaced, not removed | Holes augered; spoil to spread or remove | Full excavation; spoil out, fill in |
| Install time on site | Half a day to one day for a typical grid | One to two days plus formwork and pour | Several days including sub-base and pour |
| Ready to load | Immediately | After the concrete gains strength | After the slab cures, typically a week or more |
| Levelling | Adjustable heads; corrected with a spanner and laser | Shimmed on top, or re-poured | Set before the pour; errors are permanent |
| Wet and winter work | Workable in frost and light rain; no washout risk | Needs cold-weather concreting precautions | Poor season; freezing and heavy rain disrupt the pour |
| Removal / reversibility | Reverse-rotated out; site nearly restored; reusable | Break out and haul away | Break out and haul away; effectively permanent |
| Sloping ground | Excellent — pile lengths vary point by point | Good with stepped pier heights | Poor without cut and fill or retaining work |
| Weakness | Refusal in rock or cobbles; unreliable in peat and loose fill | Slower; weather-dependent; more site disruption | Permanent; highest site impact; costly on slopes |
In practice, screws win where the schedule is tight, the ground slopes, the season is bad, the land is rented, or roots and services make digging risky. Piers win where surface soil is poor and a deep drilled pier is needed regardless. A slab wins where the buyer wants a permanent insulated floor at ground level and has the season and access for it. Our folding container home foundation guide covers pier and slab detailing in more depth.
Leveling and Connecting the Frame
- Set a datum. Establish one reference level for the whole footprint with a rotating laser, and measure every pile to that datum rather than to its neighbour.
- Trim the shafts. Cut each shaft square so its head lands inside the bracket's adjustment window, and coat the cut end to stop rust starting at the top of the pile.
- Pre-set the brackets. Wind adjustable heads to mid-travel so there is room to correct in both directions once the building is on.
- Place the unit. Yes — a crane or forklift is required to offload the folded unit from the truck. Once it is set in position, four workers can unfold and assemble the main structure in about 2 hours. The piles must already be in and protected, because the frame has to land on its supports in the same visit.
- Fine-level. With the frame bearing, use the laser to bring every point to datum. Adjust in small steps in a diagonal sequence, and re-check the first points you adjusted — lifting one corner unloads the others.
- Connect and verify. Fit the specified bolts, plates or clamps, tighten to torque, and use locking nuts where wind cycling could loosen a plain nut. Re-check level and tightness after the first week and after the first winter; any pile moving relative to its neighbours is a signal to look at drainage.
Two details are worth insisting on: keep the underside of the frame ventilated and drained so the steel and brackets do not sit in a damp pocket, and keep soil and mulch clear of each bracket so the connection can still be inspected years later.
Winter and Wet-Weather Installation
Screw piles have a real seasonal advantage — there is no water in the mix, so nothing freezes, washes out or needs protecting from a downpour, and crews can often work on frozen ground.
- Access first. The limiting factor is getting the machine and the delivery truck to the site. Confirm ground bearing along the route and lay matting or a gravel running surface if the topsoil is saturated.
- Frozen crust. A hard frozen surface layer can deflect the first few centimetres, so pre-auger or break through it at each position to start the helix true.
- Snow on the datum. Clear the reference point completely; a laser set on compacted snow drifts as it melts.
- Heavy rain. Stop if surface water hides the marks or softens the machine's bearing, and never install where water is actively flowing — saturated fine sand can lose bearing while the crew works.
- Cap open shafts. If a pile is left before the frame arrives, cap it so meltwater cannot enter and freeze inside the tube near the head.
Cost Planning
Start with the building, then add the foundation as its own line. HG Prefab factory prices for the folding expandable unit are 20FT $7,200–$9,800; 30FT $10,500–$14,500; 40FT $12,500–$16,500, ex-works, before freight, taxes and site work. The foundation figures below are planning estimates for a typical grid on good ground, not a quotation; rock refusal, peat or a steep cross-fall will push a project to the top of the range or above it.
| Line item | 20FT | 30FT | 40FT | Notes |
|---|---|---|---|---|
| Ground screws, supplied | $900–$1,600 | $1,200–$2,200 | $1,600–$3,000 | Scales with pile count, shaft diameter and helix size |
| Brackets and heads | $300–$700 | $400–$900 | $600–$1,300 | Adjustable heads cost more and save levelling time |
| Installation machine and crew | $600–$1,400 | $800–$1,800 | $1,000–$2,400 | Half-day to full-day rate for drive head and operator |
| Set-out and levelling | $200–$500 | $250–$600 | $300–$800 | Survey, laser hire, trimming shafts |
| Trial installation | $200–$450 | $200–$450 | $200–$450 | Recommended on unknown or mixed ground |
| Foundation subtotal (estimate) | $2,000–$4,650 | $2,650–$5,950 | $3,500–$7,950 | Excludes access works, drainage and lift hire |
Against the alternatives, a screw foundation is usually competitive with piers and clearly cheaper than a slab once excavation, fill, spoil removal and programme delay are counted, and it is the only one with a resale value, because the piles come back out of the ground. What it does not remove are the costs at the site boundary: access improvement, drainage, service runs and the lift itself. Crane or forklift hire depends on reach, ground bearing and travel distance, so get a local quote rather than assuming a number. Current factory pricing and the full model range are on the products page, and the pre-delivery work is listed in our container home site preparation checklist.
Planning a screw pile foundation for your unit?
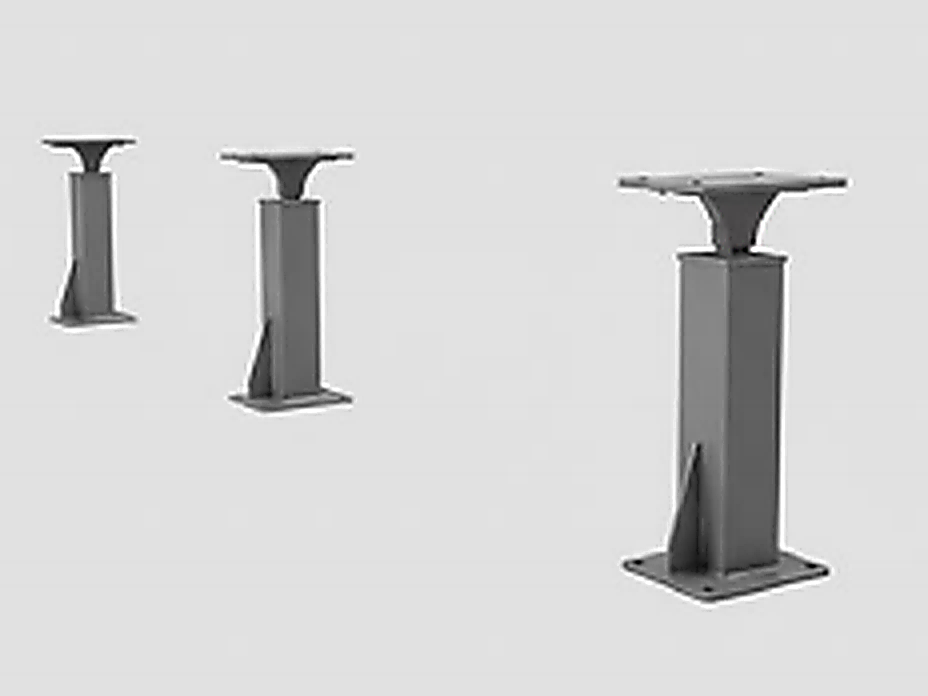
HG Prefab, manufactured by Henan Huangang Machinery Equipment Co., Ltd., builds 20FT, 30FT and 40FT folding expandable container houses and supplies matched support posts, adjustable feet and bracket sets for a screw pile or pier foundation. Send your site location, soil description, slope and the model you are considering for a pile layout and foundation estimate. Email hgmechequip@gmail.com or WhatsApp +86 191 0388 7380. Full model range on the products page.
Browse modelsFrequently Asked Questions
Are ground screws strong enough for a folding container house?
Yes, when they are correctly specified and torque-verified on site. Capacity comes from the steel helix bearing on undisturbed soil below the frost line, and the installer confirms it as each pile goes in by reading installation torque rather than waiting days for a concrete test. What decides the result is shaft and helix diameter, embedment depth, and the bracket that transfers the frame load into the pile head. A folding container house concentrates its weight at defined corner and perimeter points, which is exactly the load pattern screw piles handle well.
Can ground screws be removed if I move the home?
Yes, and reversibility is one of the main reasons owners pick them. The brackets are unbolted, then each screw is reverse-rotated out with the same machine that installed it, leaving a small hole instead of a concrete mass to break up and haul away. The land can be returned close to its original condition, which matters on rented ground, under temporary permits, and on agricultural or conservation land where a permanent slab would count as a change of use. Undamaged screws can be reinstalled on the next site.
How deep do ground screws go?
Most ground screws for light buildings are installed roughly 1.2 m to 2.4 m below finished grade, but the governing rule is not a fixed number: the helix must reach below the local frost penetration depth and into soil with reliable bearing. In freezing climates anything shallower can be lifted by seasonal ice lensing. Very soft or very dense ground moves the answer in both directions, so a trial installation in the worst corner of the site is worth more than a soil map.
What soil types are unsuitable?
Ground screws perform poorly in shallow bedrock or dense cobbles that refuse the helix before design depth, in saturated organic soils and peat that give little bearing and keep consolidating, and in uncontrolled fill with demolition debris, roots or voids where the shaft can deflect. Very loose dry sand is also difficult because it offers almost no shaft friction. The usual answer is a hybrid: screw piles where the ground is good, combined with concrete piers or a grade beam where the helix cannot reach a competent layer.