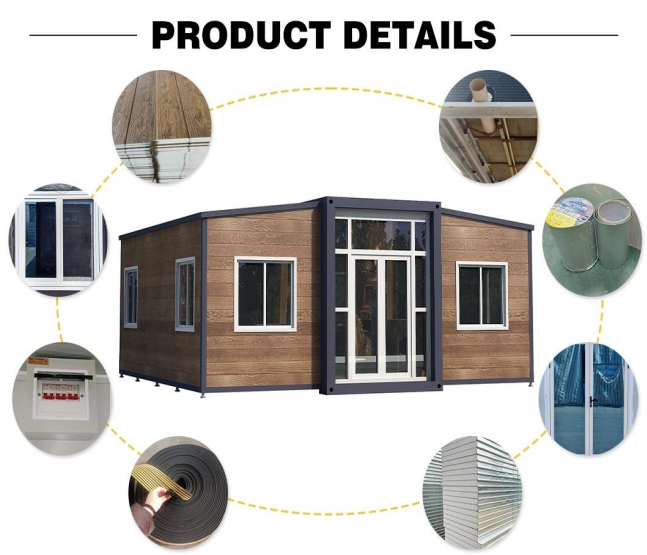
HG Prefab foldable expandable container homes — built to last, delivered worldwide.
A steel building has one real advantage over a timber one when the local rodent population looks for winter shelter: there is nothing soft to chew through. Every folding unit is still a steel shell wrapped around a large number of holes — door and window openings, plumbing penetrations, cable entries, ventilation slots, condensate drains, and the gap between the chassis and the ground. Pests do not defeat the box; they go around it, through the parts added to make it habitable. This guide covers where they get in, how to stop them, how termites behave around a steel structure on timber or concrete, and what to check month by month.
Why Sealed Steel Helps (and Where Pests Still Get In)
The shell is folded from coated steel sheet on a steel frame, so rodents cannot gnaw through it and it holds no cellulose for a termite. Compared with a timber-framed house, that removes several classic entry routes. What remains vulnerable are the interfaces: annular gaps around service penetrations, worn door threshold seals, ventilation openings cut rather than screened, roof-level flues and solar conduit nobody checks until something nests there, and the sheltered underfloor void on pads, piers or screw piles.
Getting the sequence right depends on how the unit arrives. Yes — a crane or forklift is required to offload the folded unit from the truck. Once it is set in position, four workers can unfold and assemble the main structure in about 2 hours. Having sealant, collars and mesh on site during that window means each penetration is closed as it is created. The foundation decision drives most of the underfloor risk; the options are set out in our container home foundation guide.
Rodent Defense
Rats and mice move along edges rather than across open ground, preferring a covered run against a skirting board, along a pipe or under decking, because open exposure makes them vulnerable. Defense follows from that habit: remove the runs, close the openings at their ends, and make the destination unattractive.
Sealing gaps at pipe penetrations
Every pipe should pass through a purpose-made penetration rather than a cut hole. Cut a tight opening — 10–15 mm clearance, not 40 mm, because oversized holes get pest-proofed with filler rather than engineering, and filler fails. Pack coarse stainless steel wool, copper mesh or a perforated metal escutcheon plate into the gap first: that resists chewing, since sealant only stops air and water. Clamp a two-part collar around the pipe and screw it to the panel so the backing stays put as the building flexes. Bead sealant on the weather face only, so a future leak shows inside rather than being sealed in, and never bury a penetration behind a cabinet without an access hatch.
Door sweeps and thresholds
The external door is the widest opening in the building and the one that moves most. Fit a brush strip or neoprene sweep contacting the finished floor across the full width, and test it by closing the door on a sheet of paper: if the paper slides out freely anywhere, it is not sealing. Use a threshold plate with a compression gasket rather than a flat sill, add hinge-side and head seals, fit a self-closer, and add a kick plate at the bottom of the leaf, since rodents start chewing at a damaged corner.
Choosing the right mesh grade
Mesh is specified by aperture and wire diameter, and both matter. Stainless or galvanised woven wire, roughly 6 mm aperture is the standard rodent barrier for ventilation openings and skirting vents. Finer insect mesh of roughly 1–1.5 mm is needed where flying insects are the problem, though it clogs faster with dust and pollen and must therefore be removable for cleaning. Coarse steel wool and copper mesh pack irregular gaps before sealing; never use plastic scouring pads, which hold water and corrode.
In humid coastal air, cheap electro-galvanised mesh rusts through within a few seasons and quietly re-opens the hole it was protecting; stainless costs more at purchase and nothing thereafter. This is scheduled work, itemised alongside roofing, seals and coatings in the container home maintenance checklist.
Termite Risks for Container Homes
Steel is not on the termite menu, which is valuable in subtropical and tropical markets where subterranean termites are active year-round. The risk does not disappear, though — it moves to whatever you attach to the steel.
Timber floors, sleepers and joinery
Most folding layouts use a steel chassis with a finished floor build-up: insulation between joists, a structural deck, then vinyl, laminate or engineered timber. Add external timber decking, steps, skirtings and kitchen carcasses, plus the paper facing on some insulation boards, and a building that looks all-metal has considerable cellulose content. Where subterranean termites are present they reach it through mud tubes built over any surface, steel and concrete included. Three rules cover most situations:
- No soil contact with timber. Every timber element stays clear of grade by a visible gap, so termites must build an exposed tube you will see long before the damage is structural.
- Keep the perimeter walkable so the base of the walls can be inspected.
- Treat unavoidable contacts. Sleepers and decking joists within 150 mm of soil should be pressure-treated for ground contact, with cut ends re-sealed on site.
Site wood piles and stored materials
The most common cause of a termite problem next to a container home is not the building. It is a firewood stack against the wall, construction offcuts or pallets left under the unit, thick organic mulch laid up to the skirting, and stumps or dead roots left in the soil beneath the footprint. All of that is free to remove and cheaper than treatment: keep cellulosic storage at least a metre from the building, raise it on a metal rack, and clear mulch back from the wall line.
Insects and Screens
Insects are a comfort and hygiene issue rather than a structural one, and they are controlled by screening rather than chemicals.
Window screens
Specify screens with the window order, not afterwards. Factory-cut cassette screens fit the frame, sit flush and lift out for cleaning in seconds, while stick-on screens leave edge gaps that defeat the point. Use corrosion-resistant mesh near the coast and check the spline — the cord holding the mesh into the frame — quarterly, because it pulls out at the corners first.
Door curtains and ventilation covers
Where a door is opened often in insect season, a screen door or magnetic-close mesh curtain does more than any spray. On the mechanical side, fit a louvred or spring-loaded back-draught shutter on every external extract and dryer outlet, use coarse external hoods with insect mesh — generous in area, since a restricted intake unbalances the system — on ventilation intakes, cap condensate outlets with small mesh inserts, and fit purpose-made covers rather than sealant on window frame weep holes, because those holes exist to let water out.
Screening interacts with condensation control: a heavily screened but poorly sealed envelope traps moisture, and damp insulation attracts pests of its own. The container home insulation guide covers the vapour-control side of that trade-off.
Underfloor and Skirting as a Pest Barrier
If the unit sits on pier pads, concrete blocks or screw piles, treat the void underneath as a room that needs detailing rather than a leftover space. A continuous skirting is what converts an open, sheltered gap into a closed, inspectable zone.
- Use inert materials. Steel sheet, fibre-cement board or masonry; timber in contact with soil is food.
- Bury or trench the lower edge roughly 100 mm into soil, or into a gravel trench, so nothing burrows underneath.
- Vent it deliberately. An enclosed void still needs cross-ventilation to stay dry; screen vents on at least two opposite sides.
- Keep it dry. Grade soil away, extend downpipes beyond the skirt line, and add a capillary break so ground moisture cannot rise into the floor build-up.
- Add a lid. A removable access panel lets you inspect the void annually without dismantling finishes.
Door hardware, lock bodies and hinge alignment also affect how tightly external doors close — see the door and window security guide for the hardware details that influence sealing.
Seasonal Inspection Checklist
Pest proofing fails gradually, in small increments, so the answer is a schedule you will actually follow. Use the table below as a printable list.
| Check | Frequency | What to look for | Action |
|---|---|---|---|
| Perimeter walk-around | Monthly | Fresh gaps at skirting joints, disturbed soil, droppings, burrow entrances | Back-fill burrows, re-fix skirt panels, note the location |
| Door sweeps and thresholds | Monthly | Daylight under the door, worn bristles, paper test failing | Adjust the threshold or replace the sweep |
| Pipe and cable penetrations | Monthly | Cracked sealant, backing pulled out, drip marks | Repack with metal mesh and re-seal |
| Window screens and splines | Quarterly | Holes, pulled spline at corners, corroded wire | Re-spline or replace the mesh panel |
| Ventilation covers and louvres | Quarterly | Blocked mesh, stuck shutters, insect nests | Clean or replace the cover; confirm airflow |
| Vegetation and stored materials | Quarterly | Branches or mulch touching walls, wood stored against the building | Cut back to a clear gap and relocate storage |
| Underfloor void and skirting | Annually | Mud tubes, droppings, damp patches, chewed insulation | Stop the moisture source, seal the entry, call a licensed inspector |
| Termite barriers or monitoring stations | Annually | Broken bait cartridges, disturbed stations, active tubes | Re-bait before the local swarming season |
| Drainage and sump points | Annually | Standing water near the perimeter, silted drains | Re-grade and clear before the wet season |
In markets with a defined swarming season, move the annual barrier check to the month before it starts; in cold climates, do it just before the first heating season, the moment rodents start looking for somewhere warm.
Safe Treatment Options
Exclusion and housekeeping come first. When treatment is needed, choose the least hazardous option that works, particularly in a compact, well-sealed steel building where fumes accumulate. Use snap traps or enclosed multi-catch traps along known runs, set perpendicular to the wall, in tamper-resistant stations where there are children or pets. Use baits only in locked outdoor stations, never loose indoors. Seal entry points after the occupants are removed, not before, or you trap them inside. Treat insects with targeted gel baits and crack-and-crevice products rather than broad spray, kept away from ventilation intakes. Subterranean termite colonies need professional diagnosis; in termite-active regions ask about a soil barrier at foundation stage, because retrofitting is far more disruptive. Products and licensed applicators vary by country, so the label and local regulations take precedence over anything written here.
Landscaping and Site Habits
Most pest-proofing work happens outside. Keep a clear band of gravel or paving around the unit — it removes cover, reveals droppings and burrows, and keeps mulch off the wall base. Lift firewood, planters and crates onto metal racks with visible clearance. Fix dripping taps and condensate drips, since a damp patch draws more pests than any food source. Trim branch tips that touch the roof, because they are a rodent highway to the ridge. Store pet food, bird seed and dry goods in lidded containers, and shield exterior lighting away from doorways so insects gather at a fixture rather than the entrance. Check the envelope after any modification too: solar conduit, an air-conditioner line set or a satellite cable re-opens it, and each new penetration should go straight onto the checklist.
HG Prefab factory prices are 20FT $7,200–$9,800; 30FT $10,500–$14,500; 40FT $12,500–$16,500 ex-works, before options such as upgraded door seals, screening sets, fibre-cement skirting kits and stainless mesh packages. Ordering those with the unit is cheaper than sourcing them locally after handover, and every joint is still accessible when they are fitted.
Specifying pest-proofing options for your unit?
HG Prefab, manufactured by Henan Huangang Machinery Equipment Co., Ltd., builds 20FT, 30FT and 40FT folding expandable container houses, and can supply them with factory-fitted door seals, brush sweeps and thresholds, pipe collars with metal backing, stainless insect mesh for ventilation openings and skirting packages for pier-and-beam installations. Tell us your climate, foundation type and layout, and we will quote the sealing and screening set with the unit. Email hgmechequip@gmail.com or WhatsApp +86 191 0388 7380. Full model range on the products page.
Browse modelsFrequently Asked Questions
Are container homes more pest-resistant than wooden houses?
The steel shell itself is much harder to enter than a timber-framed wall, because there is no soft material to chew and no hollow stud cavity to nest in. Real resistance comes from the details rather than the metal: pipe penetrations, door thresholds, ventilation openings and the underfloor gap are where rodents actually get in. Seal those points, keep them sealed, and keep vegetation clear of the walls, and a folding unit is easier to keep pest-free than a comparable wooden building.
Can mice chew through folding container walls?
Mice cannot chew through the steel panels or the welded frame of a folding unit. What they exploit is everything fitted into those panels: rubber door gaskets, plastic cable glands, ventilation louvres, silicone seals that have shrunk with age, and any gap where plumbing enters the floor. A house mouse fits through an opening that is roughly 6 mm across, so every utility penetration needs a metal collar or coarse steel-wool backing plus sealant, never sealant alone.
How do I pest-proof the underfloor gap?
Close the gap between the chassis rails and the ground with a continuous skirting made of steel or fibre-cement board rather than timber, and either bury the lower edge about 100 mm or set it into a gravel trench so nothing can burrow underneath. Fit corrosion-resistant insect mesh behind every ventilation slot in that skirting, keep the soil dry with good drainage and a capillary break, and keep firewood, compost and building waste away from the perimeter so the void is never attractive as shelter.
What should I check each season?
Monthly, walk the perimeter and check door sweeps, thresholds and every pipe or cable entry for fresh gaps. Quarterly, clean the window screens and ventilation covers, renew any cracked bead of sealant, and cut back anything growing against the walls. Annually, inspect the underfloor void, skirting fixings and any timber-floored area for mud tubes, droppings or chewed insulation, and re-check termite barriers before the local swarming season begins.