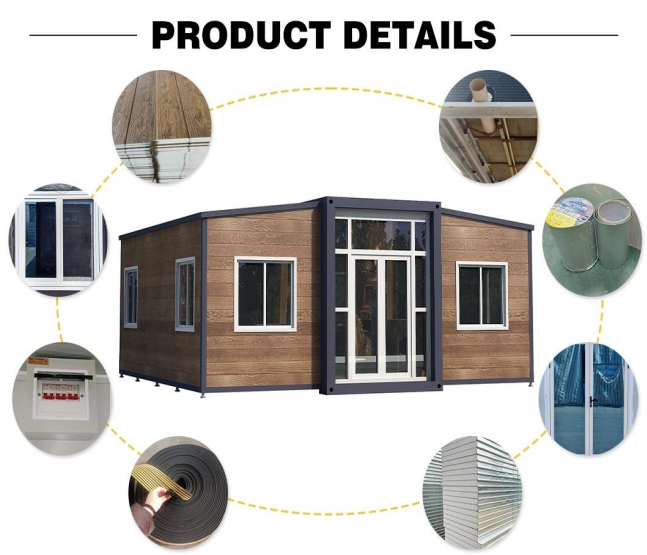
HG Prefab foldable expandable container homes — built to last, delivered worldwide.
A folding container home is usually delivered, unfolded and finished in a single site visit, so the detail nobody plans is the one that fails. Chief among them is the underfloor zone — the band of air between the ground and the underside of the floor. Skirting and underfloor enclosure is a cheap, low-skill package that closes that band, and it decides whether the unit feels warm underfoot, whether the first hard freeze bursts a pipe, and whether rodents nest in the insulation. This guide covers four material options, ventilation and insulation strategy, pipe protection, service access, pest barriers and a practical installation order. It assumes piers, blocks or a pier-and-beam base; on a slab most of this does not apply, and if you are still choosing, read our container home foundation guide.
Why the Underfloor Zone Matters
An open underfloor is not a neutral detail. It is a building defect waiting to be expressed, and it shows up in four ways.
Wind washing
Air moving under the floor strips heat out continuously. Insulation works because of still air trapped in it, and once air washes across one face, much of the stated performance is gone. Closing the perimeter restores that still-air layer. The same principle governs the assemblies in our container home insulation guide.
Frozen pipes
Everything below the unit lives at whatever temperature that space reaches, so any exposed line is first to fail in a freeze. Because the lines are hidden, a small freeze-and-thaw leak can run undetected long enough to soak insulation and rot subfloor panels.
Cold floors
Floor surface temperature drives comfort more than air temperature for anyone sitting still. A floor noticeably colder than the room air reads as a draught because the body radiates heat into it, and occupants respond by raising the thermostat — the most expensive cure there is. An enclosed, insulated, still underfloor fixes the cause.
Moisture and pests
An unmanaged cavity collects ground moisture, holds organic debris and offers undisturbed nesting space. Both problems get easier once you control access and airflow rather than treating symptoms later.
Material Options: Metal Panel, Composite, T&G Wood, Mesh Vented
Four approaches cover almost every project. Choose on three axes: how much airflow you can manage, how much maintenance you will actually do, and how far the panel must blend in.
| Material | Cost per linear metre (installed) | Durability | Ventilation control | Appearance |
|---|---|---|---|---|
| Galvanised steel or aluminium panel | Approx. $45–$90 | High — 20–30 years; no rot, no insect attack, dents and corrodes at cut edges | Good — accepts purpose-made grilles, none unless specified | Crisp and industrial, matches corrugated cladding; powder-coat colours available |
| Composite or PVC panel system | Approx. $55–$110 | Medium-high — 15–25 years; no painting, goes brittle under strong UV | Good — proprietary inserts, easy to balance | Clean and low profile; closest match to a conventional house |
| Tongue-and-groove wood (cedar or treated) | Approx. $35–$75 | Medium — 10–20 years with diligent recoating; vulnerable to rot, ground contact and borers | Excellent — easy to add gaps or vent slots anywhere | Warm and natural; best for cabin and garden settings |
| Mesh-vented frame (hardware cloth on frame) | Approx. $20–$45 | Medium — frame lasts well, mesh usually replaced in 5–10 years | Very high — almost unrestricted cross flow | Utilitarian; utilities and piers stay partly visible |
These are typical market ranges for supply and installation, varying widely by region and access; treat them as budgeting guidance. Perimeters run roughly 15–17 linear metres around a folded 20FT, 22–24 metres around a 30FT and 28–30 metres around a 40FT, so material cost stays modest against what it protects.
Two details apply to all four. Keep dissimilar metals apart — fix aluminium panels to the steel base with separating tape rather than bare contact, or galvanic corrosion eats the fastener line. And every fixed panel must come off with a driver, not a pry bar.
Ventilation Rules
Enclosing the base solves a heat problem and can create a moisture one. Ground moisture rises continuously; trapped underneath with no way out, it pushes relative humidity up until condensation forms on the coldest surface available — usually the underside of your floor insulation or the steel holding it.
Net free area
The usual rule of thumb is about 1 square foot of net free opening per 150 square feet of underfloor area with bare ground, falling to roughly 1 square foot per 1,500 square feet with a continuous sealed vapour barrier. Net free area is what remains after mesh, louvre blades and insect screen are deducted, so buy grilles with that figure printed on them.
Placement
- Use at least two opposing sides. Vents on one wall only leave a dead pocket; cross ventilation needs a path through.
- Distribute rather than concentrate. Several small vents near the corners move air exactly where stagnation starts.
- Keep them clear. Nothing stacked against them, soil below the opening, no snow banked over them.
- Protect every opening with insect screen or hardware cloth bonded behind it.
- Confirm locally. Ratios vary by jurisdiction, so check with your building department before ordering.
In very dry climates with a sealed ground barrier, some designs build a closed, unvented cavity treated as part of the conditioned envelope. Legitimate but unforgiving: taped seams, no untreated earth, and a plan for keeping the floor dry from above too. Not a first-build choice.
Insulating the Base vs Insulating the Floor Cavity
There are two places to put insulation, and they do different jobs.
Insulating the floor cavity
Insulation between the joists, or better, rigid board tight to their underside, attacks conduction directly. It is the only option that changes floor surface temperature, so it is the one that improves comfort:
- Continuous contact. Batts that sag, compress or leave gaps around services underperform badly. Support them, do not rely on friction.
- Air seal first. Seal where pipes and conduits pass through the floor plate, or you insulate around open air pathways into the room.
- Correct control layer. Which side the vapour or air control layer belongs on depends on climate and on whether the space is vented. Get it wrong and you trap moisture inside the assembly — this is where a local designer earns their fee.
- Respect the steel. The frame is a conduction path: use continuous insulation that the steel does not interrupt, exactly as described in our guide to thermal bridges in container homes.
Insulating the perimeter band
Insulation on the inside face of the skirting, or rigid board against the inner side of the enclosure, raises the temperature of the whole cavity. It is cheaper, easier to retrofit and easy to inspect — and does nothing for conduction through the floor above. In practice the two are complementary:
- Vented cavity: insulate the floor assembly, keep vents clear, and use baffles so vented air does not wash across the insulation face.
- Unvented cavity: insulate the perimeter walls of the space and leave the floor largely uninsulated, so the cavity behaves as part of the conditioned envelope.
Either way, skirting is the protector rather than the insulator: it keeps insulation dry, wind-free and free of rodents that would shred it for nesting.
Protecting Pipes and Valves
Freeze protection works best in layers. Heat alone is expensive; insulation alone eventually loses during a long cold snap.
Insulation wraps
Closed-cell foam sleeves are cheap, fast and effective for short exposed runs and for valves and fittings. Match the sleeve to the pipe diameter with no compression gaps, seal every joint rather than leaving butt joints open, cover valves and tees as well as straight runs, and keep the sleeve continuous — a bare 50 mm section is where freezing starts.
Heat tape and heat cable
For long runs, or any pipe in a shallow cavity with poor solar gain, a thermostatically controlled heat cable is the reliable answer:
- Use a listed product made for pipe freeze protection, installed to the instructions, on a protected circuit.
- Never overlap the cable along the pipe or cross it at fittings; overheating at the overlap is the commonest failure.
- Insulate over it. Bare cable mostly heats the air under the unit, at cost.
- Test before winter, not during it, and record which circuit serves which run.
Drain-down for seasonal homes
If the unit will be unoccupied and unheated in freezing weather, removing the water beats any amount of heating. The full sequence is in our folding container home winterization checklist: isolate the supply, drain the lowest points first, blow the lines clear, leave valves open and refill every trap with non-toxic propylene glycol. Never use automotive antifreeze in a potable system, and label the state of the system at the manifold.
Access Doors and Serviceability
The commonest failure of a good skirting install is behavioural: a fine perimeter with no way in, so nobody looks underneath until something leaks.
- At least one opening of about 600 x 600 mm, plus one within easy reach of any manifold — plan two for a 40FT.
- Locate them logically: opposite the manifold, near the service entry, on the side you can reach with a hose.
- Keep the path clear. Around 600 mm of working height decides whether maintenance happens or is deferred.
- Use screws, not nails or permanent rivets, and mark panels on the back so they return to place.
- Never build over them. Decking, planters, landings and sheds all end up covering access doors in time.
Pest-Barrier Details
An enclosed cavity is exactly what rodents, insects and the occasional snake want: dark, dry, sheltered and undisturbed. Physical exclusion beats any chemical approach and lasts.
- Screen every vent. Galvanised hardware cloth bonded behind each grille, sized for rodents as well as insects; stainless or PVC-coated lasts longer in wet ground.
- Seal penetrations. Every pipe, conduit and duct gets backer rod and sealant, or copper mesh packed behind foam. Rodents exploit a 15 mm gap and enlarge a soft foam plug in minutes.
- Close the base line. The panel bottom should meet ground, gravel or paving without gaps; corners and utility entries are tried first.
- Manage the ground. Geotextile and gravel or a sealed barrier underneath, mulch, offcuts and firewood away from the perimeter, and a clear strip so nothing bridges into the cavity.
- Keep it visible. Where local termite or borer risk exists, keep an inspection gap so any mud tube on a pier face is spotted. Leave treatments to a licensed professional.
Step-by-Step Installation Order
- Set the unit and check levels first. Nothing works if bearers are out of level or the height above grade varies around the perimeter. Yes — a crane or forklift is required to offload the folded unit from the truck. Once it is set in position, four workers can unfold and assemble the main structure in about 2 hours. Confirm floor height at every corner before ordering anything.
- Grade and drain. Fall away from the unit on all sides, far enough that runoff does not return.
- Prepare the ground. Geotextile plus compacted gravel, or a taped continuous vapour barrier with sealed pier penetrations.
- Complete all underfloor services. Plumbing, drainage, gas and electrical conduits, with every through-floor penetration sealed.
- Insulate. Floor cavity or perimeter strategy, sealed first and protected at vented openings.
- Protect pipes and valves. Sleeves, then heat cable where needed, tested before anything is covered.
- Install frame or track. Suitable fasteners plus isolation tape where metals differ; bottom track set level.
- Fit panels. Work outward from the corners, keep the bottom edge below finished ground, and cut vent openings as you go rather than after.
- Fit vents and mesh. Cross-ventilating pairs on opposing walls, net free area calculated, screen bonded behind each opening.
- Fit access doors and seals. Then backer rod and sealant around the whole perimeter.
- Inspect annually. Around each heating season: vents clear, mesh intact, doors operating, lagging continuous, heat cables drawing current.
HG Prefab factory prices for the folding unit itself run 20FT $7,200–$9,800; 30FT $10,500–$14,500; 40FT $12,500–$16,500 ex-works, before freight and local compliance, so a full skirting package costs a small fraction of the building it protects. The model range is on the products page.
Specifying a skirting package for your unit?
HG Prefab, manufactured by Henan Huangang Machinery Equipment Co., Ltd., builds 20FT, 30FT and 40FT folding expandable container houses, prepared with insulated floor build-ups, sealed service penetrations and valved drain-down points that make a clean underfloor enclosure straightforward. Email hgmechequip@gmail.com or WhatsApp +86 191 0388 7380.
Browse modelsFrequently Asked Questions
Does skirting replace floor insulation?
No. Skirting stops wind from washing through the underfloor zone and hides the piers, but it does very little to slow heat that conducts straight up through the floor build-up. A warm floor needs insulation in or directly beneath the floor assembly, plus an air and vapour control layer on the correct side for your climate, and skirting works best as the outer shield that keeps that insulation dry and still.
How much ventilation does an enclosed underfloor need?
Most codes use a rule of thumb of roughly 1 square foot of net free vent area for every 150 square feet of underfloor area when the ground is left bare, dropping to about 1 square foot per 1,500 square feet when a sealed continuous ground vapour barrier is installed. Split the vents between at least two opposing walls, keep them clear of soil, snow and stored items, and confirm the exact ratio with your local building department before you order the panels.
Can I install skirting myself?
Yes, provided the ground is graded, the piers are level and no plumbing or electrical work is still outstanding under the floor. Tracks, panels, screws and vent grilles are standard off-the-shelf items, and most owners finish the perimeter of a single unit over a weekend with one helper. Hire a professional instead on sloped or unstable ground, where panels must be cut around deep low clearances or service penetrations, or where local rules require an inspection of the finished enclosure.
How do I keep pipes from freezing under the unit?
There are three layers of defence. First, close the skirting so the zone is calmer and warmer than the open air. Second, fit closed-cell foam insulation sleeves over every exposed pipe and valve, and add a listed heat cable with thermostatic control on any long run that cannot be drained. Third, for a seasonal unit, drain the system completely, blow the lines clear and refill the traps with non-toxic propylene glycol antifreeze, leaving the isolation valves documented so any caretaker knows the state of the system.