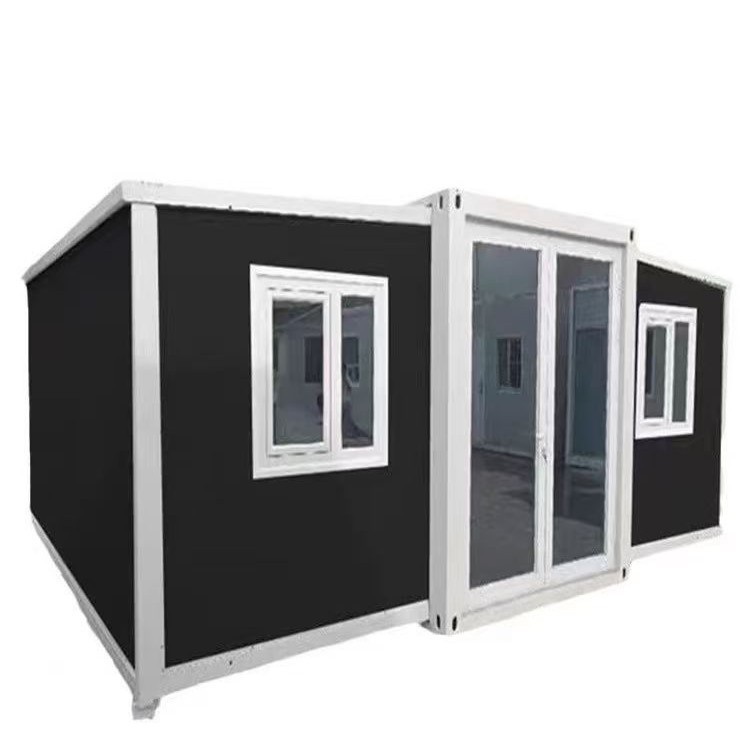
HG Prefab foldable expandable container homes — built to last, delivered worldwide.
Ask anyone who has lived through a winter in a badly insulated container home where the cold is, and they will point at the corners, the floor near the door, and a stripe running down the wall at every steel post. Those are not draughts. They are thermal bridges — paths of steel that shortcut the insulation and carry heat from your living room straight to the outside air. The good news is that a thermal bridge is a geometry problem, not a materials mystery, and it can be designed out from the factory up. This guide explains where bridges form in a folding container home, how to put a number on the risk, and the five detailing methods that eliminate cold spots and the condensation and mould that follow them. It applies to every unit HG Prefab builds, from the compact 20FT to the family-sized 30FT and 40FT models.
What a Thermal Bridge Actually Is
Heat always travels from warm to cold, and it takes the path of least resistance. Steel conducts roughly 300 times more heat than mineral wool per unit of thickness, so wherever the steel frame passes through the insulation layer, that spot loses heat far faster than the wall around it. Three consequences follow:
- Lower surface temperature. The inside face of a bridged spot can sit 3–8 °C colder than the insulated wall beside it, which you feel as a cold patch even when the room thermostat reads 21 °C.
- Condensation. When that cold surface falls below the dew point of the indoor air, water vapour condenses on it. At 21 °C and 55% relative humidity the dew point is about 11.6 °C — easily reached on bare steel in a cold climate.
- Higher energy use. Bridged steel is not a small area. In a typical container shell the frame, corner castings and floor members can account for 15–30% of the envelope area, and they can add 20–40% to the calculated heat loss if left unbroken.
Adding thicker insulation between the steel members treats the symptom. The steel itself still runs from inside to outside, and it will still be cold. The only real fix is to put a continuous insulating layer over the steel, so the metal never touches the cold side.
Where Cold Spots Appear in a Folding Container Home
Corner castings and end frames
The eight corner castings are solid steel blocks, several centimetres thick, tied directly into the corner posts. They are the classic bridge and the first place to show a damp patch in winter. Wrap them in the continuous insulation layer rather than boxing them out later, and never leave a casting exposed to the interior as a decorative feature.
Floor cross-members
The steel floor bears on transverse cross-members that run from one side of the box to the other, straight through any floor insulation laid between them. Cold floors and damp skirting boards start here. A continuous insulated floor build-up over the members — or a raised, ventilated floor with insulation above the steel — removes the path.
Door and window frames
Aluminium or steel frames conduct directly to the outside. A bare aluminium frame can be 5 °C colder than the glazing unit beside it, which is why condensation appears along the frame before it appears on the glass. Specify thermally broken frames and warm-edge spacers, and set the opening into the insulation layer rather than flush with the outer steel.
Roof-to-wall junctions and service penetrations
Every bolt, cable gland, flue and pipe that passes through the envelope is a small bridge. The folding hinge line deserves special attention: it is a long, continuous steel detail that must remain airtight and insulated after the unit is unfolded. Specify a compressible gasket plus an insulated cover strip along the hinge, and inspect it every season.
Point fixings and anchor brackets
Anchoring bolts, solar mounting feet and handrail brackets can each punch a bridge through otherwise perfect insulation. Use thermally isolated standoffs and seal every penetration to the air barrier.
Measuring the Risk: U-Value, Dew Point and Surface Temperature
You do not need a heat-transfer model to specify this properly — three numbers tell you everything.
| Parameter | Target for a cold-climate container home | Why it matters |
|---|---|---|
| Wall U-value (overall, bridges included) | 0.20–0.35 W/m²K | Anything above 0.40 W/m²K loses heat fast and feels cold near the frame |
| Roof U-value | 0.15–0.25 W/m²K | Warm air rises; an under-insulated roof drives both loss and summer overheating |
| Floor U-value | 0.20–0.30 W/m²K | Cold floors are the most complained-about defect in container homes |
| Temperature factor (fRsi) | ≥ 0.75 at every junction | Below 0.70 the surface is at risk of condensation and mould growth |
| Indoor relative humidity | 35–55% | Above 60% the dew point rises and even well-detailed surfaces can condense |
| Airtightness | ≤ 3 m³/h·m² at 50 Pa, or a documented sealed envelope | Air leakage carries far more moisture than diffusion and causes hidden interstitial condensation |
| Continuous insulation over steel | 50–100 mm, uninterrupted | The single most important number in the whole build-up |
The practical test is simple: in cold weather, measure the inside surface temperature at a corner casting and at the middle of a wall panel. If the difference is more than about 3 °C, you have a bridge that has not been broken.
Five Ways to Break the Bridge
1. Continuous exterior insulation, not insulation between studs
This is the master detail. A continuous layer of closed-cell spray polyurethane foam or rigid mineral wool board applied outside the steel covers the posts, the cross-members and the corner castings in one uninterrupted blanket. Interior studwork with batts — the default in many conversions — leaves every steel member bridging from the interior lining to the outer skin, which is why those homes sweat at every post. Finish the exterior insulation with a ventilated cladding cavity so any moisture that does get in can dry outwards.
2. Thermal breaks at every steel member
Where steel must remain exposed for structure — the floor bearers, the hinge line, the lifting points — insert a low-conductivity break: a rigid plastic or composite shim, a compressed mineral-fibre strip, or a structural thermal-break pad rated for the load. A 10–20 mm break is enough to lift the internal surface temperature above the dew point at that point.
3. Thermally broken frames and warm-edge glazing
Specify frames with a polyamide thermal break, double or triple glazing with a low-emissivity coating, and warm-edge spacer bars instead of aluminium spacers. Set the window into the insulation plane and seal the reveal to the air barrier on all four sides. This is also where our door and window guide and the ventilation guide connect: a well-insulated, airtight box needs controlled ventilation or humidity will rise until something condenses.
4. Airtightness with a correctly placed vapour control layer
Seal the envelope first — every panel joint, hinge line, penetration and service entry — then control vapour. In cold climates the vapour control layer belongs on the warm (inner) side of the insulation, and it must be continuous, taped at every lap and sealed at every penetration. Never place a vapour barrier on both sides of the build-up; trapped moisture has nowhere to go. More moisture enters a wall through gaps than through diffusion, so airtightness comes before thickness.
5. Manage humidity and thermal mass
Even a perfectly detailed container home will condense if the indoor air is too wet. Provide continuous mechanical extract in kitchens and bathrooms (15–30 l/s intermittent, or 7–15 l/s continuous), keep indoor relative humidity at 35–55%, and avoid blocking airflow behind furniture against external walls. A modest amount of internal thermal mass — a tiled floor or a masonry heater — damps temperature swings so the surface never dips below dew point during a cold night.
Insulation Options Compared
| Material | Thermal conductivity (λ) | Thickness for U ≈ 0.25 W/m²K | Pros | Cons |
|---|---|---|---|---|
| Closed-cell spray PU foam | 0.022–0.028 W/mK | 80–100 mm | Seamless, adheres to steel, adds stiffness, also the air barrier | Needs certified applicator; must be protected from UV |
| Rigid mineral wool board | 0.034–0.040 W/mK | 120–150 mm | Non-combustible, good acoustic performance, vapour-open | Needs a separate air barrier and careful fixing to avoid gaps |
| PIR / PUR board | 0.022–0.027 W/mK | 80–100 mm | Thin for the performance, clean to fit | Cost; joints must be taped to avoid a linear bridge at every board edge |
| EPS / graphite EPS | 0.031–0.038 W/mK | 110–140 mm | Cheap, light, easy to cut | Lower performance per mm; melts near heat sources |
| Interior stud + batt | 0.035–0.044 W/mK | Not achievable alone | Familiar, cheap, easy to service | Leaves every steel post bridging — the main cause of cold spots |
For most cold-climate projects the best value is a hybrid: 40–60 mm of closed-cell foam directly on the steel to kill the bridges and seal the air, plus an exterior mineral wool or PIR board to reach the target U-value, all behind a ventilated rainscreen. Factory application is worth insisting on, because a folded unit that arrives with the insulation already bonded to the steel will be far more consistent than anything sprayed on a windy site. See the insulation guide and the cold climate guide for full build-ups.
Cold-Climate Specification Checklist
Put these lines into your order so the factory builds them in rather than the site patching them on:
- Continuous insulation over all steel: 50–100 mm, with the corner castings and end frames fully covered.
- Thermal break at the floor: insulation laid over the cross-members, not between them.
- Thermally broken window and door frames with warm-edge spacers, set into the insulation plane.
- Insulated, gasketed cover strip along the folding hinge line, inspected after every unfold.
- Vapour control layer on the warm side, taped at all laps and penetrations; single-sided only.
- Ventilated cladding cavity of 20–40 mm behind the exterior finish.
- Sealed service penetrations: every cable, flue and pipe grommeted and taped to the air barrier.
- Mechanical extract in wet rooms, sized to the room, running on a humidistat.
- Thermally isolated fixings for solar mounts, handrails and anchor brackets.
- Commissioning: an infrared check in cold weather — any patch more than 3 °C colder than the surrounding wall is a bridge still to fix.
Delivery and setup are quick by comparison. Yes — a crane or forklift is required to offload the folded unit from the truck. Once it is set in position, four workers can unfold and assemble the main structure in about 2 hours. Tell your sales engineer the climate zone and the design winter temperature at the time of order, and Henan Huangang Machinery Equipment Co., Ltd. (HG Prefab) will specify the insulation build-up, hinge gasket and frame specification for that zone before the unit ships. Browse the full model range to see which sizes can carry the thicker wall build-up, and read the winterization guide for the seasonal maintenance that keeps the envelope performing.
Frequently Asked Questions
Why does my container home have cold, damp patches on the walls?
Those patches are thermal bridges — places where steel conducts heat straight from the inside surface to the outside air. The steel frame, corner castings and floor cross-members are roughly 300 times more conductive than insulation, so the inner surface at those points runs several degrees colder than the insulated wall around it. When that surface falls below the dew point of your indoor air, moisture condenses on it, and mould follows the damp. Insulation thickness alone will not fix it; the steel path has to be broken.
How is a folding container home delivered and installed?
Yes — a crane or forklift is required to offload the folded unit from the truck. Once it is set in position, four workers can unfold and assemble the main structure in about 2 hours.
Which insulation is best for stopping thermal bridges in a container home?
Closed-cell spray polyurethane foam applied on the outside of the steel, or a continuous exterior mineral wool board, works best because it covers the frame instead of sitting between the frame members. Interior studwork with batts leaves every steel post and cross-member exposed as a bridge. Aim for a continuous layer of 50-100 mm over the steel plus a ventilated cladding cavity.
Can thermal bridges cause structural damage to a container home?
Yes, over time. Persistent condensation inside the wall build-up keeps the steel and any organic lining damp, which accelerates corrosion at welds, floor cross-members and the folding hinge line, and rots timber battens and plasterboard. Interstitial condensation is more damaging than surface damp because it is hidden until the lining fails.
Need a folding container house?
Contact HG Prefab on WhatsApp +86 191 0388 7380 or email hgmechequip@gmail.com for a fast quote.