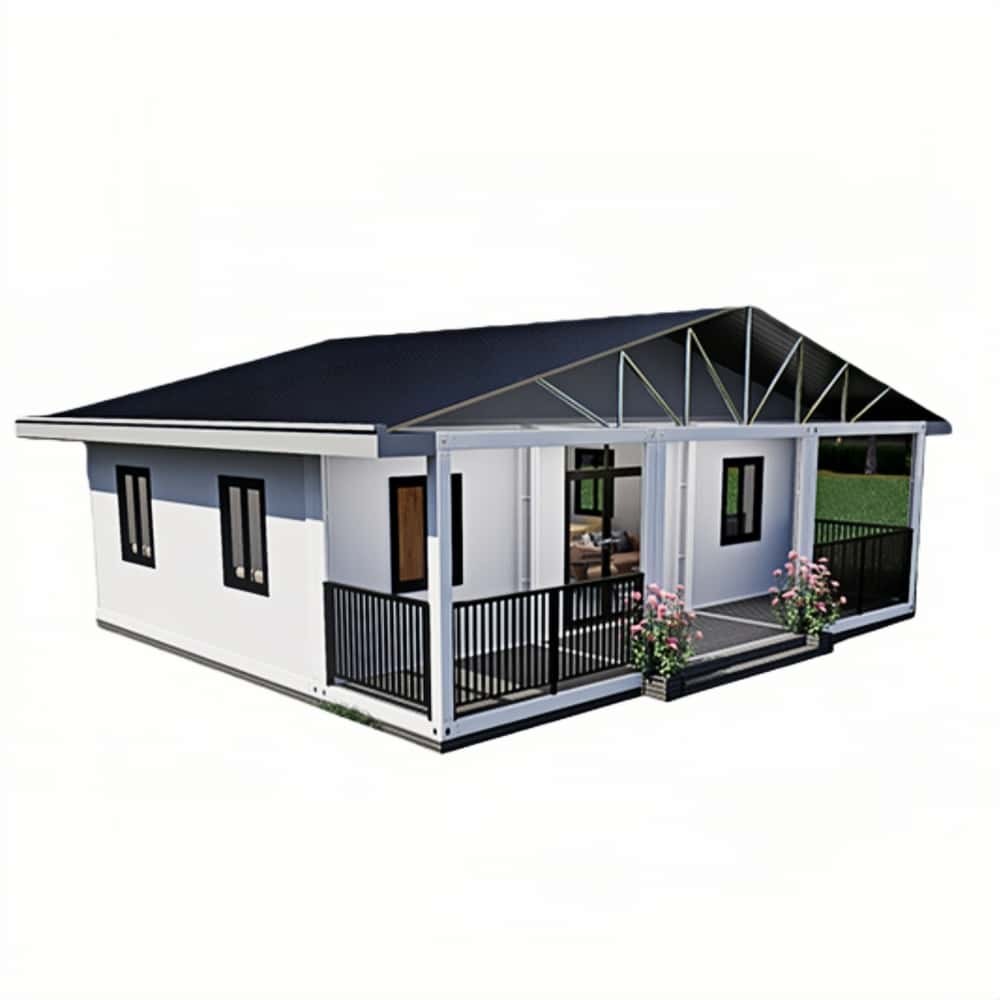
HG Prefab foldable expandable container homes — built to last, delivered worldwide.
A recording space is the most acoustically demanding thing most people will ever ask a building to do. It has to keep the outside world out, stop your own noise from escaping, and then sound neutral enough inside that a microphone hears a voice rather than a metal box. A folding container home is a genuinely strong starting point for that job, and a slightly unusual one: it arrives as a sealed, insulated steel shell with no shared walls and no upstairs neighbour, which solves three of the five problems a garage or spare-bedroom studio normally has. The two it does not solve — internal reflections and low-frequency panel resonance — are both fixable with a treatment package that costs less than a decent microphone locker.
This guide covers why a steel shell behaves the way it does, which unit size supports which kind of studio, the acoustic build-up that works on corrugated steel, three worked gear layouts, the electrical and grounding detail that separates a quiet studio from a humming one, and the complete 2026 budget.
Why a Folding Container Home Works as a Studio
Mass, isolation and a genuinely quiet location
Sound isolation is mostly a function of mass and airtightness. A folding expandable container unit gives you both before you lift a tool: a corrugated steel skin, a welded frame and a factory-installed insulation layer in the wall cavity. Against traffic noise, wind, rain on the roof and a neighbour's lawnmower, that shell performs far better than a timber-framed garden room of the same price. Locating the unit 10–20 m from the house also removes the domestic noise floor — footsteps overhead, a washing machine through the wall, a television in the next room — which is the single biggest complaint people have about home studios.
What steel does badly, and why it matters
Steel is light, stiff and thin. It blocks airborne sound well at mid and high frequencies, and it is poor at two things that matter for recording.
The first is internal reflection. A bare steel and plasterboard box is a hard, reflective parallel-walled room with a reverberation time far above what speech or music wants. Untreated, you get flutter echo between parallel walls and a metallic ring on every transient. That is a room problem, not an isolation problem, and absorption fixes it cheaply.
The second is low-frequency resonance. Large thin steel panels have a resonant frequency in the bass region. Kick drums, bass guitars and even a deep male voice can set a panel vibrating, and a vibrating panel is a speaker radiating into the outside world. This is the path through which bass "leaks", and it is why decoupling and damping matter more than simply adding more absorption.
Choosing the Right Size: 20FT vs 30FT vs 40FT
The decision is driven less by how much gear you own than by how many people are in the room and whether you need one room or two. The table below sets out what each unit realistically supports.
| Specification | 20FT | 30FT | 40FT |
|---|---|---|---|
| Usable floor area | ~14 m² | ~21 m² | ~28 m² |
| Typical internal width | 2.2–2.4 m | 2.2–2.5 m | 2.2–3.0 m |
| Best studio type | Solo podcast / voice-over | Control room + vocal booth | Two-room tracking studio |
| People on mic at once | 1–2 | 2–3 | 3–5 |
| Drum kit or full amp tracking | No | Restricted, small kit | Yes, with live room |
| Separate control room | No | Partial screen | Yes, with viewing window |
| Recommended ceiling treatment | Cloud + 2 corner traps | Cloud + 4 corner traps | Full cloud grid + 4+ traps |
| Ventilation target (quiet) | 150–250 m³/h | 250–400 m³/h | 400–650 m³/h |
| Connected electrical load | 2–4 kW | 3–5 kW | 5–8 kW |
| Base unit price (2026) | $7,200–$9,800 | $10,500–$14,500 | $12,500–$16,500 |
Read the table as a ceiling. A 20FT is a genuinely professional podcast and voice-over room, and thousands of released records have been made in rooms that size. What it cannot do is hold a drum kit and a control desk at the same time. If your work is spoken word, a 20FT is the best value in the range; if it involves amplified instruments, start at 30FT; if you plan to track a band or run a video podcast with a seated panel, go straight to 40FT, because building two acoustic rooms inside one 20FT box is not physically achievable.
Acoustic Treatment: What Actually Works on Steel
Treatment has four separate jobs and buyers routinely spend money on the wrong one. The table below maps each measure to the problem it solves, so the budget goes where it does something.
| Measure | Problem it solves | Typical cost (20FT) | Priority |
|---|---|---|---|
| Broadband absorption panels, 50–100 mm, at first reflection points | Flutter echo, harsh mid-range, boxy vocal sound | $400–$1,200 | Essential |
| Bass traps in at least two, ideally four, vertical corners | Boomy low end, uneven bass response at the listening position | $300–$1,000 | Essential |
| Ceiling cloud over the desk or mic position | Vertical reflections and ceiling slap-back | $200–$800 | High |
| Carpet or heavy rug plus underlay over the whole floor | Floor reflection, footfall noise, chair roll | $200–$700 | High |
| Resilient channel or isolation clips on walls and ceiling | Structure-borne transmission into the steel shell | $800–$2,500 | High if neighbours are close |
| Second layer of 15 mm acoustic plasterboard or mass-loaded vinyl | Added mass, lowers resonant frequency of panels | $600–$2,000 | Medium |
| Floating plywood floor on rubber isolation pads | Impact noise and bass transmission through the deck | $700–$2,000 | Medium |
| Acoustic door seals, drop seal and brush threshold | Airborne leakage at the weakest point in the shell | $150–$500 | Essential |
| Diffusers on the rear wall | Keeps the room lively after absorption is added | $300–$1,200 | Optional |
Start with absorption, not with soundproofing
Almost every first-time studio buyer over-invests in blocking sound out and under-invests in controlling the room. If you are recording a podcast in a suburban garden, the ambient noise floor outside is probably 35–45 dB(A) and the sealed container shell already brings that below the noise floor of your microphone preamp. What you will actually hear on playback is the room. Put 50–100 mm broadband absorbers at the first reflection points on the side walls and ceiling, trap at least two corners full height, and lay carpet. That single package turns a ringy metal box into a controlled room, and it is where the first $1,000 should go.
Decouple before you add mass
Once the room sounds right, deal with transmission — and only if you need to. Decoupling is the higher-value step: mount the inner wall and ceiling lining on resilient channel or isolation clips so it is not rigidly screwed to the steel frame, and the panel can no longer be driven directly by sound pressure in the room. Adding a second layer of 15 mm acoustic plasterboard or a mass-loaded vinyl barrier then increases the mass of that now-isolated leaf. Doing them in the reverse order means the extra mass is still bolted to the shell and much of the benefit is lost.
Seal the weak points
The door, the window and every cable penetration are the holes in an otherwise airtight box, and air gaps defeat mass. Fit a perimeter seal and an automatic drop seal on the door, use a brush threshold, choose a window with a double-glazed acoustic unit and a compression seal, and close every conduit entry with acoustic putty or a brush-grommet plate. A 5 mm gap under a door will undo several thousand dollars of wall build-up.
Gear Layout and Signal Chain
Where the desk goes, and why
Place the working position on the short axis rather than the long one. Sitting with your back to a short end wall means the first side-wall reflections arrive later and from a wider angle, which gives a wider, more even stereo image than firing sound down the length of a 6 m room. Keep the desk at least 500 mm off the front wall, put the monitors on isolation pads at ear height with the tweeters forming an equilateral triangle with your head, and treat the wall directly behind you.
Run all audio cabling in a dedicated conduit, physically separated from mains power by at least 200 mm and crossing at 90 degrees where it has to cross. This single habit prevents most of the hum and buzz problems that send studio owners chasing expensive gear swaps.
Power and grounding for a quiet studio
| Item | Typical draw | Circuit requirement | Noise notes |
|---|---|---|---|
| Audio interface, computer, monitors | 150–400 W | Dedicated 10–16 A audio circuit | Keep on one circuit to avoid ground loops |
| LED lighting, 300–500 lux | 100–300 W | Lighting circuit | Use dimmable drivers rated for studio use; cheap drivers buzz |
| Quiet ventilation (supply + extract) | 80–250 W | Ventilation circuit | Oversize the duct so the fan runs slow; speed is noise |
| Mini-split air conditioning | 700–2,000 W | Dedicated 16–20 A circuit | Size the outdoor unit away from the mic wall |
| Guitar amps, keyboards, outboard rack | 200–1,500 W | Shared power circuit | Isolate from the audio circuit; never daisy-chain |
| Video podcast lighting and cameras | 400–1,500 W | Dedicated circuit | LED panels avoid the ballast hum of older fixtures |
Three rules carry most of the benefit. Give the audio chain its own circuit back to the distribution board so compressor startups and fridge motors are not on the same feed. Use a single earth reference for the whole studio and avoid lifting grounds ad hoc, which creates the loop hum people then blame on their interface. And specify a surge-protected distribution board with an RCD, because a container studio full of electronics sitting at the end of a long garden supply run is exactly the installation that gets damaged by a transient.
Full detail on sizing the supply is in our electrical load planning guide.
Ventilation Without the Noise
This is where most container studios fail. A vocal booth needs fresh air, and every fan makes noise. The fix is to move a larger volume of air more slowly: size the duct one step up from the calculated requirement and run the fan at 40–60 per cent of maximum speed, which drops the noise dramatically for the same delivered airflow. Target roughly 150–250 m³/h in a 20FT and 400–650 m³/h in a 40FT, use a balanced supply-and-extract pair with silenced duct runs and flexible connectors at both ends, and mount the fan unit outside the studio on rubber isolators.
Air conditioning deserves the same attention. Choose an inverter mini-split with a low-speed indoor noise rating, and locate the outdoor unit on the side of the building furthest from the microphone wall. See our ventilation guide and soundproofing guide for more on both.
Three Worked Layouts
20FT — solo podcast and voice-over room
A desk against one short end wall with two or three hosts seated at it, broadband panels at the first reflection points on both side walls, a cloud above the table, bass traps in the two corners behind the desk and a full-height trap in the corner opposite, carpet throughout, and a small rack for the interface, preamps and a headphone distribution amp. Leave a 1 m clear strip by the door for coats, bags and a small water station. Equipment spend is typically $1,200–$4,000 for a serious two-host spoken-word set-up.
30FT — control room plus vocal booth
Split the unit roughly 60/40. The larger half is the control room: desk on the short axis, monitors on isolation pads, a cloud grid over the listening position and four corner traps. The smaller half becomes a booth or iso area for a vocalist, a guitar cabinet or a small drum kit, built with a double-leaf partition and its own door seals. A single viewing window with a double-glazed acoustic unit connects the two. This is the smallest configuration that lets you record one person while another engineers.
40FT — two-room tracking studio or video podcast set
Either a proper control room with a 3 × 2.5 m live room at the far end for drums and amps, or a video podcast set with a three-person seating arrangement, two camera positions and ceiling-mounted LED panels. In both cases the 40FT width matters as much as the area: it is the first size where the live room and control room can each have a usable short-axis orientation rather than one of them being a corridor. Allow $6,000–$20,000 for gear at this level, more if you are buying drums, amplifiers and a large microphone locker.
Floors, Walls and Finishes
The acoustic build-up interacts with the floor, so specify them together. A practical sequence from the steel deck upward is a 15–18 mm plywood structural layer, then 8–10 mm rubber or neoprene isolation pads laid in a grid under the studio area, then a second 15 mm plywood layer floating on top, then underlay and carpet. The floating layer is what stops footfall and bass reaching the frame. Where you are not building a floating floor, heavy carpet with a quality underlay over the plywood is an acceptable compromise and is what most podcast rooms use.
For surface trade-offs and durability, see our container home flooring guide, and for the wider interior scheme our interior design guide.
Cost, Delivery and Installation
Typical 2026 budget for a container home music studio or podcast room:
- Folding container unit: 20FT $7,200–$9,800; 30FT $10,500–$14,500; 40FT $12,500–$16,500 depending on size and finish.
- Acoustic treatment package: $1,500–$6,000, from a basic absorption and trapping kit up to full decoupling with a floating floor.
- Electrical, lighting and grounding: $1,200–$4,000.
- Quiet ventilation and cooling: $1,500–$5,000.
- Flooring build-up and finishes: $800–$3,000.
- Recording gear: $1,200–$20,000 depending on whether you are buying two microphones or outfitting a tracking room.
- Foundation, delivery and crane: $1,500–$6,000 depending on site access.
Delivery is fast and predictable. Yes — a crane or forklift is required to offload the folded unit from the truck. Once it is set in position, four workers can unfold and assemble the main structure in about 2 hours. Acoustic panels, power, lighting and gear installation then take another two to four days depending on how much is factory-prepared.
That last point is the highest-leverage thing you can do with the order. Tell your sales engineer where the desk, the wall panels, the corner traps, the conduit runs and the ventilation penetrations will sit, and HG Prefab can factory-prep the subfloor build-up, cable conduit, socket positions, acoustic batten locations and fan openings so the studio is quiet and usable days after assembly instead of after a week of cutting into finished surfaces. Browse the current range on our products page.
Need a folding container house for your studio?
Henan Huangang Machinery Equipment Co., Ltd. manufactures 20FT, 30FT and 40FT folding expandable container houses under the HG Prefab brand, with factory-prepared subfloor build-ups, acoustic batten locations, conduit runs, ventilation penetrations and socket layouts for music studios and podcast rooms — shipped flat-packed worldwide. Email hgmechequip@gmail.com or WhatsApp +86 191 0388 7380 for a layout drawing and quote.
Browse modelsFrequently Asked Questions
Is a container home quiet enough to record a podcast?
Yes, with treatment. A folding container unit already gives you a sealed steel shell with solid insulation in the wall cavity, which blocks a useful amount of mid and high frequency sound. What it does not do on its own is control the sound inside the room or stop low-frequency energy vibrating the panels. Add broadband absorption panels at first reflection points, a rug or carpet over the floor, bass traps in at least two corners, and sealed door and cable penetrations. With that package a podcast room in a 20FT unit records clean voice with no audible room ring and no traffic or neighbour noise.
Which container size should I choose for a music studio or podcast room?
A 20FT unit at about 14 m² is the right size for a solo spoken-word podcast, voice-over work or a single-instrument writing room with one or two people at a desk. A 30FT at about 21 m² is the first size that fits a proper control-room desk plus a small live area for a vocal booth, amp or drum kit. A 40FT at about 28 m² supports a two-room split with a separate control room and live room, which is what you need for band tracking, drum recording or a video podcast set with three or more people on camera.
How do I stop bass from leaking out of a steel container studio?
Bass leaks through structure, not through air gaps. Three steps handle it: decouple the inner leaf from the steel frame using resilient channel or isolation clips so the wall panels are not rigidly screwed to the shell; add mass with a second layer of 15 mm acoustic plasterboard or a mass-loaded vinyl barrier inside the cavity; and isolate the floor by floating a 15–18 mm plywood layer on rubber isolation pads under the studio area. Bass traps in the corners then reduce the energy inside the room so less of it reaches the shell in the first place.
How is a folding container studio delivered and installed?
Yes — a crane or forklift is required to offload the folded unit from the truck. Once it is set in position, four workers can unfold and assemble the main structure in about 2 hours. Acoustic panels, power, lighting and gear installation are normally finished within another two to four days depending on how much is factory-prepared.
What does a container home music studio cost in 2026?
The folding container unit runs 20FT $7,200–$9,800; 30FT $10,500–$14,500; 40FT $12,500–$16,500 depending on size and finish. Budget a further $1,500–$6,000 for acoustic treatment, $1,200–$4,000 for electrical and lighting, $1,500–$5,000 for ventilation and cooling, and $1,500–$15,000 or more for microphones, interface, monitoring and instruments. A complete solo podcast room in a 20FT typically lands between $12,000 and $22,000 all in.