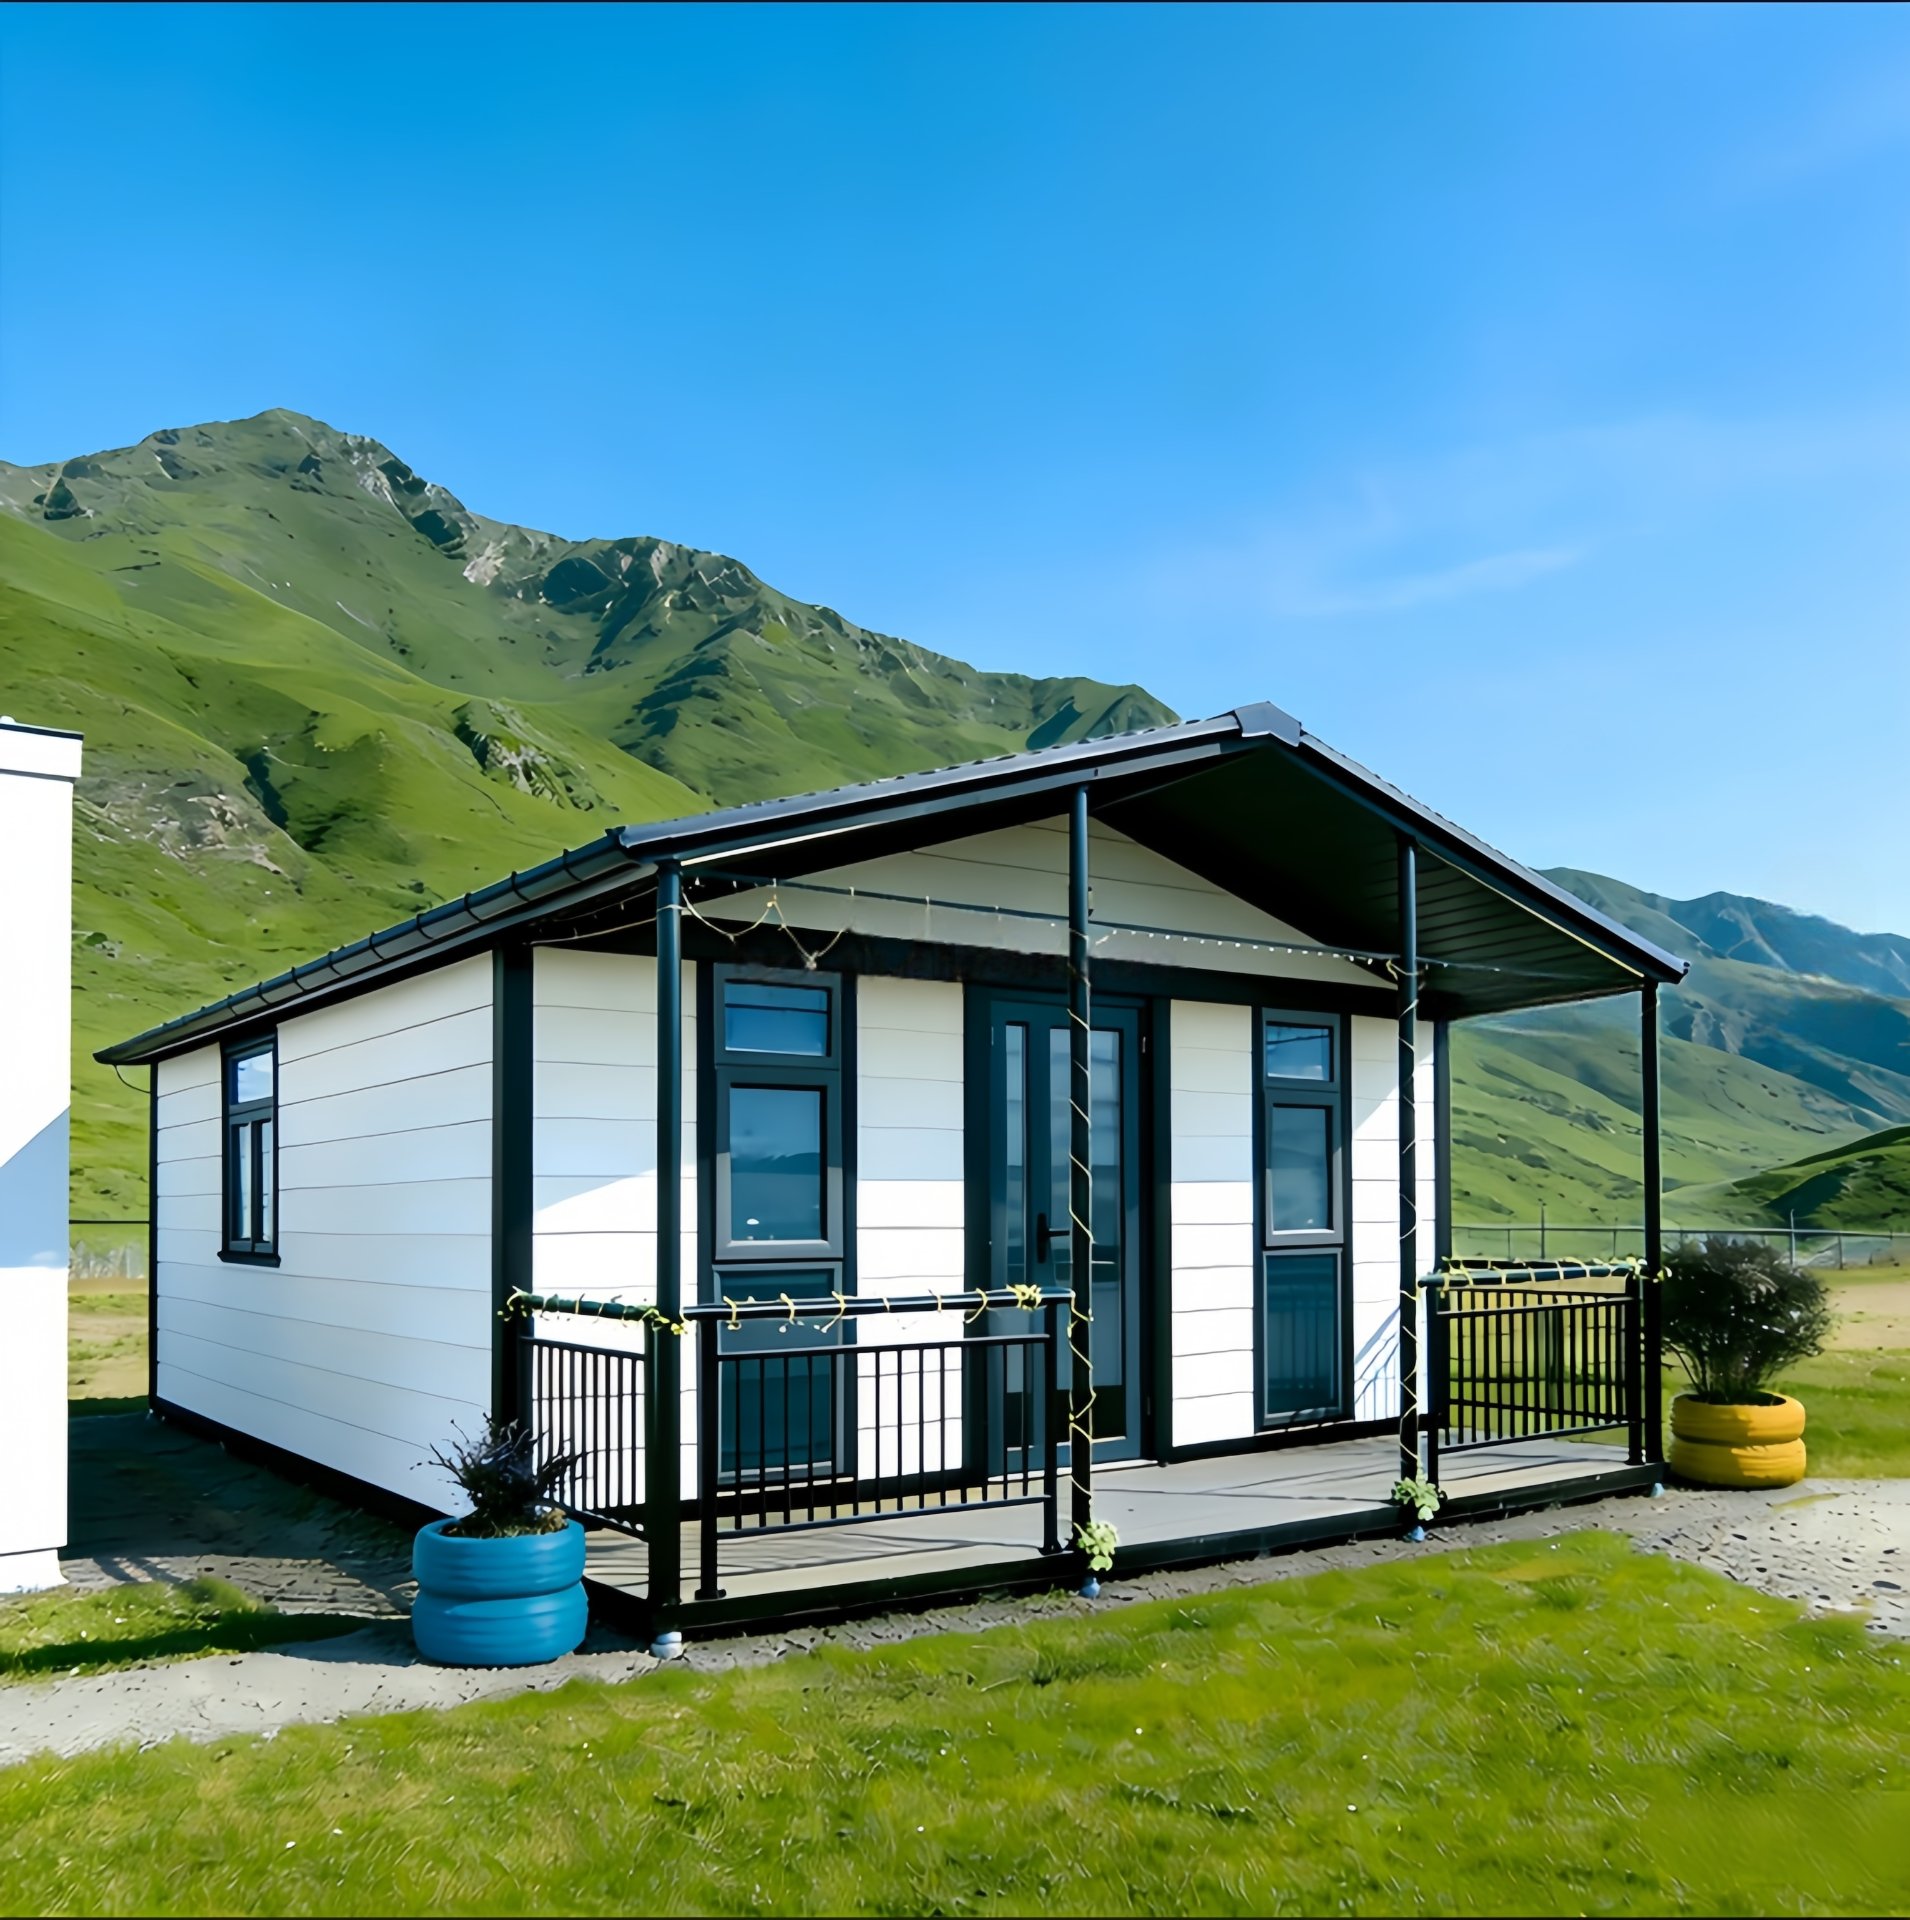
HG Prefab foldable expandable container homes — built to last, delivered worldwide.
A folding container home starts from a much better position than a timber-framed house. There is no stud wall cavity full of warm organic material, no timber floor joist, no soft barge board, no sarking, no paper-faced plasterboard and no roof truss — which removes, in one stroke, almost everything that termites, carpenter ants, powderpost beetles and nesting rodents actually eat and burrow into. Steel is not food, not nesting material and not a substrate that can be excavated with mandibles.
But a building is not pest-proof because its walls are inedible. It is pest-proof because its openings are closed and its surroundings are unattractive, and on those two tests a folding unit has the same list of vulnerabilities as any light building — plus one or two that are specific to the way it is delivered and unfolded. This guide works through the whole problem in that order: what the steel already solves, the seven openings that remain, the site hygiene that removes the incentive, the physical proofing materials with the correct mesh and sealant specifications, the pest profiles by climate, a comparison table of every measure with cost and frequency, and the maintenance calendar. It pairs with our mould prevention guide, because moisture control and pest control are largely the same work, and with our rust and corrosion guide, because the sealants that keep pests out also keep water out of the steel.
Why Steel Construction Already Wins
There is no timber framing for termites or carpenter ants
Subterranean termites and carpenter ants are the two agents that cause structural damage to light-framed buildings, and both need cellulose. A folding container home has a welded steel frame, steel-faced sandwich panels for walls and roof, and a steel-faced floor panel. There is no sill plate in contact with the ground, no bottom plate, no stud, no joist, no rafter. A termite colony foraging under the unit finds steel, compacted gravel and concrete, and moves on. That is a genuine structural advantage, not a marketing line, and it is worth stating plainly because it removes the single largest category of pest risk in warm climates.
The sandwich panels are closed, not hollow
The wall and roof panels are a bonded sandwich: two coated steel facings with a rigid insulation core, factory-laminated so there is no accessible void between the skins. Pests cannot enter the panel from the edge because the edges are closed by the frame and by the panel joint, and they cannot chew through the facing. Compare that with a timber frame, where the cavity between the plasterboard and the sheathing is a continuous, warm, dark, unlit highway from the subfloor to the roof — exactly the route mice use, and exactly where carpenter ants establish a satellite nest.
What that does not cover
Three caveats, and they are the reason the rest of this guide exists. First, everything you add to the unit can reintroduce the risk: a timber deck, timber skirting, a timber bed frame, plywood storage boxes, cardboard cartons, paper-backed insulation offcuts and any fabric stored against a cold wall. Second, the unit is delivered folded and unfolded on site, which means there are moving joints, hinge pockets and a roof seam that are not the same as the static welded seams of a shipping container. Third, no building is sealed by default — it has a door, it has vents, it has services passing through it, and every one of those is a hole.
Seven Weak Points to Close
Inspect in this order, because it follows the routes pests actually use: ground level first, then the envelope, then the penetrations, then the roof.
1. The door threshold
The main door is the largest and most-used opening on the building, and the threshold is where it fails. A folding unit door closes against a raised sill, but the sill is rarely perfectly flat across its width after a season of settlement, and the bottom edge of the door leaf is rarely parallel to it. A 4 mm gap at one end is enough for a house mouse; 8 mm is enough for a young roof rat; and any gap at all admits ants, cockroaches and, in arid regions, scorpions. Fit an adjustable threshold closure or a brush-and-fin door sweep across the full width, set so the brush or fin just touches the sill along its whole length — not compressing hard, which makes the door stiff and wears the sweep, but touching everywhere.
2. Cable and pipe penetrations
Every electrical conduit, water pipe, condensate drain, air-conditioning line set and data cable that passes through the wall or floor is a hole that was cut on site, usually with a hole saw one size larger than the pipe. That annular gap is the single most common rodent entry point in a modern prefabricated building, and it is also a wasp and ant route. It is fixed in three stages, described in detail in the sealing section below, and it cannot be fixed with foam alone.
3. The floor-to-wall joint
Where the floor panel meets the wall panel there is a junction, and on the inside it is normally covered by a skirting or a trim. Behind the trim there is usually a continuous slot a few millimetres wide running the length of the wall. It is the perfect ant highway, it admits silverfish and cockroaches, and it is where a mouse will start to widen an entry. Seal the joint with a continuous bead of flexible sealant before the trim goes on, and treat any gap you can slide a 2 mm feeler into as open.
4. Ventilation openings
Bathroom and kitchen extract vents, a passive intake vent, a dryer vent, a combustion air intake and any underfloor ventilation grille are all open holes by design. They are the correct holes to have — you need them for moisture control, which is why they cannot simply be blocked — and they are the holes most often left unscreened. Every vent needs two layers: a robust outer layer that stops rodents, birds and snakes, and a fine inner layer that stops insects.
5. The gap under the base rail
A folding unit sits on its base rail, and depending on the pad type there is often a continuous gap of 20–80 mm between the underside of the rail and the ground or the top of the pier. That gap is the most attractive shelter on the site: dark, cool, dry, protected, and sized exactly for a rat, a snake, a toad or a scorpion. This is also the one weak point that is best dealt with at site-prep stage, because the finished ground level and the pad detail determine how big the gap is. Keep the finished ground 100–150 mm below the bottom rail so you can see daylight under the whole perimeter — if you can see through it, nothing is living in it — and close any section that is larger than 6 mm with perforated steel or welded mesh.
6. Eaves, roof seam and hinge pockets
The folded roof creates seam and hinge geometry that a static building does not have. Wasps build in the sheltered angle under an eave overhang within weeks, birds nest in any open hinge pocket, and in humid climates the seam is where ants and cockroaches travel. Close the open ends of hinge pockets with a formed cap or a mesh closure, keep the eave line inspected through spring, and treat any wasp nest as soon as it is the size of a walnut rather than a football.
7. Windows and their reveals
Window frames are usually well sealed to the panel, but the reveal closes against the frame with a trim that can leave a slot, and the weep holes at the bottom of a window frame are open by design. Fit insect screen on any opening window, seal the reveal perimeter, and leave weep holes functioning — blocking them causes a water problem, which is worse than the insect problem, so screen them rather than seal them.
Site Hygiene: Removing the Reason Pests Arrive
Sealing defeats the pest that arrives at the wall. Site hygiene stops it arriving at all, and it is the cheaper half of the job. Pests need three things: shelter, food and water. A tidy yard removes all three within a couple of metres of the building.
Vegetation clearance band
Keep a continuous mineral band of 1.0–1.5 m around the whole perimeter, finished as 20–40 mm angular gravel 50–75 mm deep over a compacted base and a geotextile separation layer. Nothing planted, nothing organic, no pots, no stored material. The band does four jobs at once: it removes shelter for rodents and insects immediately against the building, it removes the moist organic layer that termites and ants travel through, it lets you see the base rail and any fresh droppings or runs during a walk-around, and it eliminates splash-back staining on the lower wall. Beyond the band, keep grass below 100 mm and prune so no canopy touches the building anywhere — a branch in contact with the wall is a rodent bridge and an ant highway in one.
No woodpiles or mulch against steel
This is the rule most often broken, and it is the fastest way to undo the advantage of steel construction. Firewood, timber offcuts, plywood sheets, bark mulch, wood chips, compost, straw bales and stacked cardboard against or under the unit provide termite food, carpenter ant habitat, cockroach harbourage and rodent nesting material within a metre of your door. Store firewood at least 5 m from the building, raised 150–300 mm off the ground on a steel or concrete rack, stacked clear of the wall on all sides. Keep bark mulch out of the inner band entirely and, where termites are active, at least 300 mm clear of any timber deck board or skirting. Cut grass and weeds back so nothing touches the coated steel — constant contact holds moisture against the coating and gives ants a covered route up the wall.
Standing-water control for mosquitoes
Mosquitoes breed in about a week in any container holding water for more than four or five days, and a container does not have to be a pond — a folded tarpaulin hollow, a wheelbarrow, a blocked gutter section, a plant saucer, an empty bucket, a water butt without a lid, a tyre, or a low spot in the pad that holds a puddle after rain. Once a fortnight in the warm season, walk the site and tip out or drain anything holding water. Keep gutters and the roof clear so water does not stand along the roof seam, fit a fine insect screen to any tank inlet and overflow, keep the overflow discharging away from the building, and check any French drain or soakaway is draining rather than ponding. Where standing water cannot be drained — a low corner of a paddock, a drainage sump — it can be treated with a larvicide appropriate to local regulation, but drainage is always the better answer.
Garbage, food and compost storage
Garbage is the strongest attractant on any site and the one that pulls rodents in from outside the property boundary. Use bins with tight-fitting locking lids, keep them in a defined store rather than loose along the wall, wash them out when they are emptied, and keep the store on a hard surface at least 3–5 m from the unit. Compost is fine and useful, but site it 5–10 m out, turn it, keep it covered, and never put meat, dairy or cooked food in an open heap. Inside the unit, the rule is simple and it matters more than any trap: no food left open, crumbs cleared from the floor-wall joint, pet food not left down overnight, and dry goods decanted into sealed containers.
Physical Proofing: What to Use and Where
Stainless mesh on vents: two gauges, two jobs
One mesh cannot do both jobs, and using the wrong one is why screened vents still let pests through.
- Rodent, bird and snake barrier: stainless steel hardware cloth, aperture 6 mm or smaller, wire diameter at least 0.8 mm and preferably 1.0 mm. A house mouse passes any opening above about 6 mm; a young roof rat any opening above about 12 mm; a snake or a gecko needs far more, but 6 mm excludes essentially all of them. Use 316 stainless within about 10 km of the coast and 304 inland. Avoid galvanised wire mesh in coastal or permanently humid sites — it loses its coating in a few seasons at exactly the point where it is hardest to replace.
- Insect barrier: 18×16 or 20×20 mesh insect screen, aperture roughly 1.2 mm, in stainless or in a UV-stable fibreglass. That stops mosquitoes, flies, wasps, most ants and cockroaches while still passing air.
- Installation order: coarse stainless on the outside, fine insect screen on the inside of the same opening. The robust layer takes the weather, the impact and any attempt at gnawing, while the fine layer sits protected behind it.
- Fixing: fix with stainless self-tapping screws and a continuous stainless backing strip or a large-diameter washer, not with adhesive alone and not with plastic ties. Rodents push a poorly fixed screen out of the way; they do not push out a screen clamped between steel and a screw every 100 mm.
Door sweeps and weatherstripping
Fit three things to the main door. A threshold closure or sweep at the bottom: a brush type works well on an uneven sill because the bristles follow the profile, and a fin or blade type works better on a flat sill and gives a tighter seal against insects. Compression weatherstripping on the jambs and the head: a closed-cell foam or EPDM section in a carrier, compressed about 25–30% when the door is shut, which is enough to seal without making the door hard to latch. And a door bottom seal on the inside face as a second line where the climate is dusty or the site has scorpions. Check the whole assembly by closing the door on a strip of paper at eight points around the frame: if you can pull the paper out without resistance at any point, the seal is not doing its job there.
Sealing penetrations: backer rod, foam, then silicone
The three-stage method, in order, and the order matters:
- Back it. Push closed-cell backer rod or mineral wool into the annular gap to a depth of 25–40 mm. This gives the sealant a backing, controls the depth of the foam so it expands where you want it, and stops the whole assembly slumping out of a vertical penetration.
- Fill it. Low-expansion polyurethane foam, applied in one pass, in a gap no larger than the product is rated for. Use the low-expansion formulation around frames and penetrations — high-expansion foam generates enough pressure to distort a door frame or bow a trim. Let it cure fully, then trim flush with a sharp blade. Foam alone is not a pest barrier: mice, rats, ants and wasps all chew through it inside a season.
- Cap it. A bead of neutral-cure exterior silicone or a hybrid MS polymer sealant on the exterior face, tooled so it laps at least 10 mm onto the steel on both sides of the penetration. This cap is what makes the repair permanent. Silicone bonds well to coated steel, stays flexible across the full temperature range the building sees, and is not attractive to rodents. Choose a neutral-cure product: acetoxy-cure silicone releases acetic acid while curing and is not the right choice against metal.
For the floor-to-wall joint and any long linear gap, skip the foam and run a continuous bead of the same sealant, tooled into the joint rather than smeared over it. Expect to re-check every sealed joint once a year: sealant is a maintenance item, not a permanent fix.
Rodent-proof feed and pet-food storage
A folding unit used as a site office, a farm building, a glamping unit or a family home will at some point have animal feed or pet food in it, and both are the most attractive thing you can leave inside a sealed steel box — because once a rodent finds it, it will work at the building until it gets in. Store feed and pet food in containers with gasketed, clamping lids: heavy-gauge galvanised steel or food-grade HDPE with a locking ring, not a plastic tub with a push-on lid and not the original paper sack. Keep them off the floor on a steel rack, never against an external wall, and never leave food down overnight. Where feed is stored at scale, use a dedicated bin store rather than the interior of the unit — the best way to keep rodents out of the house is to give them nothing inside worth the trip.
Chimney and flue caps
Where the unit has a wood stove, a boiler flue or a range hood discharge, fit a cap with 6 mm stainless mesh on every termination. An uncapped flue is an open vertical shaft that birds, squirrels, rats and wasps find irresistible, and a blocked flue is a genuine safety hazard, not only a nuisance. Choose a cap that can be removed for sweeping, check it annually before the heating season, and make sure the mesh is stainless rather than galvanised — a galvanised cap sitting in hot flue gas fails quickly.
Comparison: Measures, Targets, Cost and Frequency
| Measure | Pest targeted | Cost tier | Inspection frequency |
|---|---|---|---|
| Door sweep and jamb weatherstripping | Mice, rats, cockroaches, ants, scorpions, wasps | Low: $25–$90 per door | Quarterly; replace every 2–3 years |
| Sealant bead at the floor-to-wall joint | Ants, cockroaches, silverfish, mice | Low: $15–$45 in materials | Annual re-seal check |
| Backer rod, foam and exterior silicone at penetrations | Mice, rats, wasps, ants, geckos | Low: $20–$65 per penetration | Annual; re-cap as needed |
| Stainless hardware cloth, 6 mm aperture, on vents | Rats, mice, birds, snakes, squirrels | Medium: $60–$190 fitted | Quarterly visual; clean twice a year |
| Insect screen, 18×16 mesh, on vents and windows | Mosquitoes, flies, cockroaches, ants | Medium: $120–$330 per unit | Quarterly; replace every 5–8 years |
| Perforated steel or 6 mm mesh closure under the base rail | Rats, mice, snakes, scorpions, toads | Medium: $150–$420 | Annual check after pad settlement |
| Stainless mesh cap on flue and chimney terminals | Birds, squirrels, rats, wasps | Medium: $80–$230 | Annual, before the heating season |
| Hinge pocket and eave closure caps | Wasps, birds, bats, squirrels | Low to medium: $80–$250 | Annual; inspect monthly through spring |
| Mineral gravel band, 1.0–1.5 m, over geotextile | Termites, ants, rodents, scorpions, snakes | Low to medium: $200–$750 | Monthly visual; regrade and top up annually |
| Locking-lidded bins in a defined hard-surfaced store | Rats, mice, flies, cockroaches | Medium: $60–$210 per bin | Weekly emptying and wash-out |
| Sealed steel or HDPE containers for feed and pet food | Mice, rats, ants, cockroaches | Low: $25–$80 each | Ongoing; check lid gasket annually |
| Standing-water elimination and gutter clearance | Mosquitoes | Low: $0–$150 | Fortnightly in the warm season |
| Tamper-resistant bait stations 3–5 m out | Rats, mice | Low: $40–$130 per year | Monthly in season; fortnightly if active |
| Vegetation cut back and canopies clear of the walls | Rodents, ants, termites, scorpions, wasps | Low: $0–$120 per year | Monthly in the growing season |
Read the table as a sequence rather than a menu. The four items under $100 — door sweeps, joint sealant, penetration sealing and vegetation control — do most of the work, and they are also the four most often skipped in the first month of occupancy when the building is new and everything still fits tightly. The mesh items are the ones worth doing properly the first time, because replacing a corroded screen inside a vent is far more work than fitting a stainless one at the start.
Regional Pests: What to Expect Where You Build
Termites in warm climates
Subterranean termites are active across most of the tropics, subtropics, Mediterranean and warm temperate zones, and they are the pest most buyers ask about first. The structural answer is already solved by the steel frame, so the practical work is about the accessories and the ground: keep the 1.0–1.5 m mineral band, keep every timber element — deck boards, steps, skirting, pergola posts — off the ground and clear of the steel, keep stored timber and cardboard away from the perimeter, and inspect the band visually each quarter for mud tubes running up a pier or a wall. Where a termite management system is required by local code or by a lender, it is installed in the ground around the pad, not in the building, and it needs to be compatible with the pad design. Drywood termites, which need no ground contact, are the exception: they can infest timber furniture and trim anywhere, which is another argument for keeping timber fit-out minimal and inspectable.
Mice and rats, everywhere
Rodents are the universal pest and the one that does real damage to a container home, because what they chew is not the structure — it is the cable insulation, the pipe lagging, the stored goods and the sealant. A house mouse needs a 6 mm gap, a roof rat about 12 mm, and both are persistent, good climbers and capable of gnawing through foam, thin plastic, aluminium flashing and soft mortar. The defence is exclusion at the seven weak points above, food control inside, and interception outside. Signs to recognise on a walk-around: droppings 3–8 mm long along a run, greasy smear marks at wall bases, gnaw marks on a sealed edge or a cable, a musky odour in a closed unit, and nesting material pulled into a gap under the base rail. Deal with the entry and the food, not only with the animal — trapping without sealing simply resets the population.
Cockroaches in humid climates
In tropical and subtropical regions and in any humid summer, cockroaches are the most common indoor complaint, and they arrive through door thresholds, floor-wall joints, unscreened vents and penetrations, and in cardboard boxes and appliances. They want warmth, a film of moisture, and a dark crevice a few millimetres high. The control is the same sealing work plus moisture control: fix any condensation problem, keep the floor-wall joint sealed, keep food sealed and surfaces dry, screen every vent, and keep vegetation and stored material off the walls. Because cockroaches harbour in the gap under the base rail and in any stacked material, the gravel band and the no-storage rule do more here than any spray. See our mould prevention guide for the humidity targets that also make the interior less attractive to them.
Scorpions and snakes in arid regions
Arid and semi-arid sites bring two risks that do not exist in temperate ones, and both concentrate under the building. Scorpions shelter in any dark gap during the day and hunt at night; snakes do the same, and both are drawn to the cool, protected void beneath a steel unit that has been standing in full sun. Check under the folded unit before and during setup: walk the perimeter in daylight with a torch, look into the gap under the base rail and into the hinge pockets, tap the underside of the frame with a stick rather than a hand, and check the folded roof cavity before the first panel is lifted. Keep the gravel band clear and the vegetation cut back so you can see the ground for a metre out on every side, keep the base rail gap closed with mesh or perforated steel, fit door sweeps so nothing slips under the door at night, and shake out shoes, gloves and bedding left on the floor. If you find a snake or a scorpion colony, stop work and call a licensed removal service rather than handling it.
Wasps nesting in eaves
Wasps build in the sheltered angle under an eave or inside an open hinge pocket, and a nest started in early spring can reach football size by late summer. Inspect the eave line, the roof seam and the open ends of hinge pockets monthly from the start of spring, and remove a nest while it is small — the size of a walnut — rather than waiting. Close the geometry afterwards with a formed cap or a mesh closure, because the same angle will be used again next year. Screen any vent opening before the season starts rather than after the first nest.
Maintenance Calendar
Quarterly walk-around, about 20 minutes
- Base rail and gravel band: walk the whole perimeter. Confirm you can see daylight under the rail everywhere, confirm no vegetation, stored material or debris has been placed against the wall, and look for fresh droppings, runs, mud tubes or pulled nesting material.
- Door seals: close the door on a strip of paper at eight points around the frame. Any point where the paper pulls out freely needs the sweep or the weatherstrip adjusted.
- Vents and screens: check every screen is present, undamaged, firmly fixed and clear of dust and insect debris. A blocked screen is a moisture problem as well as an airflow problem.
- Penetrations and joints: look at every sealant bead for cracking, shrinking or debonding from the steel. Mark anything that has lifted.
- Water: confirm gutters and the roof are clear, no low spot on the pad is holding water, and tank inlets and overflows are screened.
- Inside: check under the sink, behind the toilet and along the floor-wall joint for moisture, and confirm no food is stored open.
Annual re-seal check
Once a year, usually at the change of season, do the full pass. Re-tool or replace every cracked sealant bead at penetrations and at the floor-to-wall joint; re-cap any foam that has been exposed by weathering; replace worn door sweeps and flattened weatherstripping; re-tension or re-fix any vent screen that has come loose; re-check the base rail gap after a year of pad settlement, because settlement is when new gaps appear; clear and re-grade the gravel band and confirm the finished level is still 100–150 mm below the rail; and service the flue cap before the heating season. Sealant and rubber are consumables with a service life measured in years, and the annual pass is what turns a set of one-off repairs into a system.
Monitoring and bait stations, placed away from the house
Monitoring tells you about pressure before it becomes an infestation, and placement determines whether it helps or hurts. Put tamper-resistant bait stations and monitoring blocks 3–5 m out from the unit, along the routes rodents actually use: the outer edge of the gravel band, the base of a retaining structure, the line of service pipework and the path to the bin store. Secure each station so it cannot be dragged away, keep them clear of children, pets and non-target wildlife, and record what you find. Check monthly through the cool season and fortnightly once there is any sign of activity. Never place bait inside the unit or immediately at the base of the wall — that draws rodents toward the building and, worse, risks a rodent dying inside a sealed wall void or under the floor panel where you cannot reach it. The interior strategy is exclusion and food control; the exterior strategy is interception.
Delivery, Setup and the First Inspection
Pest control starts on delivery day, before the building is opened up. Prepare the ground first: shape the subgrade, lay the geotextile and the compacted base, and compact the gravel band and the access route in layers. The delivery vehicle and the lifting machine both need firm, level, load-bearing ground within reach of the pad, so the compaction of that band is structural work, not finishing work — loose stone will rut under the load and the machine cannot be positioned safely. Keep a 3.5–4 m wide route with about 4.5 m of overhead clearance, and keep the pad and the immediate perimeter clear of stacked material, timber, packaging and vegetation on the day, because all of it is harbourage.
Then the unit arrives and goes up quickly: Yes — a crane or forklift is required to offload the folded unit from the truck. Once it is set in position, four workers can unfold and assemble the main structure in about 2 hours. Before anyone reaches underneath, do the animal check described above, and repeat it after the first night if the unit has been standing folded on site. As soon as the structure is up and the services are connected, complete the seven weak-point seals — the penetrations are accessible at that moment and much harder to reach later — then fit the door sweeps, the vent screens and the flue cap, and only then bring furniture, food and stored goods inside. Cardboard, packing crates and timber pallets should be broken down and removed from the site rather than stacked beside the building.
Two related details are worth handling at the same time. Door and frame hardware is also your security line, and our door and window security guide covers the lock and glazing side of the same openings. And because the gravel band and the finished ground level at the perimeter do double duty as drainage and as pest exclusion, read our winterization guide for the seasonal sealing pass and our xeriscape landscaping guide for the band specification.
Planning a pest-resistant container home site?
HG Prefab, made by Henan Huangang Machinery Equipment Co., Ltd., builds 20FT, 30FT and 40FT folding expandable container houses that ship folded worldwide and unfold on a compacted, level pad. Send us your site dimensions, climate region and the pests you deal with locally, and we will confirm the base rail detail, the perimeter clearance, the vent screening and the model that suits your plan. Email hgmechequip@gmail.com or WhatsApp +86 191 0388 7380. Full range on the products page.
Browse modelsFrequently Asked Questions
Are folding container homes resistant to termites?
The primary structure is. A folding container home has no timber wall framing, no timber floor joists and no timber roof structure for subterranean termites or carpenter ants to attack, and the wall and roof panels are closed-cell sandwich panels with steel facings rather than a cavity filled with organic material. What remains vulnerable is everything you add: timber deck boards, timber skirting, timber furniture, paper-backed insulation offcuts, cardboard boxes stored against the wall, and any firewood or mulch stacked at the perimeter. Keep a 1.0–1.5 m mineral gravel band around the base, keep all timber elements at least 300 mm clear of the ground and of the steel, and never store cardboard or timber offcuts under the unit.
What size mesh keeps rodents and insects out of container home vents?
Use two different products, because one mesh cannot do both jobs. For rodents, birds and snakes use welded or woven stainless steel hardware cloth with an aperture of 6 mm or smaller and a wire diameter of at least 0.8 mm, ideally 1.0 mm. A house mouse passes through any opening larger than 6 mm and a young roof rat through anything larger than 12 mm, so 6 mm is the correct number. For insects, use 18 by 16 or 20 by 20 stainless or fibreglass insect screen with an aperture close to 1.2 mm, which stops mosquitoes, flies and most ants. Fit the fine insect screen on the inner face and the coarse rodent mesh on the outer face so the robust layer takes the impact and the fine layer stays undamaged.
How do I seal cable and pipe penetrations in a container home?
Work in three stages from the inside out. First, pack the annular gap around the cable or pipe with a closed-cell backer rod or mineral wool to a depth of 25–40 mm so the sealant has a backing and cannot slump out. Second, fill the remaining depth with low-expansion polyurethane foam rated for gaps of that size, applied in one pass and allowed to cure fully before trimming flush. Third, cap the exterior face with a bead of neutral-cure exterior silicone or a hybrid MS polymer sealant, tooled so it laps at least 10 mm onto the steel on both sides of the penetration. Foam alone is not a pest barrier: rodents, ants and wasps chew through it within a season. The sealant cap is what makes the repair permanent, and it needs re-checking once a year.
What should I check under a folded unit before unfolding it?
Check for animals before anyone reaches underneath. A folded unit that has stood on a pad or in a yard for days creates a cool, dark, sheltered void that scorpions, snakes, spiders, wasps, toads and rodents all use. Walk the whole perimeter in daylight with a torch, look into the gap under the base rail and into the hinge pockets, tap the underside of the frame with a stick rather than a hand, and check the folded roof cavity before the first panel is lifted. In arid regions this is the single highest-risk moment of the whole setup. Keep the gravel band clear, keep vegetation cut back to 1.0–1.5 m, and if you find a snake or a scorpion colony, stop and call a licensed removal service rather than handling it.
Where should I put rodent bait stations around a container home?
Put them outside the house and away from it, never inside and never at the base. Place tamper-resistant stations 3–5 m out from the unit along the runs rodents actually use, which are the edges of the gravel band, the base of any retaining structure, the route to the bin store and the line of any service pipework. Secure each station so it cannot be dragged off, keep them out of reach of children and pets, and check them monthly through the cool season and fortnightly after any sign of activity. Baiting at the house itself draws rodents toward the building; the objective is to intercept them on the approach and to keep the interior dry, sealed and unattractive so there is nothing to stay for.
Talk to HG Prefab
Henan Huangang Machinery Equipment Co., Ltd. (HG Prefab) manufactures folding expandable container homes in 20FT, 30FT and 40FT sizes and ships them folded worldwide. Factory prices are 20FT $7,200–$9,800, 30FT $10,500–$14,500 and 40FT $12,500–$16,500. For pest and site planning, send us your site dimensions, your climate region, your annual rainfall and which pests are active locally — those four facts determine the base rail detail, the perimeter band, the vent screening specification and the sealant schedule.
Email hgmechequip@gmail.com or message us on WhatsApp at +86 191 0388 7380. You can also browse the full range at products.html or request a quotation at contact.html.