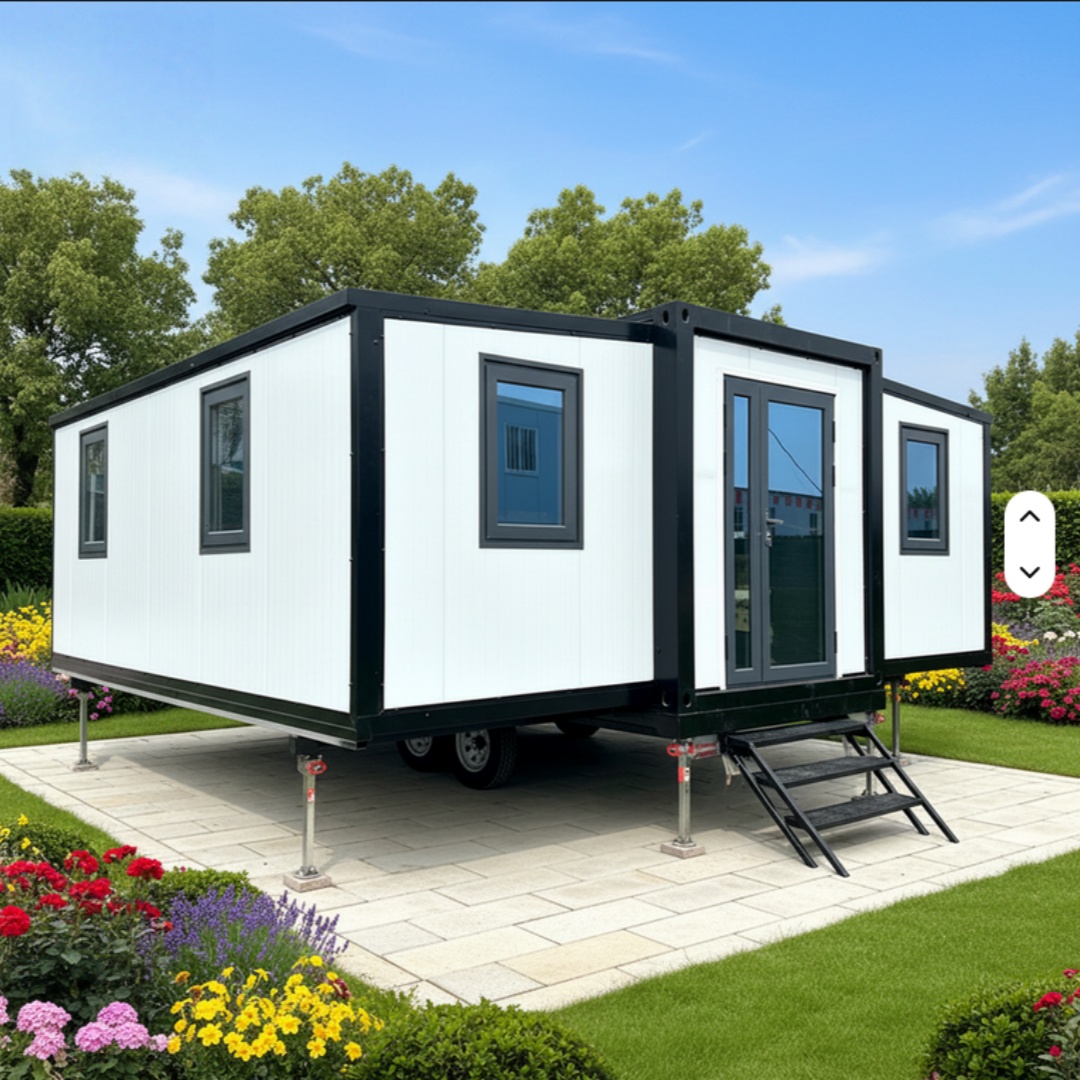
HG Prefab foldable expandable container homes — built to last, delivered worldwide.
A folding container home is a relocatable steel building sitting on a pad, and the two or three metres of ground immediately around it decide how long that building stays dry, clean and level. Most buyers spend their landscaping budget on the view side of the yard and treat the perimeter as an afterthought, which is backwards: the perimeter is where drainage fails, where splash-back stains the lower wall, where irrigation overspray rusts the skirt, and where the ground has to be firm enough to carry a delivery truck and the crane that offloads it.
Xeriscaping solves all of those problems at once, and it happens to be the cheapest landscape to own. This guide goes through the whole perimeter system in the order you would build it: grading and drainage first, then the bands of groundcover moving outward, then plant selection, turf replacement, irrigation design, mulch and hardscape, the water-saving connections to rainwater and greywater, the wildfire variant, tree placement for shading, the establishment schedule that makes drought-tolerant plants actually survive, a maintenance calendar and finally what the whole thing costs. It sits alongside our site prep checklist, our foundation comparison and our desert climate guide, because the ground plane and the substructure are one design problem, not two.
What Xeriscape Actually Means
Xeriscape is not "a yard of gravel and cacti". It is a seven-principle method for producing a landscape that performs on the rainfall a site receives, plus a modest supplement during establishment. The principles, in the order they should be applied:
- Planning and design. Draw the yard as zones of water use before you buy a single plant. The highest-water-use area should be the smallest, and it should be the one nearest the door where you actually see it.
- Soil improvement. Most drought-tolerant species fail on compacted subsoil, not on lack of water. Incorporate 30–50 mm of compost into the top 150–200 mm of planting beds and, on heavy clay, add coarse sand or fine gravel to open the structure. Improving soil once costs far less than irrigating badly for a decade.
- Efficient irrigation. Drip, not spray. Drip delivers water to the root zone at 2–8 litres per hour and loses almost nothing to wind or evaporation, where a spray head loses a large share before it reaches the soil.
- Turf reduction. Turf is the single largest water load in almost every residential yard. Reducing it to a small, genuinely useful rectangle is the highest-value change most owners can make.
- Appropriate plant selection. Match the plant to the climate, the soil and the microclimate — and around a steel unit, the microclimate is hotter than the regional average.
- Mulch. A surface layer cuts evaporation dramatically. Around a container home, that layer is mineral in the inner band and organic further out.
- Maintenance. Low water does not mean no work. It means different work: less mowing and watering, more pruning, weeding and irrigation inspection.
Why it matters more around a relocatable steel home
Four things make the ground around a folding unit different from the ground around a conventional house. First, the roof catchment is small and usually not plumbed to a tank, so almost no rainfall is captured and directed — what falls either runs off the pad or soaks in where it lands. Second, the steel skin creates a genuinely hot microclimate: a dark wall in full summer sun can reach 60–70 °C, and the radiated and reflected heat raises the air temperature immediately beside it by several degrees and pushes the surface soil temperature well above ambient, so the planting in that band has to tolerate conditions the regional climate data does not describe. Third, the pad and the skirt need protection: standing water at the base, damp soil stacked against the bottom rail and irrigation spray against the coated steel are the three fastest ways to shorten the life of the unit. Fourth, the whole assembly is designed to be moved, so the ground immediately around it has to remain a clean, load-bearing, serviceable surface rather than a permanent built garden.
Section 1: Why the Ground Around the Unit Matters
Drainage away from the base
Water is the enemy of any pad. The working rule is a minimum 2% fall away from the unit for the first 3 m, which is a 60 mm drop over 3 m — enough to move surface water off without looking like a slope. Where the site is flat, build that fall by shaping the pad slightly high rather than by excavating a channel right at the base, which would collect water instead of shedding it.
The three failures to design against:
- Ponding at the skirt. Any hollow within 1.5 m of the base will hold water after a storm and keep the bottom rail permanently damp. Fill and regrade before you plant anything.
- Concentrated roof discharge. A folding unit sheds a surprising volume off a flat-ish roof in a downpour. Fit a downpipe or a chained discharge point and carry it at least 2 m from the base on a solid splash pad, or route it into a gravel-filled infiltration pit. Never let it dump onto bare soil at the perimeter.
- Upslope run-on. If ground behind the unit is higher, intercept that water before it arrives. A shallow swale 2–3 m upslope, graded at 1–2% along its length, carries it around the building to a discharge point.
Where a swale cannot be routed away — a flat site, a pad cut into a slope — use a French drain: a 150–200 mm wide trench, 300–600 mm deep, lined with geotextile, filled with 20–40 mm angular stone and containing a slotted pipe with a continuous 1% fall to a daylight outlet or a soakaway. Keep it at least 1 m clear of the pad edge so it never undermines the bearing soil.
Keeping soil off the steel skirt
The bottom rail and the lower 300–500 mm of wall are the most vulnerable parts of the unit. Soil stacked against coated steel holds moisture, holds salts and, in some soils, holds organic acids. Keep a clear air gap: the finished ground level at the perimeter should sit 100–150 mm below the bottom rail, and nothing organic should ever be placed against it. That is the whole reason the first band of the yard is mineral rather than planted.
Splash-back staining
On bare soil, a heavy rain bounces off the ground and throws mud up onto the lower wall. Over a season that leaves a tide mark that is difficult to remove and, worse, keeps a film of wet, mineral-laden soil sitting against the coating. A 50–75 mm layer of angular gravel eliminates splash-back entirely, because the stone breaks the droplet energy. This is the cheapest corrosion-protection measure on the entire site.
Heat reflection off the walls
Measure the soil surface temperature 300 mm out from a dark south- or west-facing wall on a summer afternoon and it will routinely run 8–15 °C above the soil temperature in open ground two metres away. Reflected radiation also scorches foliage. The practical consequences: choose heat-tolerant species for that inner transition band, expect to water it slightly more than the same species planted in open ground, and use the wall itself as a shading opportunity rather than only as a problem — which is the subject of the tree and trellis section below.
Section 2: The Zone Plan — Layering Around the House
Design outward in three bands rather than as one uniform yard. The band boundaries follow the physics: how close is it to the steel, how much reflected heat does it get, and how much water are you willing to spend there.
Band 1: 0–1.5 m, the gravel drip-line band
- Surface: angular crushed stone, 20–40 mm, laid 50–75 mm deep. Angular stone locks together and stays put; rounded pea gravel rolls underfoot and migrates.
- Structure: geotextile over the shaped subgrade, then 50–75 mm of compacted road base or crusher run beneath the decorative stone, compacted in two layers. This is what makes the band load-bearing.
- Clearance: finished gravel surface 100–150 mm below the bottom rail, with a continuous gap so you can see daylight under the skirt.
- Irrigation: none in the first 600 mm. No spray heads anywhere in the band. Any emitter serving the transition zone sits at the outer edge of the band, discharging outward.
- No organic mulch. No bark, no chips, no compost, no planting pockets. This band is a service strip and a termite inspection strip, not a border.
Band 2: 1.5–4 m, the transition
This is the designed part of the garden: the one visitors walk past and the one that takes the reflected heat. Use Mediterranean and arid shrubs, ornamental grasses and groundcovers on drip, mulched with 50–75 mm of coarse wood chips or, in fire-prone regions, with more gravel. Plant in drifts of three to seven of a single species rather than one-of-everything, which reads as a collection rather than a landscape and costs more to irrigate because every plant wants a different schedule.
Band 3: 4 m and beyond, native and meadow
Once established, this band should need no irrigation at all in a Mediterranean or temperate climate and only a monthly summer soak in a true desert climate. Sow or plug native grass and forb mixes at the regional recommended rate, mow once a year in late winter, and accept that it looks dormant through the dry season — that is what a meadow does. This is where rainwater should be directed: the roof discharge and any upslope run-on should end up here, not at the foundation.
Section 3: Plant Selection by Climate
The table below lists species that have proven themselves in low-water landscapes and, critically, notes how aggressive each root system is near a foundation or pad edge. Heights are mature heights in a typical garden; in a hotter microclimate expect roughly 10–20% less.
| Plant | Climate | Water need once established | Mature height | Root behaviour near base | Maintenance | Wildlife value |
|---|---|---|---|---|---|---|
| Lavandula angustifolia (English lavender) | Mediterranean, temperate | Very low: monthly deep soak | 0.6–0.9 m | Non-aggressive fibrous; safe at 1.2 m | Shear after flowering; replace every 8–10 years | Very high for bees |
| Salvia rosmarinus (rosemary) | Mediterranean, arid | Very low | 1.0–1.5 m | Non-aggressive; safe at 1.5 m | Light annual prune | Very high for bees |
| Salvia greggii (autumn sage) | Arid, hot-humid | Low | 0.6–1.0 m | Non-aggressive; safe at 1.0 m | Cut back hard each spring | High: bees and hummingbirds |
| Salvia yangii (Russian sage) | Temperate, arid | Low | 1.0–1.5 m | Moderate, spreads by rhizome; keep 2 m clear | Cut to 150 mm in late winter | Very high for bees |
| Bouteloua gracilis (blue grama) | Arid, temperate | Very low: rain-fed | 0.3–0.5 m | Fine fibrous, entirely safe | Mow or burn every 2–3 years | Seed for small birds |
| Muhlenbergia reverchonii (seep muhly) | Arid, temperate | Low | 0.6–0.9 m | Fibrous, safe at 0.8 m | Comb or cut back annually | Moderate: nesting cover |
| Muhlenbergia capillaris (pink muhly) | Hot-humid, temperate | Low | 0.9–1.2 m | Fibrous, safe at 1.0 m | Cut back in late winter | Moderate: seed and cover |
| Agave parryi (Parry's agave) | Arid | Extremely low | 0.6–0.9 m | Shallow fibrous; safe at 1.0 m | Remove dead leaves only | Low, but nectar when flowering |
| Yucca filamentosa (Adam's needle) | Arid, temperate | Extremely low | 0.9–1.8 m in flower | Deep but non-spreading; safe at 1.5 m | Remove spent flower spikes | Moderate; night moth pollinated |
| Phlomis fruticosa (Jerusalem sage) | Mediterranean | Low | 0.9–1.2 m | Moderate woody root; keep 1.5 m clear | Cut back by a third after flowering | Very high for bees |
| Cistus × purpureus (rockrose) | Mediterranean, arid | Very low | 0.9–1.2 m | Moderate; keep 1.5 m clear | Tip-prune only; dislikes hard cutting | Moderate for pollinators |
| Teucrium fruticans (shrubby germander) | Mediterranean, hot-humid | Low | 1.2–1.8 m | Moderate; keep 2 m clear | Clip to shape twice a year | High for bees |
| Santolina chamaecyparissus (cotton lavender) | Mediterranean | Very low | 0.5–0.7 m | Non-aggressive; safe at 0.8 m | Shear in early spring | Low to moderate |
| Bulbine frutescens (stalked bulbine) | Arid, hot-humid | Very low | 0.4–0.6 m | Fleshy fibrous; safe at 0.6 m | Divide every 3–4 years | High for small bees |
| Westringia fruticosa (coastal rosemary) | Hot-humid, Mediterranean | Low | 1.0–1.5 m | Non-aggressive; safe at 1.5 m | Light clip after flowering | High for bees |
| Lomandra longifolia (spiny-headed mat-rush) | Hot-humid, temperate | Low | 0.6–1.0 m | Dense fibrous, stabilising; safe at 0.8 m | Cut back every 3–5 years | Moderate: shelter for small birds |
| Dianella revoluta (blue flax lily) | Hot-humid, temperate | Low to moderate | 0.6–0.9 m | Rhizomatous but shallow; safe at 1.0 m | Divide clumps every 4 years | Moderate: berries for birds |
| Echinacea purpurea (purple coneflower) | Temperate | Moderate: fortnightly in drought | 0.6–1.0 m | Taproot, non-spreading; safe at 0.8 m | Deadhead or leave seed heads | Very high: birds and butterflies |
| Rudbeckia fulgida (orange coneflower) | Temperate | Moderate | 0.5–0.8 m | Fibrous with short rhizomes; safe at 0.8 m | Divide every 3 years | High: late-season nectar |
| Panicum virgatum (switchgrass) | Temperate, hot-humid | Low to moderate | 1.2–1.8 m | Deep fibrous, entirely safe | Cut to 150 mm in late winter | High: nesting and seed |
Two rules cut across the whole table. Plant anything with a moderate or aggressive root note no closer than 1.5–2 m to the pad edge regardless of how small it looks in the pot, because the note describes the mature plant. And never put a species that needs constant moisture in the inner two bands: if a plant needs weekly water forever, it does not belong next to a steel base, and you will either kill it or damage the unit.
Section 4: Turf Alternatives and What They Actually Save
Turf is the load to attack first. Measured outdoor water use per square metre per year in a hot summer climate:
- Cool-season turf (fescue, rye): 900–1,400 litres per m² per year, mown 25–35 times.
- Warm-season turf (bermuda, zoysia): 700–1,000 litres per m² per year, mown 20–30 times.
- Buchloe dactyloides (buffalo grass): 250–400 litres per m² per year, mown 4–8 times, dormant and straw-coloured in winter.
- Trifolium repens (clover lawn): 300–500 litres per m² per year, mown 6–12 times, fixes its own nitrogen and stays green through moderate drought.
- Thymus serpyllum (creeping thyme): 250–450 litres per m² per year, cut once a year, tolerates light foot traffic and smells extraordinary when walked on.
- Native grass and forb meadow mix: 150–300 litres per m² per year, cut once annually, no fertiliser ever.
- Gravel, decomposed granite or paving: 0–50 litres per m² per year, and zero mowing.
Do the arithmetic on a 100 m² yard. Sixty square metres of cool-season turf plus forty square metres of beds is roughly 70,000–95,000 litres per year. Replace the turf with a clover and thyme matrix on drip and the same yard drops to roughly 22,000–32,000 litres per year. At a delivered-water price of $0.02 per litre that is $900–$1,600 a year, which on a ten-year horizon is more than the difference between a low and a medium landscaping budget.
Choose by use, not only by water. Buffalo grass and meadow mixes take real foot traffic badly and go dormant; clover and thyme take light traffic but not a children's play area; if you need a genuine lawn, keep it, shrink it to 20–30 m² within 4 m of the door where you see and use it, and convert everything else.
Section 5: Drip Irrigation Design
Components and sizing
A perimeter drip system has six parts, and skipping any one of them is why cheap installations fail:
- Backflow prevention and isolation. A valve and, wherever the supply is potable, an approved backflow device. Non-negotiable.
- Filter. A 120–200 mesh screen filter or a disc filter, because a 2 litre-per-hour emitter orifice is smaller than almost any sediment particle in a tank or a well supply. Clean it monthly in the first season.
- Pressure regulator. Drip line and emitters are designed for about 1.0–1.5 bar (15–22 psi). Mains pressure of 4–5 bar will blow emitters off the tubing. Regulate to 1.0–1.4 bar at the zone valve.
- Distribution tubing. 16 mm or 17 mm polyethylene lateral, with 4 mm micro-tube or inline emitter line to the plants.
- Emitters. The three rates that cover almost everything: 2 L/h for small perennials, groundcovers and clay soil; 4 L/h for medium shrubs and loam; 8 L/h for large shrubs, specimen plants and sandy soil where water moves fast.
- Controller, rain sensor and, ideally, a flow sensor. A controller with at least two independent programs (establishment and mature), a rain or soil-moisture sensor that suspends the cycle, and a master valve.
Emitter spacing and per-plant volumes
- Fine sandy soil: water moves down fast and sideways slowly. Use 4–8 L/h emitters spaced 30 cm apart and run shorter, more frequent cycles.
- Loam: the easy case. 2–4 L/h emitters spaced 30–45 cm.
- Heavy clay: water moves sideways more than down and runs off if applied fast. Use 2 L/h emitters spaced 45–60 cm and cycle-and-soak: run, wait 30–60 minutes, run again.
- Per plant: two emitters for anything with a mature spread over 0.8 m, three for a large shrub, and a ring of four to six at the dripline for a specimen. Never a single emitter at the stem — that produces one wet spot and one dry root ball.
Zone by plant type, not by geometry
Group plants with the same water need on the same valve, even if that means a zone snakes across the yard. A typical three-zone layout for a folding unit: Zone 1 transition shrubs and grasses (Mediterranean, low water); Zone 2 any intentional higher-use area near the door, plus the meadow plugs in their first season; Zone 3 trees, on their own infrequent deep-soak cycle. The gravel band has no zone at all, which is the point.
Seasonal scheduling
| Season | Frequency (mature planting) | Run time per cycle | Approximate litres per m² per month | Notes |
|---|---|---|---|---|
| Early spring | Every 10–14 days | 40–60 min per zone | 10–18 | Soil still cool; deep, infrequent soaking encourages roots to go down |
| Late spring | Every 7–10 days | 50–70 min | 20–32 | Demand rising; start before the first heatwave, not during it |
| Peak summer | Every 5–7 days | 60–90 min | 35–55 | Water at dawn to cut evaporative loss; reflected heat off the wall adds roughly 10–20% demand in the transition band |
| Early autumn | Every 10–14 days | 50–70 min | 20–30 | Still hot, days shortening; this is the best planting window |
| Late autumn | Every 21–30 days | 40–60 min | 8–15 | Taper down so plants harden off before any frost |
| Winter (Mediterranean) | Off, unless a dry spell exceeds 4–6 weeks | 30–45 min as needed | 0–8 | Rain sensor should have the system suspended most weeks |
| Winter (freezing) | Off; drain the system | — | 0 | Blow out or drain the lateral line at the low point before the first freeze |
Water budget and savings
Build the budget from emitters, not from guesswork. Forty emitters at 4 L/h running 60 minutes is 160 litres per cycle; three cycles a week is about 480 litres a week in peak summer, or roughly 2,000 litres a month for a transition band of 40–50 m². That is 40–50 litres per m² in the hottest month, against 90–120 litres per m² for a spray-irrigated shrub bed of the same size — the 40–60% saving that drip delivers over spray, which comes from eliminating wind drift, leaf-surface evaporation and runoff on crusted soil rather than from any magic in the tubing.
Section 6: Mulch and Groundcover
Three options, each with a correct place:
- Gravel and crushed stone, 50–75 mm deep. The only correct choice in the 0–1.5 m band and in any fire-prone region. Does not hold moisture against anything, does not decompose, does not feed termites, and is load-bearing when compacted over a base. Downsides: it radiates heat, it is hostile to seedlings you may want, and leaves and dust eventually fill the voids and need blowing or raking out every year or two.
- Coarse wood chips, 50–100 mm deep. The best performer for soil moisture and soil biology in the transition band, and the cheapest where arborist chips are available free. Rules: keep it 100–150 mm off any stem collar, keep it at least 300–450 mm clear of any timber deck board, door threshold or skirting, and renew it every 18–24 months as it decomposes. Never place it against steel.
- Living groundcover. Creeping thyme, Dichondra, native sedges or a low creeping manzanita, planted at 4–8 plants per m². It suppresses weeds, cools the soil surface and needs no renewal, but it needs water for its first season and it will not take foot traffic. Best used in the outer transition and the meadow edge.
Termite and fire considerations push in the same direction. Where termites are active — which includes most warm temperate, Mediterranean, subtropical and tropical regions — keep all organic mulch at least 300 mm clear of every timber element and treat the gravel band as a permanent, visible inspection strip. Where fire is a risk, use mineral mulch everywhere within 5 m of the unit and keep wood chips out entirely. See our wildfire safety guide for the full defensible-space specification.
Section 7: Hardscape
Paths and patios
Decomposed granite is the workhorse: 50–75 mm of stabilised DG over a compacted base, contained by steel, stone or concrete edging, at roughly $25–$55 per m². It drains, it is cheap, it looks right next to a steel building, and it can be regraded and recompacted. Add a resin or binder stabiliser where the path takes regular traffic or sits on any slope.
Permeable pavers are the upgrade: concrete or clay pavers on an open-graded aggregate base with no fines, jointed with 5–10 mm angular chip. Water infiltrates through the joints, so a patio beside the unit does not become a runoff source that drains toward the pad. Budget $70–$140 per m² installed. Slope the finished surface 1.5–2% away from the building and hold the paver edge 150–200 mm below the bottom rail.
For the patio immediately adjacent to the folding unit, three details matter more than the material: an expansion joint or a flexible edge against the pad so the two structures move independently; a continuous fall away from the base; and a removable or open edge on at least one side so the skirt can be inspected and the gravel band topped up without lifting paving. A patio is permanent; the house is designed to be relocatable, and the detailing has to respect that.
Sloped pads, steps and retaining
On a sloping site, break the level change into steps rather than one long ramp, and keep every step and every retaining structure at least 1 m clear of the pad so their footings and their drainage do not interact with the pad edge. Where a retaining wall is unavoidable upslope, put a drained gravel backfill behind it and a clean-out at the base, and carry the intercepted water around the building. Our sloped terrain guide covers the structural side; the landscape rule is simply that water must always be able to get past the house without touching it.
Section 8: Rainwater and Greywater Link-Up
A xeriscape and a rainwater tank are the same project. The roof of a 20FT, 30FT or 40FT folding unit is a clean catchment of roughly 18, 28 or 38 m² respectively, and a modest 400–600 mm of annual rainfall on the largest of those yields 15,000 litres before any losses — enough to carry the whole landscape through a dry season in most climates. Fit a first-flush diverter of 20–40 litres, a leaf screen at the downpipe, and route the overflow to the outer meadow band rather than to the perimeter. Our rainwater harvesting guide covers tank sizing, filtration and pump selection in detail, and our greywater and composting guide covers the second stream.
Greywater from the shower and basin — typically 30–60 litres per person per day — is a good match for the meadow band and for fruit trees in the outer zone, provided it is used within 24 hours, discharged below the surface through a mulch-filled basin, and kept at least 3 m from the pad. Never discharge it into the gravel band and never uphill of the unit. Kitchen and toilet waste must go to a sealed system, not to a landscape.
Tank placement interacts with the landscape twice: the tank base needs the same compacted, level, load-bearing ground as the crane access route, and the tank should be sited upslope of the planted area where the terrain allows so gravity contributes head. Keep it shaded by the tree canopy you are planting anyway — sunlight through a translucent tank grows algae within weeks.
Section 9: The Wildfire-Defensible Version
In fire-prone regions the same zone plan becomes a defensible-space plan, and the changes are small but absolute. Within 0–1.5 m: bare mineral ground or non-combustible gravel, no wood mulch, no timber edging, no stored firewood, no stacked planters. Within 1.5–5 m: only low-growing, high-moisture-content, low-resin species, irrigated through the fire season, pruned so no plant touches another and none touches the building. Within 5–10 m: thin and prune so canopies are separated, remove ladder fuels, and keep grass below 100 mm. Avoid highly resinous species entirely — juniper, cypress, rosemary in dense masses, most Eucalyptus — within the inner 10 m. The full specification, including roof and vent ember protection, is in our wildfire safety guide.
Section 10: Tree Placement and Shading the Unit
A steel box in sun is a heat problem, and the cheapest cooling measure available is a tree. Shading the wall and roof on the hot side — the west and south in the northern hemisphere, the north and west in the southern — reduces solar gain enough to cut the cooling load by a realistic 20–30% once the canopy is mature, and a deciduous tree gives that in summer while allowing winter sun through. Planting two or three trees on the afternoon side is a genuine energy measure, not decoration.
Rules for doing it safely:
- Distance: keep every tree 3–5 m from the base of the unit and from the pad edge. Closer than that risks root pressure on the pad and, for aggressive species, real structural damage.
- Species: choose moderate-rooted, drought-tolerant trees suited to your climate — a small ornamental pear or a honey locust, a desert willow in arid regions, a pistache or a small-leaved acacia in Mediterranean and hot climates. Avoid the aggressive list in the FAQ below without exception.
- Canopy: plant for canopy height above the roofline at maturity so the tree shades the roof rather than pressing against the wall, and prune to lift the crown clear of the eaves by at least 1 m.
- Position: on the hot afternoon side, offset far enough that the canopy reaches the wall at maturity without the trunk ever being close.
- Irrigation: trees get their own zone and their own deep, infrequent cycle. A tree watered lightly and often develops shallow roots and becomes a hazard instead of an asset.
Section 11: Establishment vs Mature Irrigation
This is the part most low-water landscapes get wrong. Drought tolerance is a property of a mature, deep-rooted plant; a two-litre pot plant has neither.
Year 1
- Weeks 1–2: water at planting, then every 2–3 days. 8–12 litres per shrub, 4–6 litres per grass plug, 20–40 litres per tree.
- Weeks 3–12: twice a week. 12–20 litres per shrub, 30–60 litres per tree.
- Months 4–12: once a week through the warm season, tapering to fortnightly as temperatures fall.
- Budget: roughly 400–700 litres per m² of planted bed for year one. That is a lot — about half of what turf would use — and it is temporary.
Year 2
- Every 10–14 days in the warm season, nothing in the wet season.
- Increase per-visit volumes and reduce frequency, which is what drives roots deeper: 20–35 litres per shrub per visit.
- Budget: roughly 200–350 litres per m².
Year 3 and beyond
- Mediterranean and arid species: a monthly deep soak through the hottest month, nothing otherwise, plus one or two emergency irrigations in an exceptional drought year.
- Temperate species: fortnightly through a dry summer.
- Budget: 150–300 litres per m², and near zero in a wet year.
The mistake to avoid is tapering too early in year two because the plants "look fine". Fine in September after a wet August is not fine in the following July. Taper on the calendar, not on appearances.
Section 12: Maintenance Calendar
- January: prune dormant deciduous shrubs and grasses; check the gravel band has not silted up after winter rain; inspect and clean the filter.
- February: top up gravel where it has migrated; order plants for the autumn planting window; service the controller and replace batteries in the rain sensor.
- March: apply 30–50 mm of compost to beds, not to the gravel band; shear lavender and santolina; check emitter output at the far end of each zone.
- April: step irrigation up to the late-spring schedule; spot-treat weeds before they set seed; check the drainage swales are clear.
- May: plant warm-season groundcovers; mulch beds to 50–75 mm; verify every zone valve and flush the lateral lines.
- June: switch to the peak-summer schedule; deep-soak trees monthly; deadhead salvias and coneflowers to extend flowering.
- July: inspect weekly for blocked emitters and chewed tubing; blow or rake leaves out of the gravel; check for ponding at the skirt after any storm.
- August: minimum-intervention month; water at dawn; do not prune or fertilise in heat.
- September: reduce frequency; plant new shrubs — this is the best window in most climates; divide overcrowded perennials.
- October: sow meadow seed or plant plugs; cut meadow grass to 100–150 mm if required; last deep soak before leaf fall.
- November: taper hard; clear leaves from the gravel band and from the swales; in freezing climates, drain the drip system and open the low-point valve.
- December: structural pruning of trees while dormant and visible; check the finished ground level is still 100–150 mm below the bottom rail after a season of settlement; confirm the access route is still firm and level.
Section 13: What It Costs
Unit rates
| Item | DIY material cost | Installed by contractor | Notes |
|---|---|---|---|
| Geotextile and separation layer | $1–$3 per m² | $3–$6 per m² | Use a non-woven, UV-stable product; cheap landscape fabric silts up in two years |
| Compacted road base, 50–75 mm | $4–$10 per m² | $10–$18 per m² | Compacted in two layers; this is what makes the band load-bearing |
| Decorative angular gravel, 50–75 mm | $8–$18 per m² | $18–$32 per m² | Buy in bulk by the tonne, not in bags — bags cost three to four times more per litre |
| Decomposed granite path, stabilised | $14–$28 per m² | $25–$55 per m² | Add edging; unstabilised DG migrates on any slope |
| Permeable pavers on open-graded base | $40–$80 per m² | $70–$140 per m² | Correct base preparation is most of the cost and all of the performance |
| Soil amendment, compost and incorporation | $4–$10 per m² | $10–$20 per m² | Once, before planting; the highest-return item on the list |
| Shrubs and perennials, 2–5 litre pots | $12–$35 per m² planted | $30–$70 per m² | At roughly one plant per 1–1.5 m²; smaller pots establish faster than large ones |
| Mature specimen tree, 3–4 m | $180–$600 each | $350–$1,100 each | Includes stake, tie and the first season's deep-soak watering |
| Drip kit for 100 m², controller included | $350–$900 | $1,200–$2,600 | Filter, regulator, valves, 150 m lateral, 120 emitters, controller, rain sensor |
A 100 m² yard, three ways
Assuming 30 m² of gravel band and access, 35 m² of planted transition, 25 m² of path and patio, and 10 m² of meadow:
- Low, fully DIY — $1,800–$3,500. Gravel over geotextile on a hand-compacted base, decomposed granite paths, plants bought as small pots and plugs, a basic hose-end timer and no automated drip. Labour is your own, roughly 60–100 hours spread over two seasons. Expect to replace the timer with a proper controller in year three.
- Medium, DIY surfaces with a contractor-installed irrigation system — $4,500–$8,500. Gravel and DG as above, professionally designed and installed drip with a controller, filter and regulator, two specimen trees, and a proper plant palette at 2–5 litre size. This is the sweet spot for most owners: the irrigation is the one item where professional design pays for itself, and everything else is honest labour.
- High, full design-and-build — $11,000–$20,000. Designed planting plan, permeable pavers on an engineered base, specimen trees, lighting, an automated controller with a flow sensor and soil-moisture input, and grading done by machine. Justified where the site has real drainage problems, where the slope needs retaining, or where the landscape is part of a rental or hospitality offer.
For scale against the building itself: factory prices are 20FT $7,200–$9,800; 30FT $10,500–$14,500; 40FT $12,500–$16,500. A medium-specification landscape is therefore roughly a third to a half of the cost of the unit — worth designing at the same time rather than afterwards, because the grading, the drainage and the load-bearing access route all have to be built before the truck arrives.
Section 14: Mistakes to Avoid
- Paving or mulching right up to the base. Keep 100–150 mm of visible clearance below the bottom rail and a mineral band of at least 1.0–1.5 m. Organic material against steel is the single most common perimeter error.
- Spray irrigation near the unit. Overspray keeps the skirt wet and deposits minerals on the coating. Drip only, and no emitter within 600 mm of the base.
- Grading toward the house. A 2% fall for 3 m is the minimum. If it is not there, build it before you plant.
- Loose rounded gravel on the access route. The delivery truck and the crane that offloads it need firm, compacted, level ground. Angular stone over a compacted base, compacted in layers — not pea gravel, not bark, not fresh topsoil.
- Planting for the pot, not the plant. A 0.3 m shrub with a 2 m mature spread and moderate roots goes 1.5–2 m out, not 0.5 m.
- Tapering irrigation too early. Follow the two-year schedule on the calendar, not on how healthy the plants look in spring.
- Skipping the filter and the pressure regulator. Both are cheap; both prevent the failure that makes people conclude drip "does not work".
- One emitter per plant. Use two or three at the dripline, or the root ball dries unevenly and the plant leans.
- Mixing water needs on one zone. A Mediterranean shrub and a temperate perennial on the same valve means one is overwatered and the other is stressed.
- Wood mulch against timber elements. Keep 300–450 mm clear of every deck board, threshold and skirting board where termites are active.
- Planting aggressive-rooted trees too close. 3–5 m minimum from the base, and never a willow, poplar, fig or running bamboo anywhere near the pad.
- Covering the gravel band with pots and planters. The band is a drainage, inspection and service strip. Keep it clear and visible.
- Ignoring the splash-back. Bare soil at the perimeter throws mud onto the lower wall every storm. Gravel fixes it for a few hundred dollars.
- Landscaping before delivery. Do the grading, the drainage, the compacted gravel band and the access route first. Plant after the unit is standing and unfolded.
Delivery Day and the Landscape Sequence
The order matters, because half the landscape has to exist before the truck and the other half cannot be installed until the truck has left. Build first: shape the subgrade, install any French drain or swale, lay the geotextile and the compacted base, and compact the gravel band and the access route in layers. The delivery vehicle and the lifting machine both need firm, level, load-bearing ground within reach of the pad, so the compaction of that gravel band is structural work, not finishing work — loose stone will rut under the load and the machine cannot be positioned safely. Keep a 3.5–4 m wide route with about 4.5 m of overhead clearance, and keep it clear of planted stock and stacked materials on the day.
Then the unit arrives and goes up quickly: Yes — a crane or forklift is required to offload the folded unit from the truck. Once it is set in position, four workers can unfold and assemble the main structure in about 2 hours. Only after that do you install the drip zones, mulch the beds, plant the shrubs and lay the decorative path edging — all of which are easier and safer once the final position of the building, the door and the utility connection face is known. Browse the folding container home range, pair a compact 20FT winter-finish unit with a tight gravel-and-thyme perimeter, or a family-sized 30FT white unit with a layered transition band and two shading trees on the hot side.
Planning the ground around your container home?
HG Prefab, made by Henan Huangang Machinery Equipment Co., Ltd., builds 20FT, 30FT and 40FT folding expandable container houses that ship folded worldwide and unfold on a compacted, level pad. Send us your site dimensions, slope, climate and how firm the ground is, and we will confirm the pad type, the perimeter clearance and the model that suits your plan. Email hgmechequip@gmail.com or WhatsApp +86 191 0388 7380. Full range on the products page.
Browse modelsFrequently Asked Questions
Can I xeriscape right up against the base of a folding container home?
Not with organic material. Keep a 1.0–1.5 m band directly against the unit as clean, angular crushed gravel 20–40 mm in size, laid 50–75 mm deep over a compacted base and a geotextile separation layer, and hold the gravel surface 100–150 mm below the bottom rail so no stone or soil ever touches the steel skirt. No wood chips, no bark, no compost and no planting soil belong in that band, because organic matter holds moisture against the coated steel and gives termites and ants a covered route to any timber element. Keep every irrigation emitter at least 600 mm out from the base and keep all spray heads outside the band entirely.
How much water does a xeriscape yard actually save around a container home?
A conventional cool-season turf lawn uses roughly 900–1,400 litres per square metre per year in a hot summer climate, and a warm-season turf such as bermuda still uses 700–1,000. An established drought-tolerant shrub and grass planting on drip uses 150–350 litres per square metre per year, and the gravel band uses none. Switching the planted area from spray heads to drip saves a further 40–60 percent, because spray loses water to wind drift, evaporation off the foliage and runoff on crusted soil. On a 100 m² yard, replacing turf with a xeriscape planting typically cuts outdoor water use from around 110,000 litres a year to somewhere between 20,000 and 35,000 litres.
Which plants should I avoid planting near a container home foundation?
Avoid anything with aggressive, water-seeking roots or with a running habit: willow, poplar, silver maple, liquidambar, mulberry, fig and most large Eucalyptus species, plus every running bamboo. Their roots travel far further than the canopy and will lift pavers, enter drain runs and push against a pad edge. Keep trees and large shrubs 3–5 m clear of the base, which usually means a mature canopy radius of no more than about half the planting distance. Also avoid plants that need constant moisture right at the perimeter, because keeping soil damp against steel is the single fastest way to shorten the life of the skirt and the base coating.
Do I need drip irrigation if I choose drought-tolerant plants?
Yes, for the first two growing seasons and often for a third. Drought tolerance describes a mature plant with a deep root system, not a rootling in a two-litre pot. For the first 8–12 weeks water two to three times a week with 8–20 litres per plant per visit depending on size, then step down to weekly in year one and to every 10–14 days in year two. From year three most Mediterranean and arid species need only a monthly deep soak through the hottest month and nothing at all through the wet season. Drip also lets you stop watering the gravel band entirely, which is exactly what you want next to a steel base.
Does the landscaping affect delivery and installation of the folding unit?
Yes, and it is the reason the gravel band has to be engineered rather than simply spread. Yes — a crane or forklift is required to offload the folded unit from the truck. Once it is set in position, four workers can unfold and assemble the main structure in about 2 hours. That means the delivery vehicle and the lifting machine both need firm, compacted, level ground within reach of the pad: a well-compacted angular gravel band over a compacted sub-base carries a truck and a mobile crane properly, while loose rounded pea gravel, deep bark mulch or fresh topsoil will rut and the machine cannot be safely positioned. Keep a 3.5–4 m wide access route with 4.5 m of overhead clearance, compact the gravel band in layers before delivery day, and leave the decorative planting, the mulch and the permanent edging until after the unit is standing.
Talk to HG Prefab
Henan Huangang Machinery Equipment Co., Ltd. (HG Prefab) manufactures folding expandable container homes in 20FT, 30FT and 40FT sizes and ships them folded worldwide. Factory prices are 20FT $7,200–$9,800, 30FT $10,500–$14,500 and 40FT $12,500–$16,500. For landscape and site planning, send us your site dimensions, the slope, your climate zone, your annual rainfall and whether the ground is rock, sand or clay — those five facts determine the pad, the drainage, the perimeter band and the planting palette.
Email hgmechequip@gmail.com or message us on WhatsApp at +86 191 0388 7380. You can also browse the full range at products.html or request a quotation at contact.html.