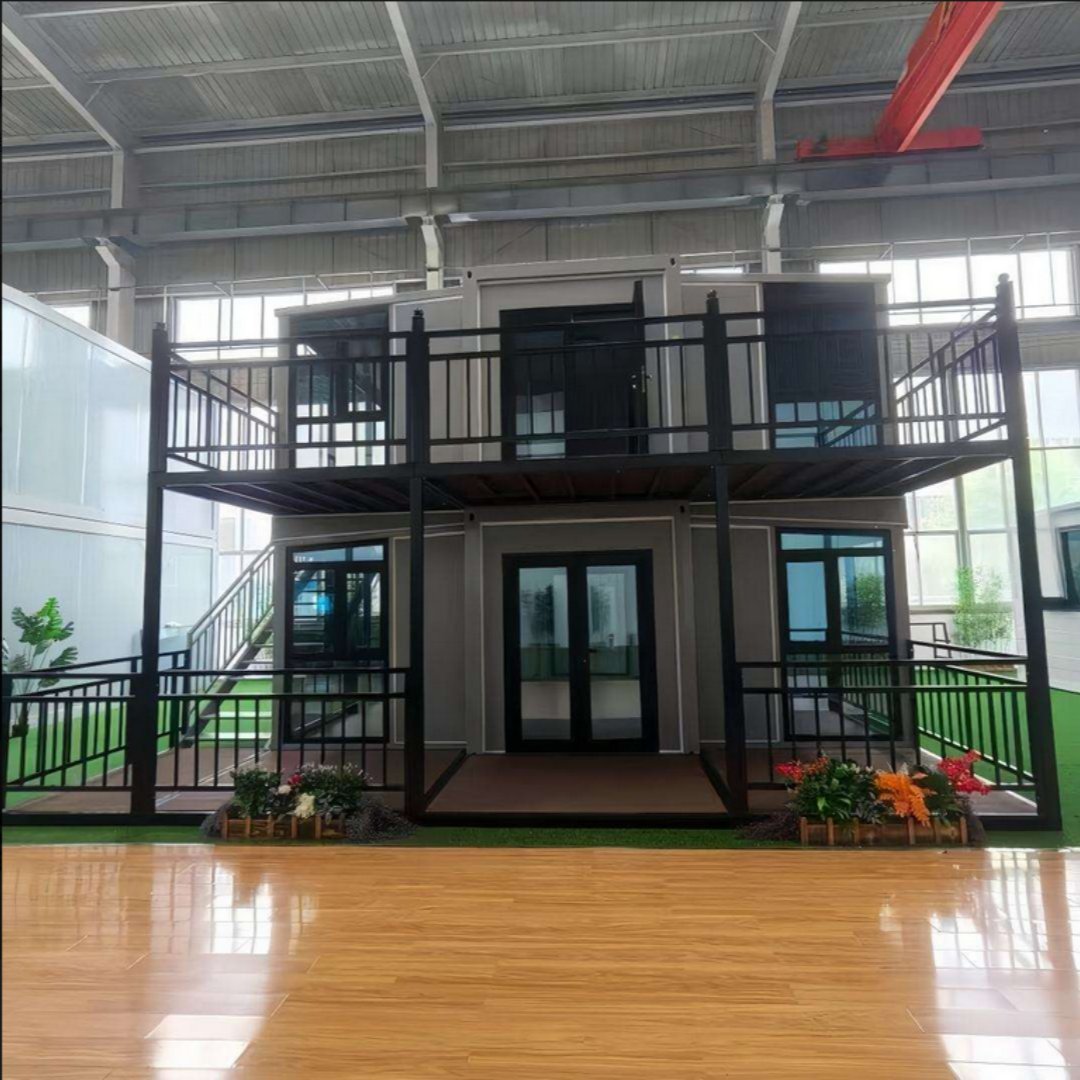
HG Prefab foldable expandable container homes — built to last, delivered worldwide.
A folding container house is an unusually good starting point for a recording studio. It arrives as a rectangular steel box with parallel walls, a flat ceiling, a predictable volume and a sealed envelope — the same starting geometry that purpose-built studio shells are designed around. It also arrives flat-packed, which means it can be craned onto a backyard, a rural block or an industrial lot where a conventional building would never get planning approval. This guide walks through what actually matters when you convert an HG Prefab 20FT, 30FT or 40FT folding container house into a working home recording studio: the difference between isolation and treatment, how to build a room-in-room inside a steel shell, room layout, HVAC noise, electrical design, treatment placement and realistic budget bands.
Why a Folding Container House Suits a Recording Studio
Most home studios are built in spare bedrooms, and most spare bedrooms are acoustic compromises — irregular shapes, closets, doorways in the wrong place and a window right where the mix position needs to be. A container shell removes most of that friction. Four properties make it work:
- Predictable geometry — a 20FT unit is roughly 5.9 × 2.45 m internally, a 30FT about 9.0 × 2.45 m and a 40FT about 11.8 × 2.45 m. Parallel walls and a known ceiling height mean you can model the room in acoustic software before you buy a single panel.
- Mass in the envelope — the steel skin and structural frame add mass that already attenuates mid and high frequencies, so you are improving an envelope rather than starting from a timber frame with nothing in it.
- A completely separate structure — because the studio is its own building, noise you generate inside does not travel through the shared floor structure of a house. That single fact removes the most common noise complaint between a studio and a family.
- Flat-pack delivery to difficult sites — the folded unit ships at roughly 20% of its unfolded volume, so a studio can be placed on a rural plot or a rear yard that has no vehicle access for a conventional build.
Delivery and assembly set the schedule. Yes — a crane or forklift is required to offload the folded unit from the truck. Once it is set in position, four workers can unfold and assemble the main structure in about 2 hours, so the slab, the conduit runs and the cable entry points should all be ready before the truck arrives.
Isolation vs. Treatment: The Distinction That Decides Your Budget
Almost every failed home studio project fails because these two words were treated as one. They are different problems with different budgets, different trades and different materials.
- Soundproofing (isolation) — stops sound leaving or entering the room. It is a construction problem solved with mass, decoupling and airtight sealing. It happens inside the walls, floor and ceiling, and it is expensive and disruptive to retrofit later.
- Acoustic treatment — controls how sound behaves inside the room. It is solved with absorption, diffusion and bass trapping mounted on the surfaces. It is modular, adjustable and can be added in stages.
If your neighbours will hear a kick drum, you need isolation. If your mixes sound boomy and your vocal takes sound boxy, you need treatment. Most real studios need both, and the correct order is isolation first, treatment second, because treatment cannot compensate for a room that leaks.
Building a Room-in-Room Inside a Steel Shell
The steel shell is the outer leaf. The inner leaf is a separate timber or light-gauge steel frame that never touches the container structure. Everything in between is the acoustic assembly.
The Decoupling Detail
Isolation comes from breaking the mechanical path between the two leaves. The inner frame sits on resilient isolation clips and a neoprene or EPDM perimeter gasket, and it stops 20–30 mm short of the container walls, floor and ceiling. No screw, no conduit and no duct may bridge that gap. One solid bridge — a conduit saddle bolted straight through, or a door frame packed hard against the steel — can cut the whole assembly's performance by 10 dB or more.
The Wall Build-Up That Works
A proven, repeatable wall assembly for a container studio is:
- Existing steel container wall as the outer leaf.
- 25–50 mm air gap, no insulation bridging.
- Independent 70–90 mm stud frame on isolation clips, set 20–30 mm clear of the steel.
- 100 mm mineral wool at 45–60 kg/m³ filling the stud cavity — not compressed, and not the light 10 kg/m³ loft roll, which absorbs poorly at low frequencies.
- Two layers of 15 mm acoustic plasterboard, the second layer bonded with a viscoelastic damping compound and staggered so joints do not align.
- Every joint, socket box, pipe penetration and door frame sealed with acoustic sealant.
That assembly typically achieves an airborne rating around Rw 50–58 depending on the door and the flanking paths. The door is usually the weakest link, so specify a purpose-built acoustic door with double magnetic seals and a drop seal, not a domestic door with foam tape around it.
Floor and Ceiling
Impact noise — footsteps, a dropped mic stand, a bass cabinet — travels through structure. Float the inner floor on a resilient layer or a proprietary floating floor system, then finish with a heavy underlay and a dense floor covering. The ceiling follows the same logic as the walls: independent joists on clips, mineral wool in the cavity, two layers of board, sealed at the perimeter. For more detail on thermal and acoustic layering in these units, see our container home insulation guide.
Room Layout: 20FT, 30FT and 40FT Compared
Layout is where a container studio either works beautifully or becomes an ergonomic annoyance for years. The narrow 2.45 m internal width is the governing constraint, and every decision flows from it.
- 20FT — single-room studio or voice booth. Roughly 14 m². Too tight for a proper separate control room once you build two isolated leaves, so design it as one room: mix position at one end, a vocal or instrument corner at the other, absorbers on both long walls. Ideal for voice-over, podcasting, beat-making and mixing.
- 30FT — control room plus a small live room. Roughly 21 m². A partition at about the two-thirds point gives a control room of roughly 6 × 2.4 m and a live room of roughly 3 × 2.4 m. Both need their own isolated leaf, and the shared partition needs a double-stud construction with an air gap and an acoustic door with a small window.
- 40FT — full two-room studio. Roughly 28 m². A control room of roughly 7 × 2.4 m and a live room of roughly 4.5 × 2.4 m, plus a small entrance lobby that doubles as a second acoustic buffer. This is the only size that comfortably houses a drum kit, an amp and a player at the same time.
In every size, orient the mix position so the engineer's ears sit against the short wall, facing down the long axis of the unit. That puts the long dimension behind the speakers where it does the least damage and keeps the symmetry you need for a stable stereo image. Never sit in the geometric centre of the room — that is where the worst modal cancellation lives.
Studio Specifications at a Glance: 20FT vs 30FT vs 40FT
The table below summarizes the numbers that matter when you are planning isolation, treatment, electrical and HVAC for each size. All values assume a standard HG Prefab folding container house with a 2.45 m external width and a flat ceiling.
| Parameter | 20FT | 30FT | 40FT |
|---|---|---|---|
| Internal floor area | ~14 m² | ~21 m² | ~28 m² |
| Recommended use | Voice / mix room | Control + small live room | Control + full live room |
| Inner-leaf wall build | 2 × 15 mm acoustic board | 2 × 15 mm acoustic board | 2 × 15 mm acoustic board |
| Cavity insulation | 100 mm mineral wool, 45–60 kg/m³ | 100 mm mineral wool, 45–60 kg/m³ | 100 mm mineral wool, 45–60 kg/m³ |
| Target airborne isolation | Rw 50–55 | Rw 52–58 | Rw 55–60 |
| Wall absorber coverage | 40–50% of wall area | 35–45% of wall area | 30–40% of wall area |
| Bass traps (corner, floor-to-ceiling) | 4 | 6–8 | 8–10 |
| Ceiling cloud panels | 2 | 3–4 | 4–6 |
| Electrical supply | Single-phase 230 V, 40 A | Single-phase 230 V, 50 A | Single-phase 230 V, 50–63 A |
| Dedicated audio circuits | 1 × 20 A | 2 × 20 A | 2–3 × 20 A |
| Outlet count | 6–10 | 8–14 | 12–20 |
| HVAC | 2.6 kW ducted mini-split | 3.5 kW ducted mini-split | 5.0 kW ducted mini-split |
| Design noise criterion | NC-25 to NC-30 | NC-25 to NC-30 | NC-20 to NC-25 |
| Starting price (shell only) | $7,200–$9,800 | $10,500–$14,500 | $12,500–$16,500 |
These figures assume a temperate climate and a room-in-room build with a proper acoustic door. In very cold or very hot regions, add 25–50 mm to the cavity insulation and increase the HVAC capacity by roughly 20%.
Acoustic Treatment: Absorption, Diffusion and Bass Traps
Once the room is isolated, the treatment plan shapes how it sounds. Treatment is not decoration and it is not a wall of foam. Three device types do three different jobs.
- Absorption — porous panels of mineral wool or rigid fibreglass, 50–100 mm thick, in a fabric-wrapped frame. They kill flutter echo and reduce the early reflections that smear a stereo image. Mount the first reflection points on the side walls, the ceiling cloud above the mix position and the wall behind the speakers.
- Diffusion — quadratic residue or skyline diffusers scatter sound in time and space without removing energy. They belong on the rear wall, where absorption would make the room feel dead and unnatural. A diffused rear wall keeps the room sounding live while removing the slap-back that ruins vocal takes.
- Bass trapping — the single most important treatment in a small rectangular room. Pressure builds in corners, so superchunk or corner-mounted traps filled with dense mineral wool, floor to ceiling, are where the money goes first. In a 20FT, four corner traps plus a rear-wall trap will do more for your low end than any amount of side-wall foam.
For a deeper look at the physics of absorption and how it pairs with the container envelope, see our acoustic soundproofing guide.
HVAC, Ventilation and Noise
A sealed, isolated studio has no natural airflow, and a quiet room with stale air is unusable. The challenge is that every duct is a hole in your acoustic envelope.
- Split the system. Use a ducted mini-split with the compressor and air handler outside the studio. A wall-mounted split head inside the live room puts a fan and a compressor right where the microphone is.
- Line the ducts. Wrap or line supply and return ducts with acoustic insulation for at least 3 m either side of the room.
- Add bends, not straight runs. Route each duct through at least two 90-degree bends. A lined, bent duct attenuates far more than a straight one of the same length, and it costs nothing extra at design time.
- Use acoustic duct silencers. Purpose-built silencers on both supply and return are the difference between NC-35 and NC-25.
- Balance for low fan speed. Oversize the unit slightly and run it on low. A larger unit at low speed is quieter than a small unit at full speed.
For airflow rates and fresh-air requirements in a sealed container, our container home ventilation guide covers the calculation, and the HVAC guide covers equipment selection.
Electrical Design: Clean Power and Ground Loops
Studio electrical work is different from domestic electrical work in one specific way: noise. A dimmer, a refrigerator or a fluorescent ballast on the same circuit as a preamp will put hum straight into your recordings.
- Service size. A single-phase 230 V supply at 40–63 A covers almost every home studio. The audio load itself is tiny; the capacity is for HVAC, lighting and any outboard gear.
- Separate the circuits. One dedicated 20 A circuit for audio gear, a second for HVAC, a third for lighting and general outlets. Never share a circuit between audio and a motor load.
- One earth reference. All audio circuits must reference the same earth point. Multiple earth paths between gear create ground loops, and ground loops hum at 50 or 60 Hz.
- Star-ground the rack. Bring every rack unit's chassis to a single busbar rather than daisy-chaining through the rack rails.
- Lighting. Use dimmable LED fixtures with a quality driver, or better, avoid dimmers entirely in the live room and use switched zones. A dimmer in the live room is a radio-frequency noise source.
For load calculations, circuit protection and RCD selection, see our electrical load guide for container homes. If the studio shares a unit with living space, the plumbing and electrical guide covers how to route services without breaking the acoustic envelope.
Lighting, Comfort and the Human Side
Sessions run long, and a studio that is uncomfortable is a studio that does not get used. Plan lighting in zones: a bright, dimmable work zone over the desk, a soft indirect wash behind the speakers, and a low-level ambient circuit for the live room. Avoid a single central fixture — it flattens the room and glares off screens. Our container home lighting design guide covers lux targets and fixture layouts.
Add a small quiet extractor or a CO₂ monitor if the room will hold three or more people for long sessions. A sealed studio with four musicians and no airflow reaches uncomfortable CO₂ levels within an hour.
Permits, Site Planning and Neighbours
Three approvals questions decide whether a container studio is straightforward or painful. Confirm them before you order the unit.
- Is the unit allowed as an outbuilding or ancillary structure? Most jurisdictions allow a small outbuilding subject to a setback distance from the property line, typically 1–3 m for a non-habitable structure.
- Is there a floor area limit? Many councils cap outbuildings at 20–30 m² without a full building consent. A 40FT studio at 28 m² sits right at that boundary.
- Does a home-business or noise by-law apply? Recording for personal use is normally fine. A commercial studio with clients arriving may trigger a use-class change and stricter rules.
Practically, a well-built studio measured at the property line is quieter than a domestic air conditioner, which makes the conversation with neighbours and planners much easier. Bring a decibel reading to that meeting. For the full approval path, see our permits & regulations guide.
Delivery, Foundation and On-Site Sequence
Sequence matters more than speed. The correct order for a container studio build is:
- Confirm access and the crane or forklift lift plan for the folded unit.
- Pour the slab — about 6.0 × 2.6 m for a 20FT, 9.1 × 2.6 m for a 30FT and 12.2 × 2.6 m for a 40FT, at least 100 mm thick with A393 mesh. Add 50 mm PIR under the slab in cold climates, and note that a floating inner floor sits on top of this slab.
- Offload and position the unit. Yes — a crane or forklift is required to offload the folded unit from the truck. Once it is set in position, four workers can unfold and assemble the main structure in about 2 hours.
- Seal and weatherproof the envelope, then run the duct and cable penetrations while the interior is still empty.
- Build the inner isolated leaf — floor, walls, ceiling, in that order, sealing as you go.
- Install the acoustic door and window, then commission the HVAC and check the noise floor with a measurement microphone before any treatment goes in.
- Install treatment in stages — bass traps first, then first reflections, then diffusion — measuring at each stage.
Foundation choice matters for isolation as well as structure; our foundation comparison guide covers slab, pier and screw-pile options and how each affects noise transmission.
Budget: From Shell to Finished Studio
Four cost bands cover almost every build. Use them to sanity-check a quote.
- 20FT shell — $7,200–$9,800. Add $5,000–$10,000 for a room-in-room isolation build, $1,500–$3,000 for treatment and $2,000–$4,000 for a quiet mini-split and electrical fit-out. A finished 20FT voice or mix room typically lands at $18,000–$30,000.
- 30FT shell — $10,500–$14,500. Add $8,000–$14,000 for two isolated rooms and a shared acoustic partition, $2,500–$4,500 for treatment and $2,500–$4,500 for HVAC and electrical. A finished control-plus-live-room studio lands at $26,000–$42,000.
- 40FT shell — $12,500–$16,500. Add $12,000–$18,000 for a full two-room isolation build with a lobby, $4,000–$6,000 for treatment and $3,000–$5,000 for HVAC and electrical. A finished two-room studio lands at $35,000–$60,000.
- Treatment-only upgrade — $1,500–$6,000. If the shell is already reasonably isolated, treating the room properly is the highest-value spend you can make, and it is fully reversible.
Browse the current HG Prefab 20FT/30FT/40FT folding container house line-up for shell prices and configurations that suit a studio build.
Need a folding container house for a recording studio?
HG Prefab manufactures 20FT, 30FT and 40FT folding expandable container houses with factory-prepped penetrations, electrical packages and insulation kits — shipped flat-packed worldwide.
Browse modelsFrequently Asked Questions
Can a folding container house really work as a recording studio?
Yes. A 20FT, 30FT or 40FT folding container house gives you a rectangular, weather-tight shell with parallel walls and a predictable volume, which is exactly what acoustic treatment is designed for. A 20FT unit suits a single voice-over or beat-making booth, a 30FT suits a control room plus a small live room, and a 40FT supports a full control room with a separate tracking room.
Do container walls provide any natural soundproofing?
The steel skin adds mass, which helps with mid and high frequencies, but a single steel panel also resonates at low frequencies and transmits impact noise. Real isolation comes from a room-in-room build: a decoupled inner frame on isolation clips, 100 mm mineral wool in the cavity, two layers of 15 mm acoustic plasterboard with a damping compound, and a fully sealed perimeter. Expect an airborne rating of Rw 50–58 with that build.
What is the difference between acoustic treatment and soundproofing?
Soundproofing stops sound leaving or entering the room and is a construction problem solved with mass, decoupling and airtight seals. Acoustic treatment controls how sound behaves inside the room and is solved with absorption, diffusion and bass trapping. A studio needs both, and they are budgeted separately: isolation is part of the build, treatment is part of the fit-out.
How much does it cost to convert a container house into a recording studio?
The HG Prefab shell starts at $7,200–$9,800 for a 20FT, $10,500–$14,500 for a 30FT and $12,500–$16,500 for a 40FT. A room-in-room isolation build adds roughly $6,000–$18,000 depending on size, acoustic treatment adds $1,500–$6,000, and a quiet mini-split plus electrical fit-out adds $2,000–$5,000. A finished 20FT voice booth typically lands at $18,000–$30,000 and a 40FT control-plus-live-room studio at $35,000–$60,000.
How do I keep HVAC noise out of my recordings?
Use a ducted mini-split with the compressor and air handler mounted outside the studio, then line the supply and return ducts with acoustic insulation and route them through at least two 90-degree bends. Size the unit for a low fan speed so you can track with the fan running, and keep NC-25 to NC-30 as the design target. Never place a split head or window unit inside the live room.