HG Prefab foldable expandable container homes — built to last, delivered worldwide.
Folding container houses have quietly become one of the most practical shells for a small commercial photography studio. They arrive flat-packed, open into a clean rectangular room with steel framing, factory-prepped electrical and insulation, and they cost a fraction of a brick-and-mortar buildout. For portrait, product, fashion, food, content-creator and small commercial work, a 20FT, 30FT or 40FT expandable container house delivers a controlled shooting environment that you can place in a backyard, on a farm, or next to a retail location.
This guide walks you through every decision we see photographers make when they convert one of our units into a working studio, from window placement for natural light to the electrical panel size for strobes. If you are still choosing the right size, our container home unit size guide covers footprint and ceiling heights. For HVAC, see container home HVAC. For flooring choices, see flooring options. For the broader electrical planning, see container home electrical load.
Why a folding container house works as a photography studio
The reason photographers are quietly choosing shipping-container studios is simple: shape. A rectangular steel box with a flat ceiling, four flat walls and predictable dimensions is exactly what a photographer wants. You can hang a backdrop track from one wall to another. You can build a seamless cyclorama into a corner. You can blackout the entire space in five seconds by dropping roller shades. And unlike a basement or attic, the interior is square to the world — your strobes stand where you put them and stay there.
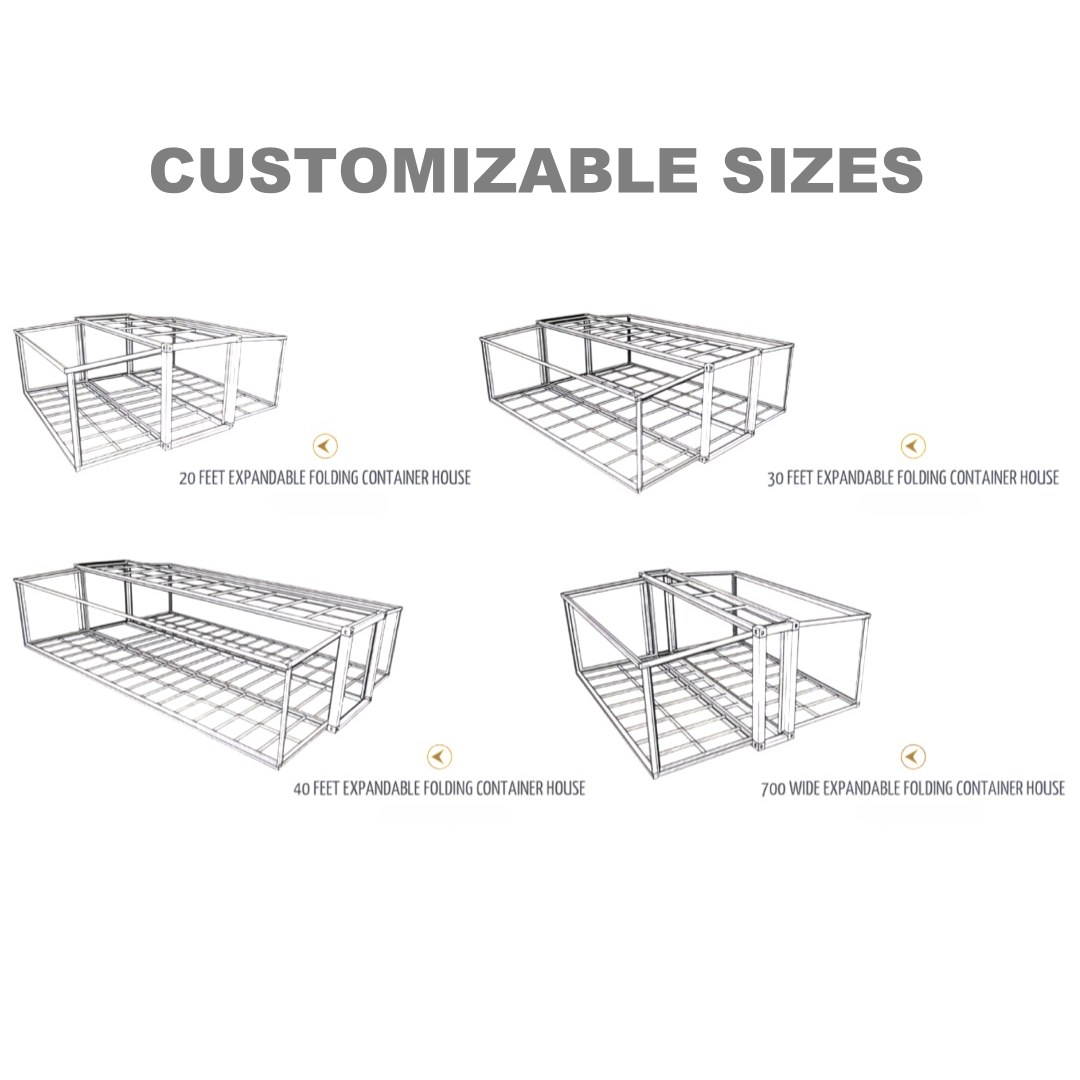
HG Prefab builds three sizes that map cleanly onto three studio formats: the 20FT for content creation and product, the 30FT for portrait and small fashion, and the 40FT for full commercial shoots with multiple sets. All three are part of our foldable expandable container home line, share the same steel frame system, and are delivered flat-packed so they ship economically even to remote locations.
The structural advantages
Our frames are welded Q235B steel with a 2.5 mm wall thickness, finished with a hot-dip galvanized and powder-coated exterior. The roof uses 0.5 mm color-bonded steel over 50 mm of rock-wool insulation. The walls are 50 mm EPS or rock-wool sandwich panels, factory-cut, with electrical conduit pre-routed through the columns. From a photographer's perspective, the key facts are these:
- Interior ceiling height: 2.4 m on standard units; 2.6 m on the higher-cube option we offer for the 30FT and 40FT.
- Interior clear span: essentially the full width of the unit, with no internal columns. A 20FT gives you 5.9 m × 2.25 m of unobstructed floor.
- Wall flatness: sandwich panels are flat to within 1 mm, so backdrop paper and roller shades install without ripples.
- Floor load: 250 kg/m² live load, which is more than enough for backdrop stands, rolling cases and a small riser.
Where container studios struggle — and how to fix it
Steel studios do four things poorly out of the box: they ring when struck, they get hot under summer sun, they let in narrow slit-shaped sidelight, and they lack a permanent cyclorama. Each one is easy to engineer around, and we cover the details in the rest of the article.
Sizing the studio: 20FT vs 30FT vs 40FT comparison
Picking the right container size is the single biggest decision. The table below maps HG Prefab's three standard sizes to the kind of shooting you can realistically do inside, with the floor, ceiling and electrical headroom you will have to work with.
| Spec / Use Case | 20FT (6 m) | 30FT (9 m) | 40FT (12 m) |
|---|---|---|---|
| Interior floor area | ~13 m² | ~20 m² | ~27 m² |
| Interior ceiling height (std) | 2.40 m | 2.40 m | 2.40 m |
| Interior ceiling height (HC) | 2.60 m | 2.60 m | 2.60 m |
| Clear wall run for backdrops | 5.70 m | 8.70 m | 11.70 m |
| Best for | Product, content, headshots | Portrait, small fashion, video | Multi-set, full fashion, commercial |
| Standard electrical panel | 32 A / 220 V | 32 A or 63 A | 63 A |
| Strobes on one circuit (400 Ws) | 2–3 units | 3–4 units | 4–6 units |
| Window openings (factory-cut) | 1–2 | 2–3 | 3–4 |
| Wheelchair-accessible entry | Yes (ramp) | Yes (ramp) | Yes (ramp) |
| FOB price range | $7,200–$9,800 | $10,500–$14,500 | $12,500–$16,500 |
Pricing reflects the standard foldable expandable configuration with EPS sandwich panel walls, PVC interior finish, one pre-hung door, factory electrical prep and standard window openings. Add around 8–12% for the higher-cube ceiling option, and budget separately for HVAC, acoustic treatment and any electrical panel upgrade. For an overview of all models, see our full product catalog.
Natural light: planning windows and skylights
Natural light is the cheapest and most flattering light source a studio has, and a container's flat walls and roof make it predictable. The default HG Prefab unit ships with one 900 × 1200 mm PVC sliding window on the front long wall, plus one 600 × 600 mm bathroom-grade window where a wet area is planned. For photography, you almost always want to re-spec.
Front long wall: your main north light
For most portrait and product work, the photographer wants a long, controllable soft-light source on one long wall. The trick is to replace the single sliding window with two or three smaller openings — typically two 1200 × 1500 mm picture windows — spaced so a 120 cm roller shade can cover each independently. If you would rather chase real north light, orient the unit so the long axis runs east-west with the shooting wall on the north side; for southern-hemisphere studios, flip that and put the long wall facing south.
Skylights: roof glass for overhead soft light
A 600 × 1200 mm double-glazed rooflight is the most popular option we get asked about. It is also the one item we strongly recommend only for shooting setups that can tolerate direct overhead light at midday. Heat gain is significant — a 0.7 m² rooflight adds roughly 350 W of solar load on a sunny day — so plan your HVAC accordingly. If you shoot food or reflective product, skip the rooflight and rely on a 1200 × 1500 mm picture window with a 1.2 m strip softbox instead; this is fully covered in our container home lighting design guide.
Blackout: roller shades on every opening
Every window and door should have a blackout roller shade. We use cordless cellular shades with side channels; they drop into a U-channel screwed into the window reveal. When the shade is down, the studio is fully dark, which is what you need for strobe work, long exposures and video. Side channels are essential — light leaks around an unchanneled shade and you get flare on every reflective product shot.
Artificial lighting: the electrical panel and strobe load
Photography studios draw surprisingly large electrical loads in short bursts. Strobe capacitors recharge in two to four seconds, but during that recharge they pull 8–12 A each from the wall. Add modeling lamps at 250 W each, a Mac Pro pulling 1.4 kW, a 50" reference monitor at 150 W, an air conditioner compressor at 1.2 kW, and the strip softboxes for video, and an undersized panel will trip mid-shoot.
Standard 32 A panel for the 20FT and 30FT
The default container ships with a 32 A single-phase 220 V panel and four breakers: lights, outlets, HVAC, and a dedicated 16 A run for a hair-station or workshop outlet. For two 400 Ws strobes plus modeling lamps, this is fine. Push it to three strobes plus modeling lamps plus a hair dryer station plus the air conditioner, and you will see nuisance trips. The fix is staggering: do not turn on the hair dryer and modeling lamps at the exact moment the strobes recycle.
Upgrade to 63 A industrial panel
For the 30FT and 40FT, we strongly recommend the 63 A industrial panel upgrade. It adds two extra 16 A breakers dedicated to lighting circuits, separates HVAC onto its own breaker, and gives you room for a 32 A dedicated run to a future EV charger or a clamp-on hair steamer. The full electrical planning process is outlined in our electrical load guide; for wet areas and wash stations, see plumbing and electrical.
Outlet placement for studio workflow
Plan outlets before the walls close up. You want at minimum one quad outlet on the back wall behind the backdrop track, two outlets per long wall halfway between the ceiling and floor for softbox stands, and one outlet in the ceiling for an overhead hair-light. Use 16 A industrial outlets so heavy transformer packs do not overheat the receptacle.
Backdrop walls, ceiling height and full-length shooting
The most common reason a photographer calls us after a shoot is ceiling height. The standard 2.4 m interior is fine for seated portraits and three-quarter shots, but full-length fashion requires the camera operator to be at chest height plus 30 cm plus the model's head plus another 15 cm of clearance. That math does not work at 2.4 m unless the photographer kneels or shoots horizontally.
Higher-cube option: 2.6 m ceiling
Our higher-cube option lifts the interior ceiling to 2.6 m. Combined with a 30 cm raised floor section built over the standard sub-floor, you get an effective shooting height around 2.85 m, which is enough for almost every standing full-length shot with a 24–70 mm lens. The cost adder is modest — typically 8% of base price — and we strongly recommend it for any container you intend to use for fashion.
Backdrop track installation
We pre-install a steel backing plate inside the long wall ceiling beam so a ceiling-mounted backdrop track can be attached with four bolts per bracket. The standard track is a manual pulley system running 6 m (for the 20FT) or 9 m (for the 30FT). The 40FT unit works well with a dual-track system so you can hang a paper roll and a muslin simultaneously.
Building a permanent cyclorama
For product photography, a built-in cyclorama in one corner is worth its weight in gold. Use 12 mm MDF painted with three coats of latex wall paint, sanded between coats, then sealed with a matte clear coat. Curve the floor-to-wall transition over a 30 cm radius to eliminate the seam. Most photographers paint in a 5% grey base coat; pure white is reserved for high-key catalog shoots.
Soundproofing and acoustic treatment for video
A bare steel container is loud. The 0.5 mm steel skin rings at low frequencies, rain on the roof is dramatic, and any external traffic noise is transmitted through the wall. For stills-only work, none of this matters. For talking-head video, podcast recording or any dialogue work, you need acoustic treatment.
The minimum viable treatment
For talking-head video and voice-over, at minimum: 50 mm rock-wool batts behind a stretched-fabric wall on the two long walls, weatherstripping on the door, and a sealed single-pane window with double glazing. This cuts the 500–2000 Hz reverb time from roughly 1.2 seconds to under 0.5 seconds, which is the threshold where dialogue starts to sound natural.
For podcast or music recording
Add 50 mm acoustic panels on the ceiling (recessed into the roof beam pockets), build a sealed double-door entry booth out of two pre-hung doors with a 1.5 m air gap between them, and float the floor on 25 mm dense rubber mat. With those four additions, you can record a four-person podcast at 65 dB(A) ambient. The deeper treatment walkthrough is in our container home acoustic soundproofing guide.
Roof rain noise
The single biggest acoustic complaint we get is rain on the roof. The factory roof insulation helps; adding an inner layer of 9 mm felt-backed plasterboard on a 27 mm furring channel underneath the roof beam brings rain noise from roughly 75 dB(A) down to 45 dB(A) — quiet enough for an interview.
Climate control: HVAC sizing for studio heat loads
Studio heat loads are dominated by lighting, not by people. Two strobes at full modeling-lamp output dump 500 W into the room continuously during setup; four continuous LED panels at 200 W each add another 800 W; the air conditioner itself dumps its condenser heat back into the room through duct leakage. You size the unit for the worst hour.
For the 20FT studio
A 9,000–12,000 BTU ductless mini-split handles a 20FT studio with two strobes and a single LED panel. Mount the head on the back wall opposite the windows; mount the compressor on a rubber isolation pad outside.
For the 30FT and 40FT studios
The 30FT wants a 12,000–18,000 BTU mini-split; the 40FT wants a 24,000 BTU unit or two 12,000 BTU heads on a multi-split. Choose inverter-driven units so they ramp down during the cool-down portion of the shoot. The full sizing walkthrough is in our container home HVAC guide.
Fresh air for makeup artists and talent
Studios run warm and stuffy after a few hours. Add a 100 mm inline duct fan drawing through a 50 mm rock-wool sound attenuator. Bring the intake from the shaded side of the unit; this drops CO² build-up during long shoots and keeps talent comfortable. Make sure your intake does not pull in your vehicle exhaust — most photographers set up their parking on the opposite wall.
Flooring choices for studios
Flooring inside a container needs to handle three things: rolling cases, occasional liquid spills, and tripod point loads. Our standard floor is 18 mm cement board over the chassis, ready for you to finish. Choices ranked by price and use case are below; the full comparison is in our flooring options guide.
- Vinyl sheet (2 mm commercial grade): cheapest, seam-free, easy to clean. Best for content-creator and product studios.
- LVT click-lock (5 mm): more durable under rolling cases; can be replaced plank-by-plank.
- Sealed concrete polish: tough, repairable, and reflects light beautifully when sealed. Adds two days of polishing.
- Painted plywood: acceptable for set-build studios, not recommended for long-term use.
Avoid carpet in a studio — it traps cyc paper dust, absorbs strobe output, and stains within a season.
Permits, foundations and site preparation
Most jurisdictions treat a folding container home as a temporary or modular structure when it is built on a removable foundation. In the United States and EU it usually requires only a temporary-use permit; in some Australian states it triggers a full building permit. Always check your local planning office before ordering. The full permitting walkthrough is in our container home permits guide.
Foundations are simple. Six concrete pier blocks at the four corners and the two mid-span beam points will hold any of the three sizes. A 100 mm broom-finished concrete slab is the upgrade if you want a permanent, frost-protected floor. A crushed gravel pad on geotextile is acceptable for short-term studios and avoids pouring concrete at all; details are in our container home foundation and foundation comparison guides.
Delivery and on-site assembly
Every HG Prefab studio ships flat-packed as a single 20FT, 30FT or 40FT ISO container footprint. A crane or forklift is required to offload the folded unit from the truck. Once it is set in position, four workers can unfold and assemble the main structure in about 2 hours. Hookup to site power, water and any data runs adds another half-day for our recommended electrician and plumber pair.
For international buyers, we ship FOB from Qingdao or Tianjin to any major port. Typical transit times run 25–35 days to the US west coast, 30–40 days to the EU, and 15–25 days to the Middle East and East Africa. The full logistics walkthrough including HS codes and customs paperwork is in our container home shipping guide.
Ready to spec a photography studio in a folding container?
HG Prefab manufactures 20FT, 30FT and 40FT folding expandable container homes with factory-prepped electrical, insulation, and customizable window and door placements — shipped flat-packed worldwide. Tell us your shooting style, ceiling height, electrical load and acoustic requirements; we will spec a unit, send you a layout drawing, and quote FOB.
Browse studio-ready modelsFrequently Asked Questions
Can a 20FT folding container house really work as a photography studio?
Yes. A 20FT unit gives you roughly 13 square meters of usable floor space, which is comfortable for headshots, product photography, content creation and small fashion shoots. The standard 2.4 m interior ceiling handles most seated and standing subjects. For full-length model work, ceiling height becomes the limiting factor — you would need to choose our higher-cube variant or step up to a 30FT or 40FT unit.
How many strobe monolights can a standard container studio electrical panel safely run?
A factory-prepped 220V panel with a 32 A breaker handles two to three 400 Ws strobes plus modeling lamps, a hair dryer station, computer and HVAC with margin. If you plan to run four or more strobes, two continuous LED panels, a steam iron and air conditioning on the same circuit, ask HG Prefab for the 63 A industrial panel upgrade with dedicated lighting circuits and a separate HVAC circuit so the air conditioner compressor does not pop your modeling lamps.
Do I need acoustic treatment if I shoot video inside a container studio?
Yes, even a basic treatment helps. The steel skin of a container resonates at low frequencies and rain or hail on the roof is loud. For talking-head video and dialogue, at minimum add 50 mm rock-wool batts behind a stretched-fabric wall on the two long walls, plus weatherstripping on the doors. For music or podcast recording, also add acoustic panels on the ceiling and a sealed double-door entry booth.
How long does it take to set up a container home photography studio on site?
Once the unit is delivered, four workers can unfold and assemble the main structure in about 2 hours. Adding interior wall finishes, backdrop track, electrical fixtures and paint usually takes three to five additional days for two people, depending on the level of finish.
What foundation does a container photography studio need?
Any flat, level surface that transfers the corner-post loads to the ground works. Common choices are six concrete pier blocks at the corners and mid-span, a 100 mm broom-finished concrete slab, or a hardwood timber deck framed to the same dimensions. A pure gravel pad is acceptable for short-term or rental studios but can settle unevenly over time.